• Skip to primary navigation
  • Skip to main content
  • Skip to primary sidebar
  • Skip to footer

A House We Built

Custom House Designed by Husband & Wife Team | Modern Farmhouse Inspired

  • Shop Our Home
  • Sources by Room
    • All Sources & FAQs
    • Kitchen Sources
    • Pantry Sources
    • Living Room Sources
    • Dining Room Sources
    • Home Office Sources
    • Laundry Room Sources
    • Entryway Sources
    • Mudroom Sources
    • Gallery Wall Sources
    • Reading Room Sources
    • Theater Room Sources
    • Game Room Sources
    • Guest Bedroom Sources
    • Primary Bedroom Sources
    • Primary Closet Sources
    • Primary Bathroom Sources
    • Powder Bathroom Sources
    • Buffalo Check Bathroom Sources
    • Basement Bathroom Sources
    • Basement Sources
    • Stairs, Landings & Hallways
    • Paint Colors and Stain Recap
    • Cleaning Sources & Routines
  • Tutorials
    • How to Make a Staircase Gallery Wall
    • How to Make Textured Canvas Art
    • How to Install Shiplap
    • How to Build a Slat Wall
    • How to Paint an Ikea Dresser
    • How to Build Bypass Barn Doors
    • How to Build a Farmhouse Table and Benches
    • How to Build a Rustic Sideboard
    • How to Build a Slat Sideboard
    • How to Make a Sofa Pit
    • How to DIY a Faux Brick Wall
    • How to Build a Window Seat
    • How to Build a Paneled Accent Wall
    • How to DIY a Functional Play Kitchen
    • How to Stencil a Wall
    • How to Build a Round Table
    • How to Build a Console Table
    • How to Make Paper Stars
    • How to Make Paper Mache Bowls
    • How to Make Clay Links
    • How to Texture Bowls & Vases
    • How to Install Open Shelves
    • How to Make Wood Block Art
    • How to Make a Wood Bead Garland
    • How to Build Cabinet Doors
    • How to Build a Wood Countertop
    • How to DIY a Nightstand Charging Drawer
    • How to Make a Wheat Wreath
    • How to Hang Gallery Wall Frames
    • How to Stain Stairs and Paint Risers
    • How to Make Industrial Stair Railings
    • How to Build a Window Seat Cushion
    • How to Make Salt Dough Ornaments
    • How to DIY a Modern Mantel Christmas Tree
    • How to DIY a Wooden Christmas Village
    • How to Build a Wood Christmas Tree Collar Box
    • How to Make Paper Christmas Trees
  • Cats
    • Cat Room Tour & Litterboxes
    • Cat-Related Sources & Cleaning Tips
    • How to Cat-Proof Christmas Trees & Decor
    • How to Stop Cats from Scratching Furniture
    • How to Stop Cats from Playing with Decor
    • How to Train Cats and Kittens
    • How to Cope with Cat Allergies
    • How to Introduce New Kittens to Older Cats
  • Christmas
    • Christmas Decor Favorites 2023
    • How to Build a Wood Christmas Tree Collar Box
    • Neutral Christmas Present Wrapping
    • How to Make Paper Christmas Stars
    • How to Make Paper Christmas Trees
    • How to Make Salt Dough Ornaments
    • DIY Holiday Art Ideas
    • How to Cat-Proof Christmas Trees & Decor
    • How to Make Modern Tabletop Trees
    • How to Make a Wooden Christmas Village
    • Holiday Cheese & Snack Boards
    • Christmas Decor 2021
    • Christmas Decor 2020
    • Christmas Decor 2019
    • Gingerbread House & Cookies Recipe
    • Puff Tastry Christmas Tree Recipe
    • Christmas Decor 2018
  • Cleaning
    • Cleaning Sources & Routines
    • Minimalism: How To Get Started
    • Cat-Related Cleaning Tips
  • Recipes
    • Apple Turnovers Recipe
    • Baked Pumpkin Donuts Recipe
    • Banana Chocolate Chip Bread Recipe
    • Blueberry Lemon Cake Recipe
    • Cheese & Cracker Snack Boards
    • Chocolate Chip Cookie Recipe
    • Christmas Crack Recipe
    • Chocolate Crinkle Cookies Recipe
    • Cinnamon Rolls Recipe
    • Cinnamon Star Pastry Recipe
    • Coconut Curry Squash Soup Recipe
    • Creamy No-Cheese Pasta Sauce Recipe
    • Crumble Recipe
    • Easy Veggie Pasta Recipe
    • Fresh Rolls Recipe
    • Garlic Flatbread Recipe
    • Gingerbread Biscotti Recipe
    • Gingerbread House & Cookies Recipe
    • Healthy Hearty Salad Recipe
    • Homemade Bread Recipe
    • Lasagna Recipe
    • Molasses Cookies Recipe
    • Oatmeal Raisin Cookies Recipe
    • Pad Thai Recipe
    • Pesto Pasta Recipe
    • Potato Curry + Naan Bread
    • Puff Pastry Christmas Tree Recipe
    • Pumpkin Donut Bites Recipe
    • Pumpkin Loaf Recipe
    • Pumpkin Oat Muffins Recipe
    • Roasted Red Pepper Pasta Recipe
    • Rocky Road Bars Recipe
    • Vegan Bolognese Pasta Sauce
    • Vegetable Soup Recipe
  • About
    • About Us
    • Website Roadmap
    • Shop Our Home
    • Minimalism: How To Get Started
    • Privacy Policy
  • Blog

admin

Easy Garlic Flatbread Recipe

December 10, 2018 by admin Leave a Comment

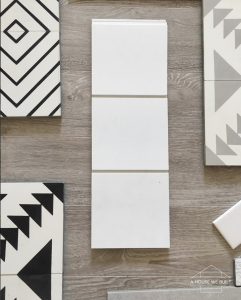
This garlic pizza dough flat bread and salad is one of our favorite quick-and-easy meals!! It takes about 15 minutes to make and can be easily modified for picky eaters or allergies but we absolutely love it around here so I thought I’d share the recipe!

We buy dough in frozen balls from a local bakery. We buy 20+ at a time and keep them in our freezer and whenever we make this (or pizza) we just set one of the dough balls out on the counter for 5-6 hours to thaw.

Preheat your oven to 500 *with* your pizza stone in it (we use a cast iron pizza stone like this: Amazon). This is VERY important. It will not cook properly if you don’t preheat the stone as well as the oven.

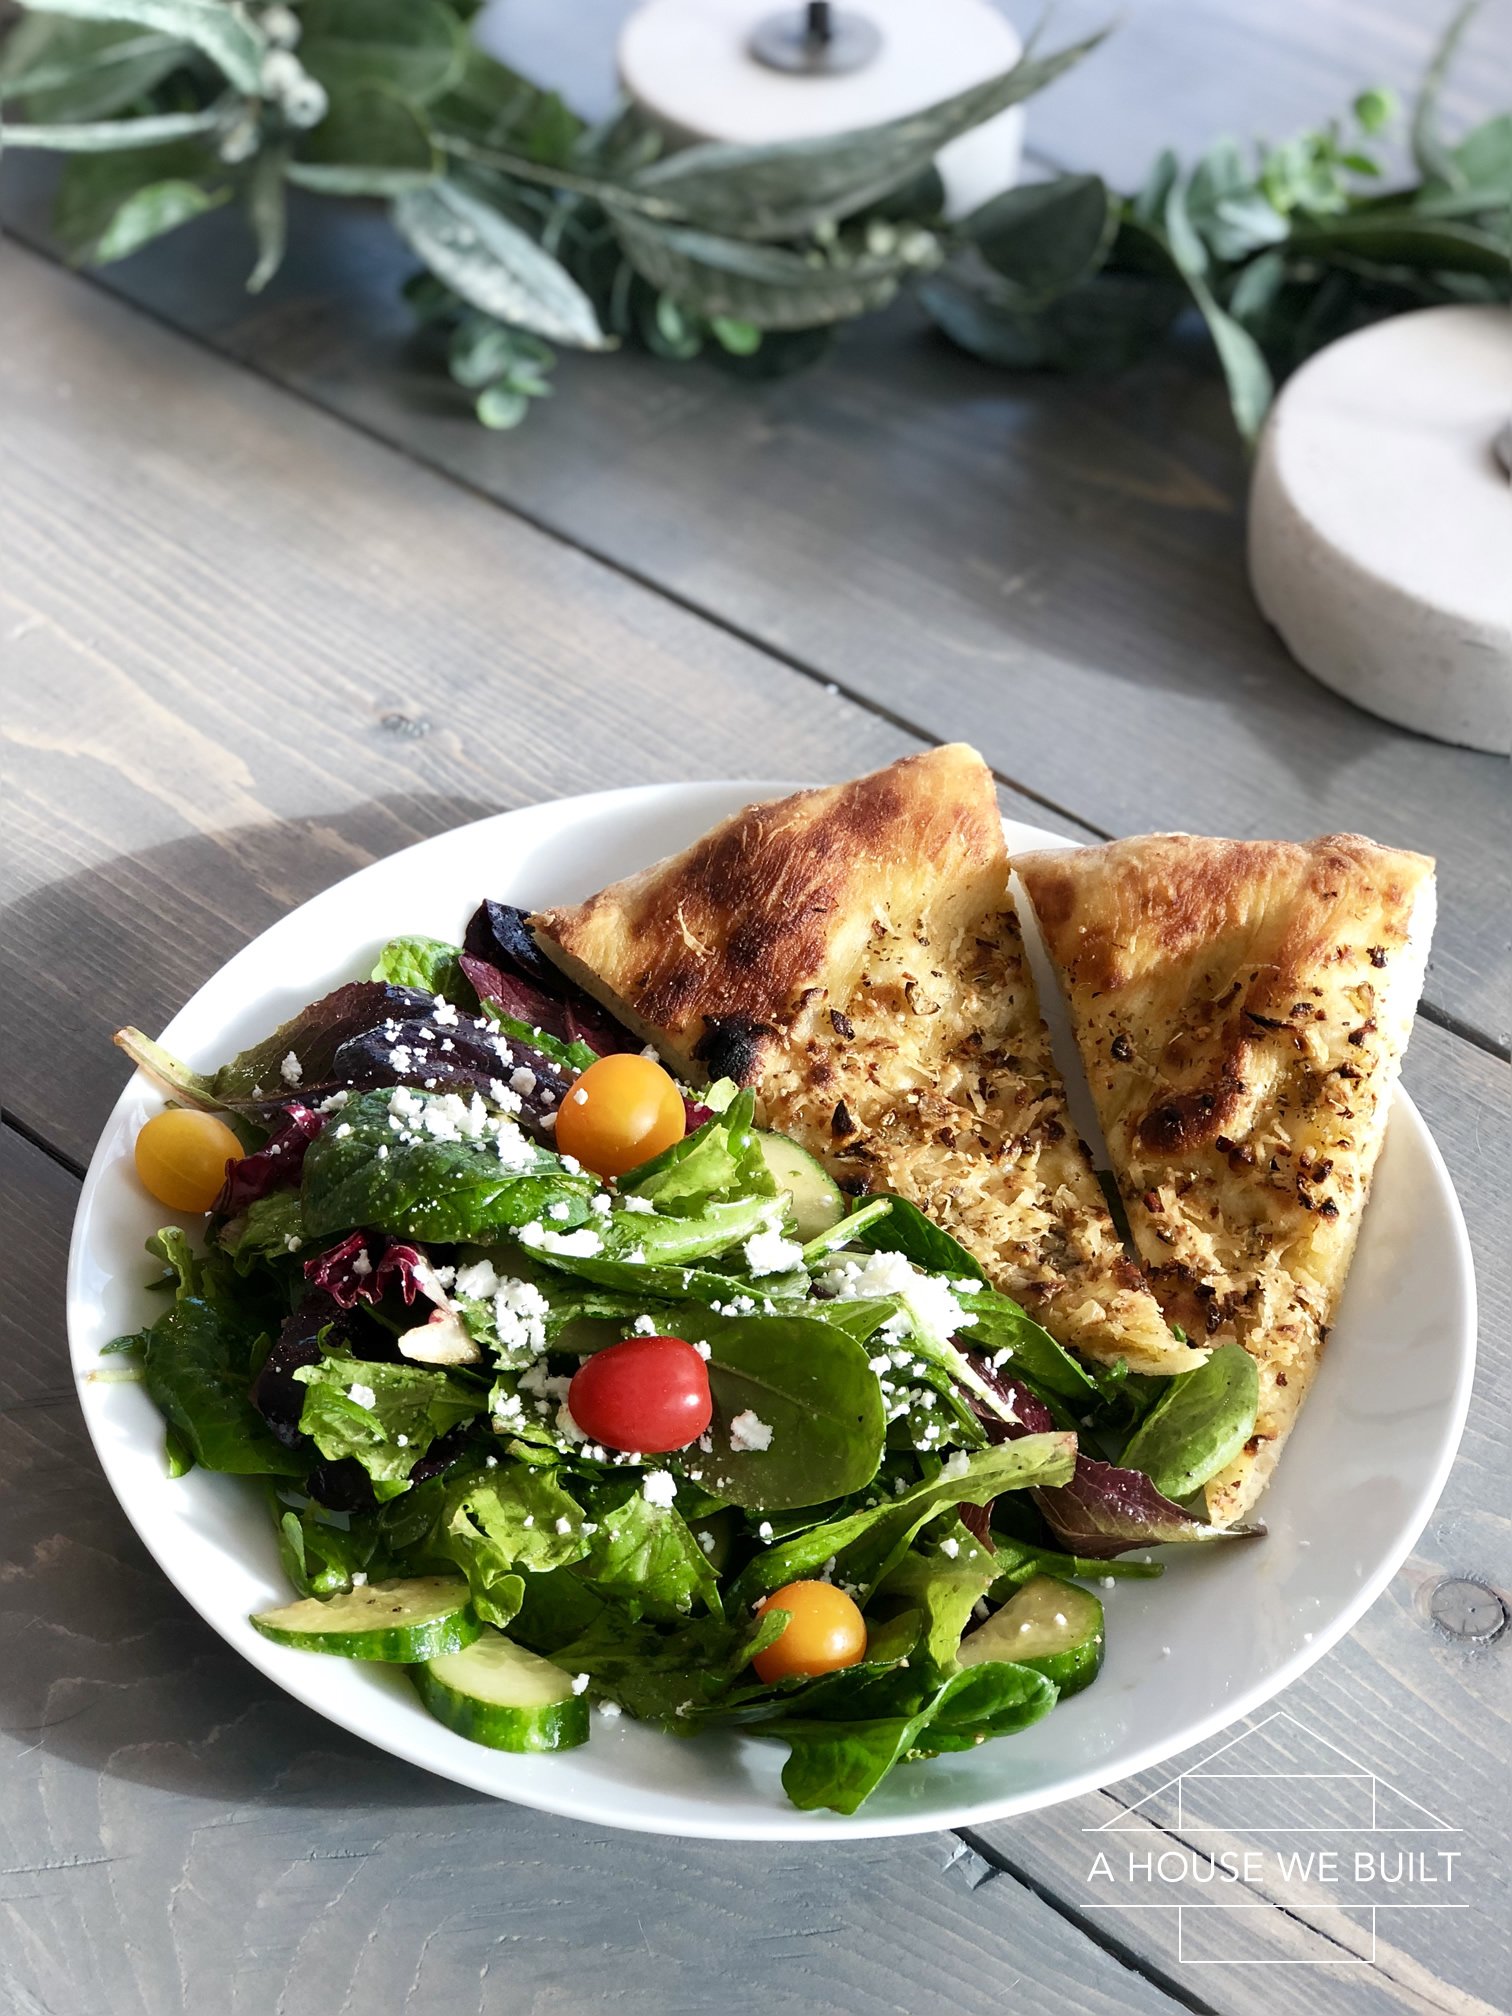
Garlic oil: Finely dice as much garlic as you’d like (we love garlic so we do a big handful). Dice it with a knife, don’t crush it. Dicing it makes it less ‘garlicy’. Then add in enough olive oil to cover the diced garlic plus a generous couple shakes of dried oregano, red pepper flakes to taste, and salt and pepper to taste. (A less garlicy alternative is to do the same mixture with garlic powder instead of garlic pieces.)

Note: this recipe is a staple in our house so we make it a lot. I’ll often pre-prep a ton of this garlic/herb/oil mix and just store it in our fridge, so I’ll literally make several heads of garlic’s worth of it. Another thing is that like I said, because it’s diced and not crushed, it lessens the garlic taste (and smell lol) so you can actually put a ton of this garlic mixture on your flatbread and it won’t taste too garlicy. It’s super healthy!

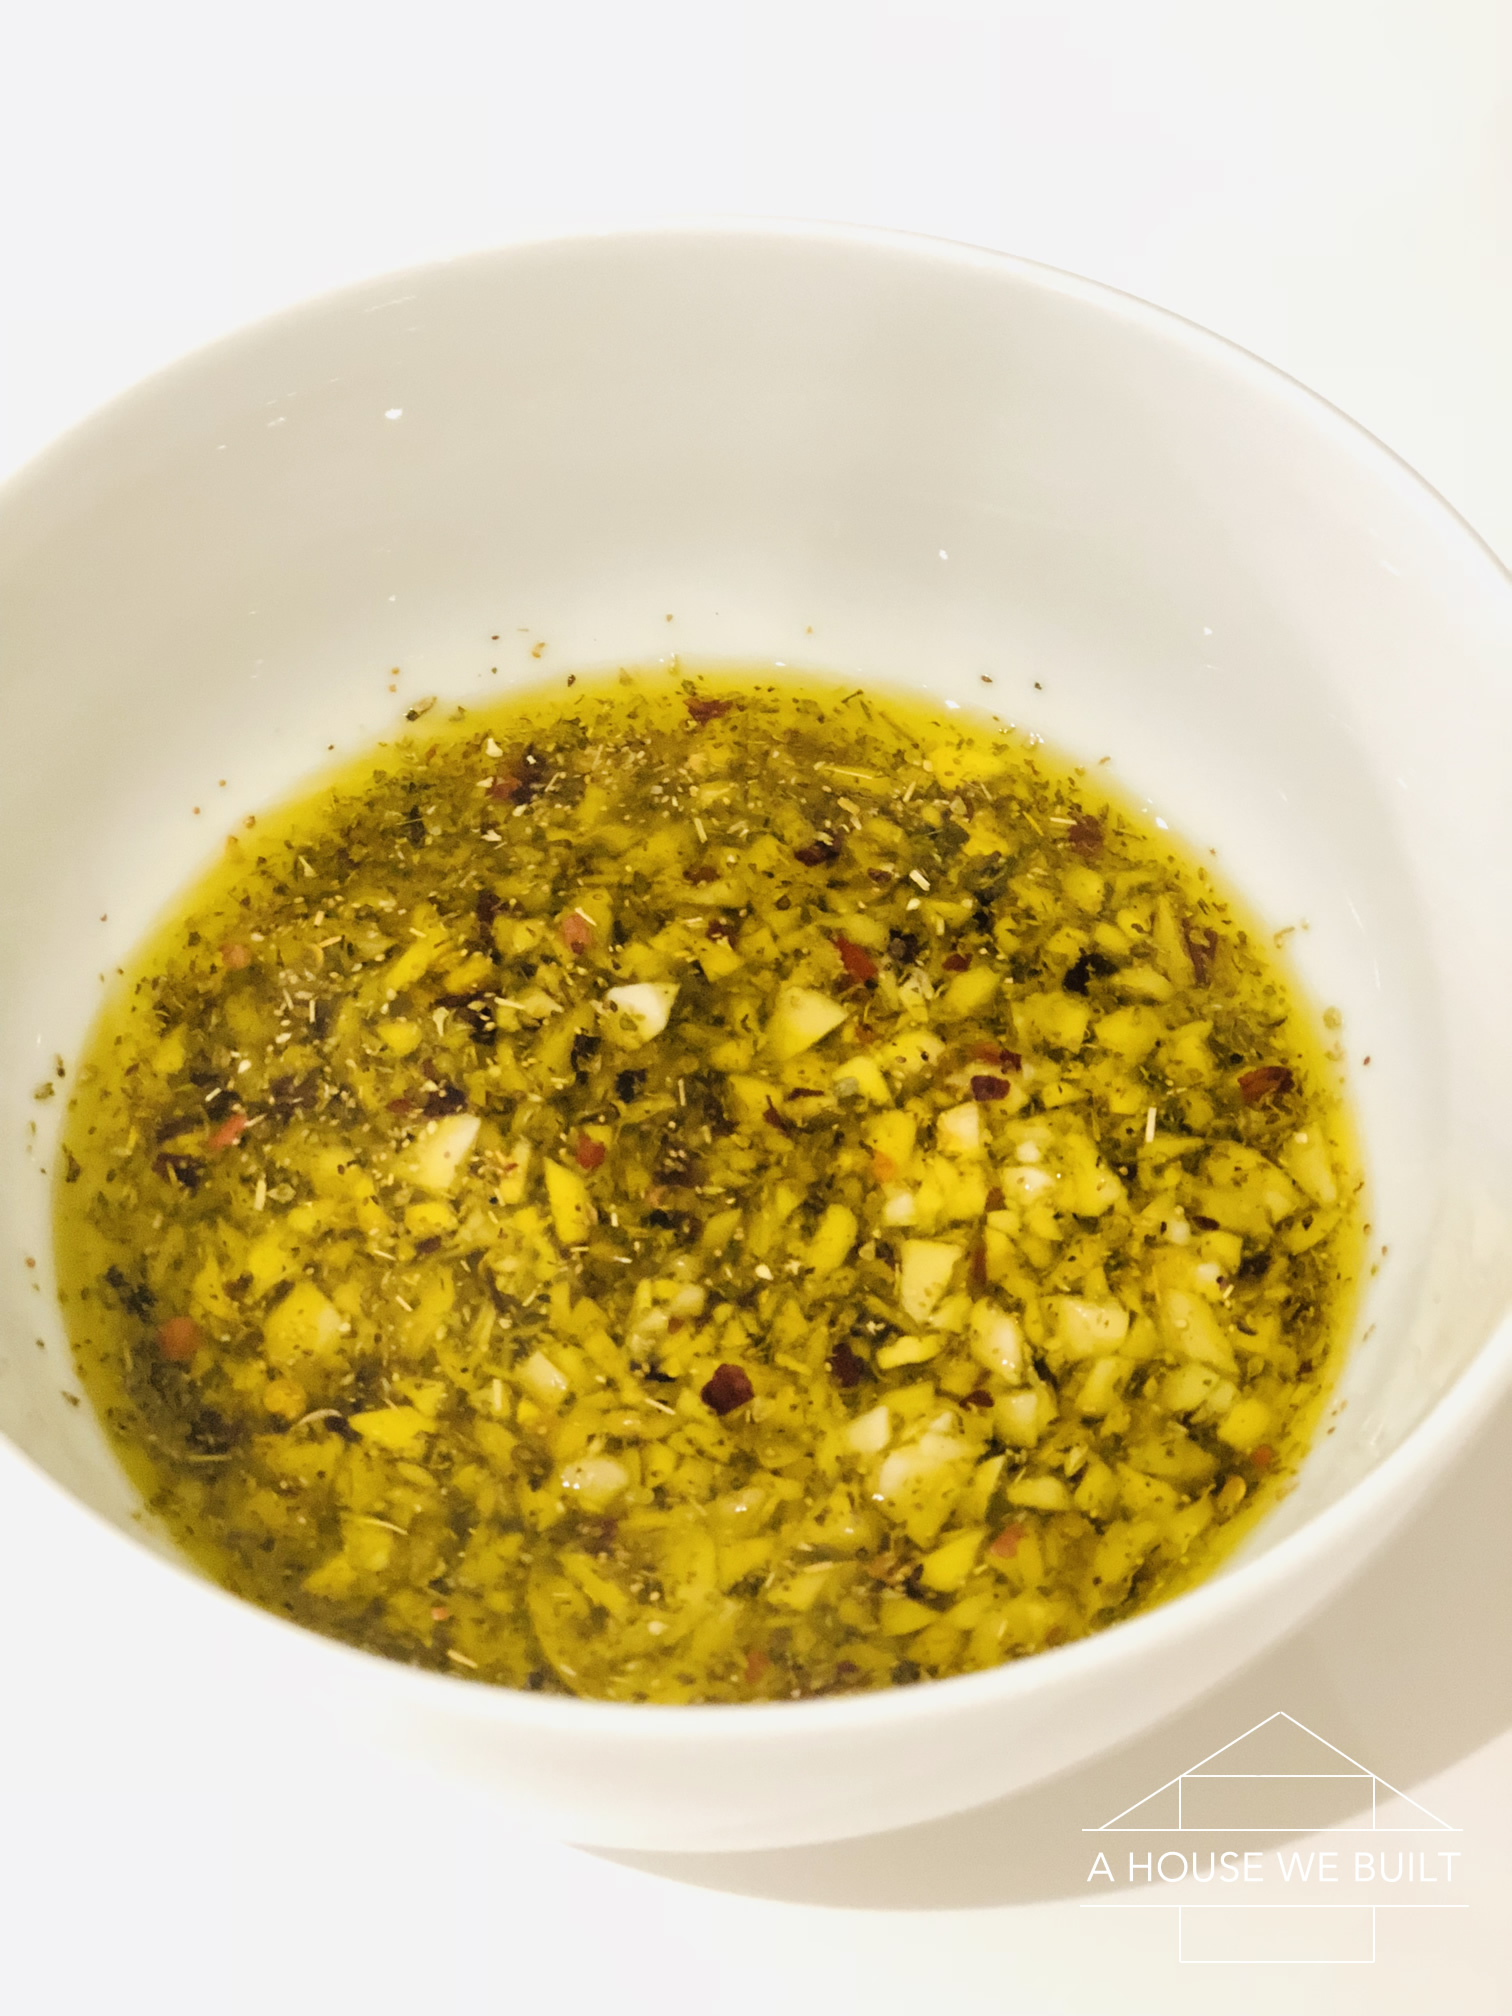
Crust: Gently roll out your dough on a lightly floured surface using a rolling pin until it’s the desired shape and about half an inch thick. Be sure that your hands are floured too to prevent sticking.

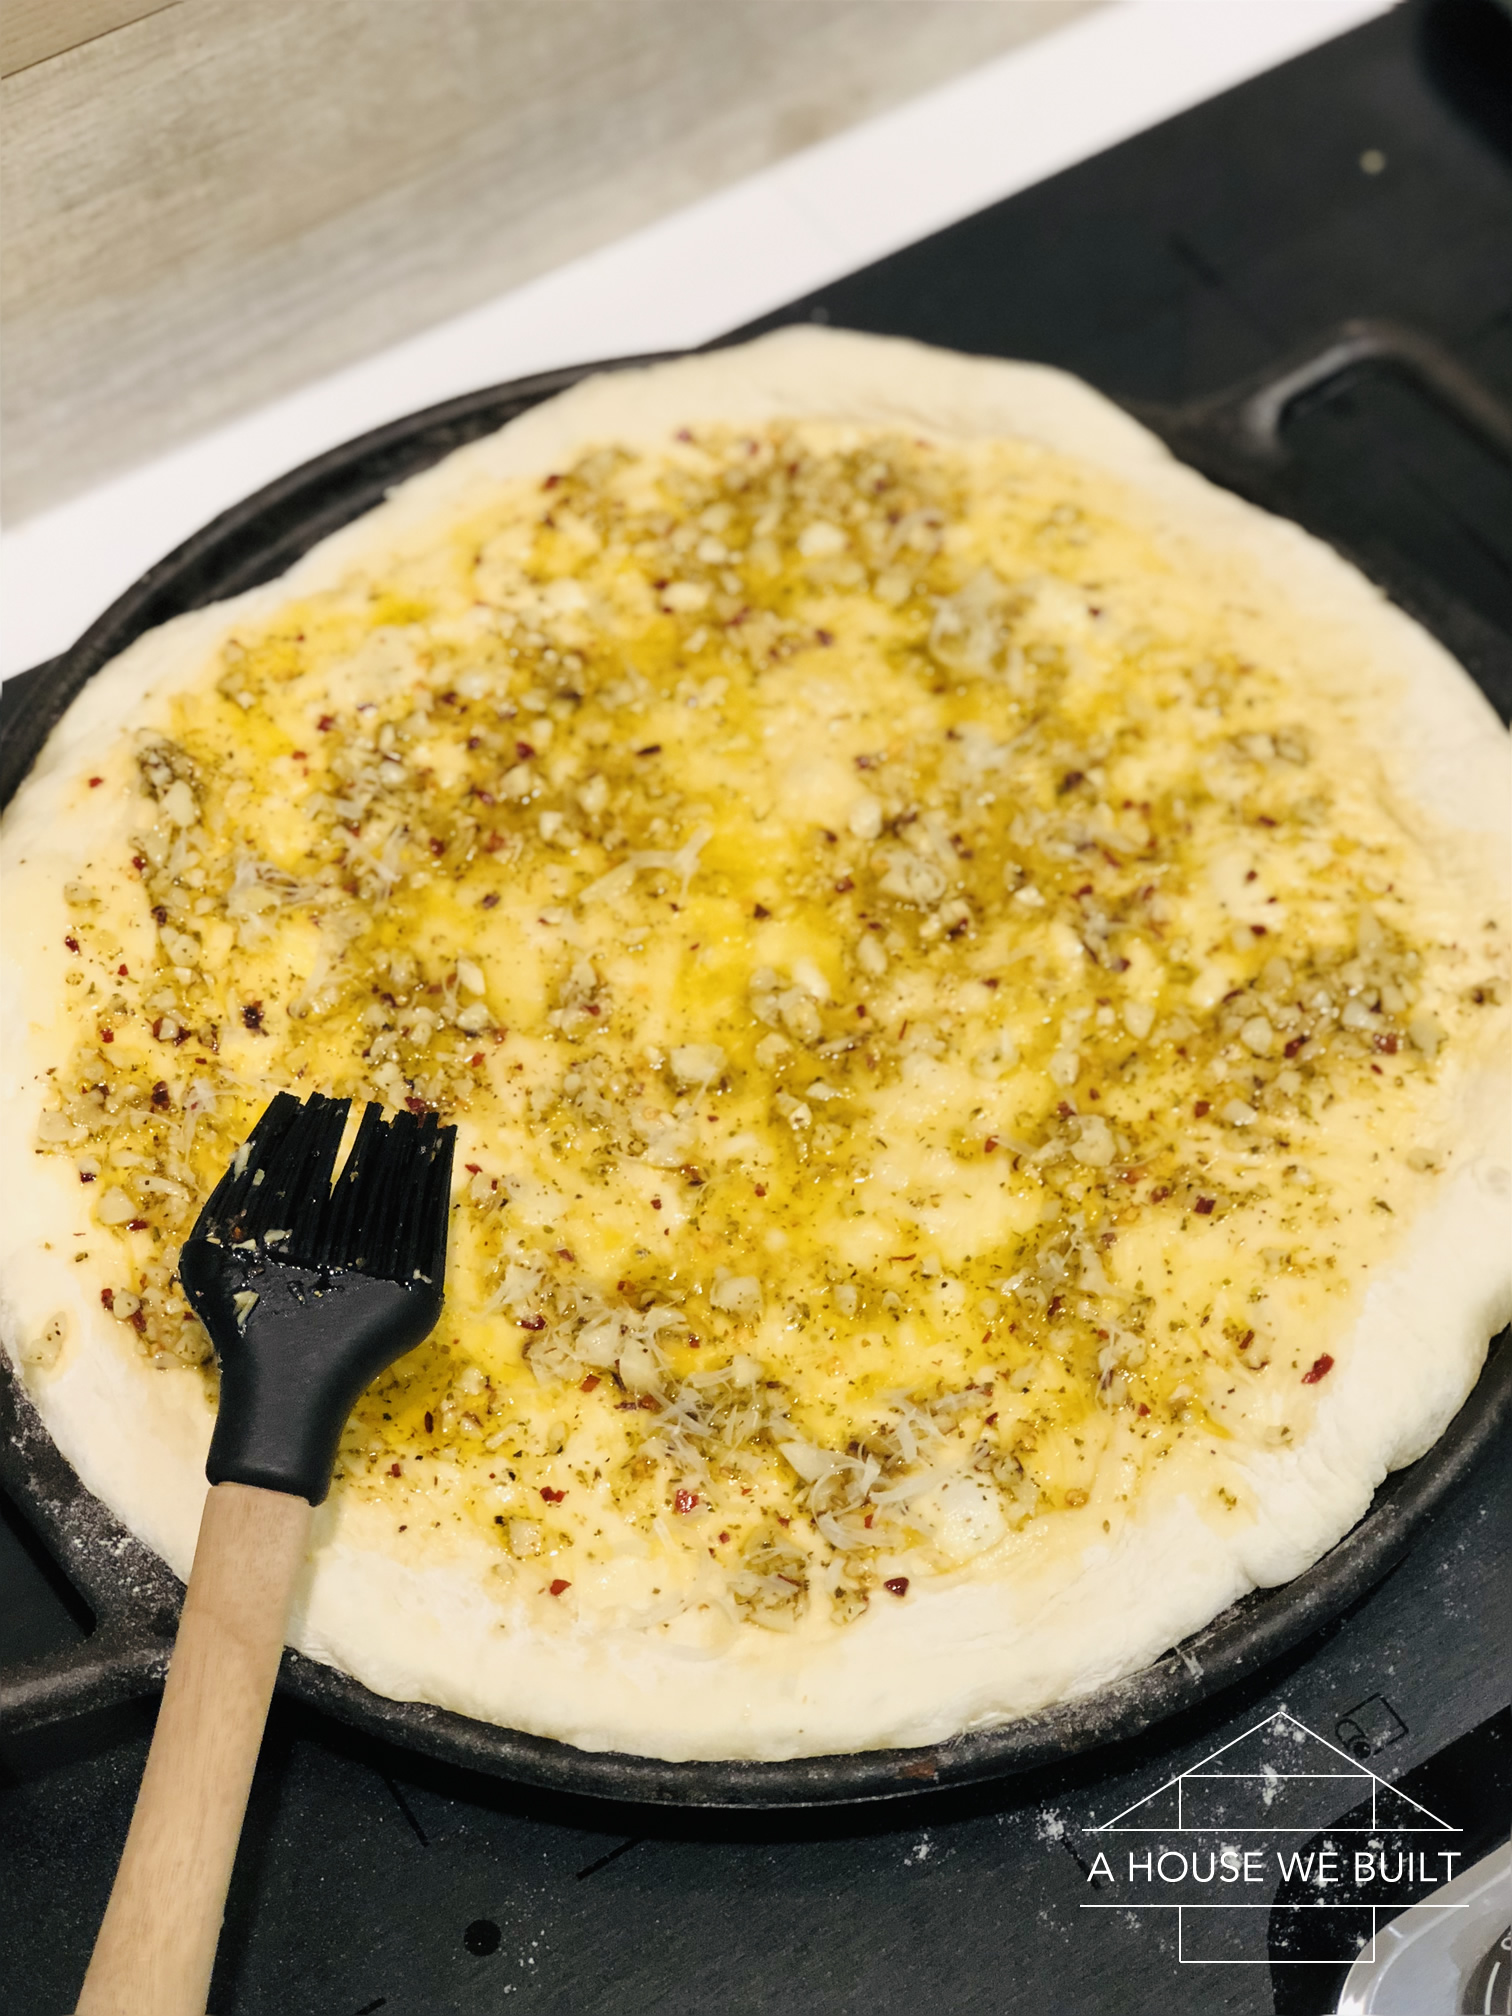
Assembly: Once your pizza stone is fully heated, transfer the dough to the hot stone (carefully!! we do this with 2 people — 4 hands are better than 2), spoon the garlic/oil mixture on and use a brush to evenly coat the dough, and sprinkle some finely grated parmesan or pecorino romano cheese on top.

Bake at 500 until it starts to turn golden — set a timer for 5 minutes. Watch it carefully!!! It might need to go to 10 minutes but as soon as the crust starts to brown it’s done and it varies so much from oven to oven that you just need to keep a close eye on it from the 5 minute point until it’s done. Our oven takes about 8-9 minutes.

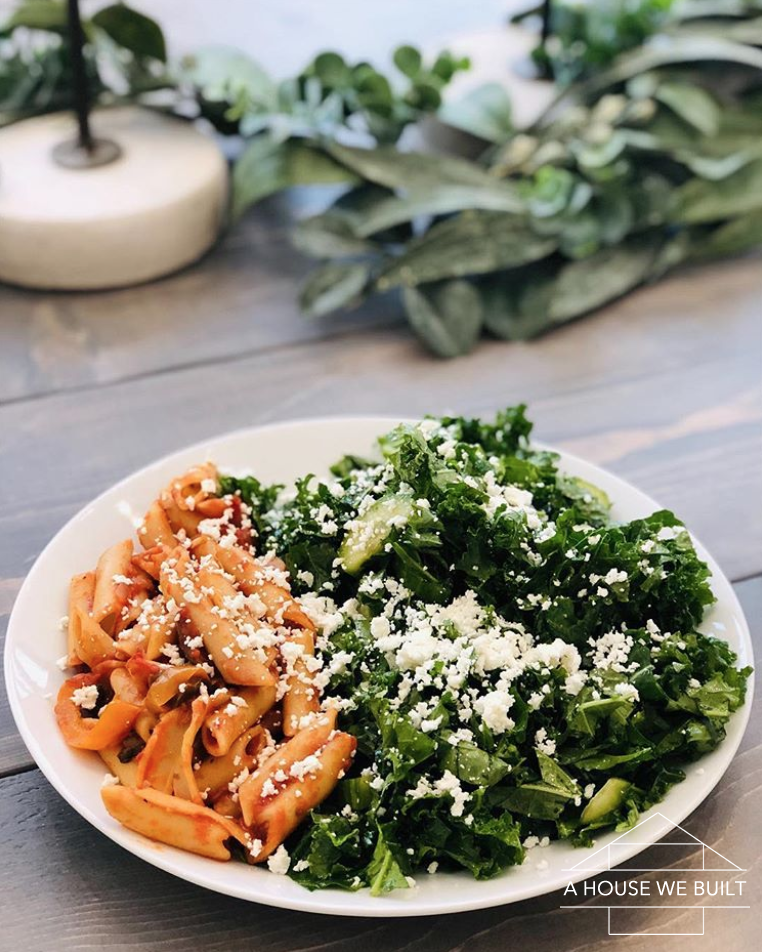
Side salad: Mixed greens, cucumber, tomato (or whatever you prefer).
Salad dressing: 2 glugs olive oil, couple dashes balsamic vinegar, 2 drops of honey, garlic powder, red chili flakes, salt, pepper to taste. Optional: add crumbled goat cheese on top).

Our favorite combo though is to serve this Garlic Flatbread with our Hearty Vegetable Soup!

Filed Under: Recipes

Easy Veggie Pasta Recipe

December 1, 2018 by admin Leave a Comment

This is one of our go-to favorite quick-and-easy homemade meals! You can make the whole thing from scratch in the time it takes to boil the pasta (~15 mins) and it’s healthy and hearty! We eat almost every meal at home and since I’m always showing you guys our kitchen and pantry and we’ve shown a few baked goods so far too, I thought I’d occasionally show some of the lunch/dinners we make too!

Start by making your pasta of choice. While it’s cooking, make the sauce and salad.

Pasta sauce: Slice up 1 onion, 1 bell pepper, some mushrooms, and garlic cloves. On med-high heat stir them in a bit of olive oil til the mushrooms release their water. Stir in dash of dried oregano & basil, red pepper flakes, salt & pepper. Add 2 cans of crushed tomatoes and let simmer until pasta is ready. Then mix it all together. (Optional: add in a can of rinsed & drained chickpeas)

Salad: dice up kale (or lettuce), cucumber, parsley, or anything else you want. Dressing: juice of a lemon, 2 big glugs of olive oil, 2 dashes of balsamic vinegar, bit of garlic powder, couple drops of honey, salt & pepper to taste.

Sprinkle goat cheese on everything after serving (parmesan or pecorino romano work too). Everything is totally modifiable if you have picky eaters or allergies (if you want it more healthy just double the veggies!) but this is one of our go-to favorites! Ooo and if you have leftover pasta just throw it in a baking dish the next day with a sprinkle of cheese on top for a yummy pasta bake!

PS: I adore that garland in the background! This is the one I have: Wayfair and it’s one of my fav recent additions to our house!

Filed Under: Recipes

How to Build a Wood Christmas Tree Collar Box

November 18, 2018 by admin 10 Comments

We built this large wooden Christmas tree box stand because we have cats and cats are notorious for getting into Christmas decorations and climbing trees so, since we have five cats, I set out to solve this problem and you guys… this box stand WORKED!! Not only is it beautiful (or at least I think so) but it also did a great job of keeping our cats away from our tree on the first year (2018) when we first built it and had a “real” tree (left pic) and it worked even better the second year (2019) when we did an artificial tree that had no nature smells. For more info, see our post on How to Cat-Proof Your Christmas Tree & Decor!

Also, if you’re not into DIY, here are a few ready-made Christmas tree boxes that have similarities to ours – although note that some of them are, in my opinion, not high enough if the goal is being a cat deterrent: Home Depot | Home Depot | Home Depot | Bed Bath & Beyond | Wayfair | BarnwoodUSA via Etsy

So the general rule is that cats are significantly less interested in Christmas trees if the lowest branches are above their head height. Our solution is that we designed and built this tree stand! Naturally, it didn’t completely stop the cats from being interested in the tree (especially when we had a real tree) but it went a very long way towards deterring their attention away from the tree. In combination with building this box, I also used my same tried and true Cat Training Methods that I used to teach our cats the rest of our house rules (like not to go on food counters) to teach them not to jump up on this Christmas tree box and for the most part this did a really great job of keeping the cats away from the tree. In the beginning did occasionally try jump up onto the top of the box, but I’d quickly correct them, they learned, and none of them ever climbed the tree. If you’re very attentive (especially in the first few hours/days that you put your tree up), and you correctly them the first time they try to engage with the tree, they’re likely to understand more than if you let them get away with it several times before correcting them. But basically, the first step is to find creative ways of elevating your tree in a very secure manner. You can do this by building a box like we did, or using a really big barrel is another way I’ve seen done beautifully. Unfortunately, simply using a regular tree collar isn’t enough because it’s not high enough. It needs to be minimum 2 feet tall (taller than the cats’ head height) with a wide base so that it can’t be tipped over.

** Side note: simply putting your tree on a table is not the answer because your cat can jump up to the table, and then the situation is actually no different than having the tree on the floor except now the tree has farther to fall. Instead it’s best to elevate your tree with a tall box or surround around the base.

If you want to build a tree box like ours, this is what you’ll need:

  • 7 x 2x4x8
  • 15 1x3x8
  • 2” screws
  • Kreg Jig: Amazon | Home Depot
  • Power drill: Amazon | Home Depot
  • Impact driver: Amazon | Home Depot
  • Miter saw: Amazon | Home Depot
  • Measuring Tape
  • Pre-stain conditioner: Amazon | Home Depot
  • Gray stain (one coat): Amazon | Home Depot
  • Matte top coat: Amazon | Home Depot

We built this to the size that we specifically needed to for the rest of the instructions I’m just going to show you the pictures of what we did and you can modify it however you want to fit your needs. Don’t forget to measure your tree stand first to be sure your box is big enough to fit it!

When you’re done building it, you can choose to paint or stain it if you want. We stained ours my favorite gray stain. Materials: Pre-stain conditioner: Amazon | Gray stain (one coat): Amazon.

The first year that we built this box, we just made it plain with vertical boards. But the second year that we used this box, I wanted to switching things up a little so I added an X detail to two sides of the box. I specifically did only 2 sides because we always place our tree in the corner and by doing the X on only 2 sides, it actually gave me a more versatile box since I can either have it plain or with an X depending on how I rotate the box. Here’s how I cut the pieces, and what they looked like finished:

And this was the complete final look:

Here are some of the sources from our mantle decor shown in these pics:

  • Round mirror: Amazon | Wayfair | Urban Outfitters (same mirror)
  • Black modern Christmas trees: DIY Tutorial | Similar: Crate & Barrel)
  • Mantle: real barn beam
  • Fireplace: Walmart | Amazon
  • More Living Room Sources

If you love the look of this tree box but don’t have cats and don’t need one that is this tall, here are some alternative tree collars in a whole bunch of different looks and styles that I personally think are gorgeous. Note that these are all too short to deter cats but they certainly do create a beautiful look:

  • Natural wicker tree collar: Crate & Barrel
  • Natural wood slats tree collar: Crate & Barrel
  • Basket weave tree collar: Pottery Barn
  • Textured gold tree collar: Crate & Barrel
  • Galvanized metal tree collar: Crate & Barrel | Home Depot
  • Wooden crate (most similar to ours): BarnwoodUSA via Etsy | Home Depot | Home Depot | Home DepotBed Bath & Beyond | Wayfair

For more of our Christmas posts, click here.
To shop our home pics, click here.
To explore rooms in our house, click here.
Follow us on Instagram to see our daily posts here: @ahousewebuilt.

Filed Under: Christmas, Tutorials

Apple Turnovers Recipe

November 5, 2018 by admin 4 Comments

I posted these apple turnovers on our our Instagram page and was asked for the recipe so here you go. We don’t worry about making them “picture perfect pretty” because they get eaten so fast around here that they last about 5 seconds once they’re made, but they sure are delicious!

Filling ingredients:

  • 3-8 apples depending on how big (about a panful) chopped into small cubes
  • 1/2 tbsp cinnamon
  • 1/4 tsp nutmeg
  • 3-5 tbsp brown sugar
  • 2 tbsp water

Pastry ingredients:

  • Puff Pastry dough (I buy mine frozen from a local Italian bakery)
  • 1 egg white or a few tablespoons of milk
  • Couple tablespoons of loose white Sugar

In a pan on medium-high heat, add the chopped apples, cinnamon, nutmeg, brown sugar, and water. Cook covered for about 3-4 mins until the apples have softened, then once they’ve softened and released their moisture, remove the lid and stir them for 1-2 minutes until they’re a chunky sauce. They can be as softened as you want.

I use ready-made puff pastry dough. An important tip is to keep the puff pastry frozen until the day before you’re ready to use it. Then transfer it to your fridge and let it thaw overnight, and keep it in the fridge until you’re literally ready to roll it out. Then (it usually comes in a set of 2 individually wrapped rolls), be sure you take each roll out AS you use them because the dough needs to remain cold until the very last minute or it becomes hard to work with.

Flour your counter, place your puff pastry on the counter, then also flour the top of your dough. Roll out the puff pastry to about 12″ x 18″. Cut it into either 6 or 8 even pieces (I usually do 8). Honestly, you can make them whatever size or shape you want though.

My favorite way to make these is to cut 2 smaller rectangles or squares (one for the bottom, one for the top) and spoon the apples onto one of the pieces, then cover it with the other piece. Another way is to make a longer rectangle or larger circle of dough, spoon the mixture onto one side, then fold the other half over. Honestly, any way you do it as long as you end up with “apple covered by pastry” is fine.

To make the top and bottom pastry stick to each other, just wet the outer edge of the bottom side with a bit of water on your finger, then place the top dough over the apples and use a fork to press top/bottom edges down.

Brush egg white or a bit of milk over the tops, sprinkle with white sugar, and poke a little hole.

Bake at 350 until golden brown (about 20-25 mins). I’d set a timer for 20 mins, then watch them from then on because they get overdone very quickly. You want to see the edges and tops turn golden before you take them out.

Enjoy!

Note: pretty much all ingredients are modifiable to taste. Add more or less sugar, more or less spice, use a different fruit for the filling etc. I promise they’ll taste amazing no matter what you do. We’ve done these with peaches too, and strawberries.

For all our recipes, click here.
To shop our home pics, click here.
To explore rooms in our house, click here.
Follow us on Instagram to see our daily posts here: @ahousewebuilt.

Filed Under: Recipes

How to Build a Farmhouse Table and Benches

October 22, 2018 by admin 88 Comments

WE BUILT A TABLE!! AND BENCHES!! And we’d never done this before but it kinda turned out awesome so I thought I’d share as much as I could in case you might want to try something like this yourself!!

So we built them out of standard lumber from Home Depot, a couple of non-fancy tools, and plans we drew up ourselves. It took us about a week of building it on-and-off in our spare time. It’s level, strong, and sturdy!! Plus it’s disassemble-able (is that a word??) so we can dismantle it if we need to move it.

Please bear in mind that we’ve never built anything like this before. We’re total amateurs who just really took our time to come up with the best possible design we could with the limited tools we had, so if you’re a master carpenter or something, please don’t judge it too harshly.

Our table is imperfect but we absolutely LOVE IT and fully embrace its imperfections as part of its charm. Because we’re not professional furniture builders, we basically had 2 directions we could take this build: either try to somehow make it absolutely perfect (which was just unreasonable for us given our limited skills and tools) or just embrace any imperfections and do the very best we could — and this was the direction we went. We like to call it RUSTIC!! It’s funny but while we were building, anytime something wasn’t totally perfect and we’d be considering if we were okay with it, we’d mostly just look at each other and shrug and be like “It’s rustic!!!!” and go with it. I mean, we did redo a few things along the way (there’s an entire 4×4 chopped into itty bitty bits in our garage where we failed a bunch of times while learning to do 45 degree cuts on an old saw but hey — we got it in the end! Sure, some of the bolts don’t perrrrrrfectly line up, and some of the joins could be a little straighter BUT like I said it is 100% level, and is strong and sturdy beyond all reason!! And most importantly, we have the memory of building it together and the satisfaction of building something that we’ll use everyday, and we learned a lot!

[For more updates from this room in our house, please visit our our dining room page.]

The original reason we chose to build this table rather than buy one was that that size we wanted was really hard to find anywhere at a reasonable price. The closest we found to what we wanted was at Restoration Hardware, but it wasn’t “exactly” what we wanted and we also didn’t feel like spending ten thousand dollars on a table set and I’ve wanted to try our hand at building one ourselves forever so we ended up finding a few different tables we liked the look of from different places and then we spent a couple hours figuring out a plan for how to build it, as well as how to reinforce it from underneath — actually this was super important because the biggest thing we heard about building out of regular lumber is that it can warp and crack over time so we really took a lot of precautions to try and avoid that.

All in all I’m going to guess that our total build cost (lumber & tools) was somewhere under $500.

TOOL SUPPLY LIST FOR BUILDING

  • Kreg Jig: Amazon | Home Depot (THIS TOOL WAS A GAME CHANGER!!! But seriously though, it saved us SO MUCH TIME. I’ve heard people raving about these and wasn’t too sure if they were worth the hype but they TOTALLY ARE. And no, this post isn’t sponsored by them lol. I’m just truly telling you that you need one of these if you’re going to build this table and don’t have a bajillion other fancy tools or don’t know how to do dowels or mortis and tenon joins etc. This is the ultimate cheat tool. It basically allows you to drill “pocket holes” which are perfectly angled holes on your boards which allows you to connect them together without overly visible joins. Seriously, I wouldn’t even consider attempting to do this build without it. This Kreg Jig Master System is the one we bought, but honestly, we didn’t use the clamp that our kit came with as much so if you want to save some money, you could totally just buy this basic Kreg Jig Pocket Hole System instead.)
  • 150 x 2 1/2″ pocket hole screws – approx (for Kreg Jig holes): Amazon
  • 50 x 2″ wood screws
  • 100 x 3 1/2″ wood screws
  • 25 x 4″ No.2 10×4″ construction screws
  • 8 x L-brackets, 6″ long both directions
  • 24 x 5″ bolts
  • 24 x nuts to fit those bolts
  • 24 washers to fit those bolts/nuts
  • Cordless power drill: Amazon | Home Depot
  • Cordless impact driver: Amazon | Home Depot
  • Wood glue
  • Miter saw: Amazon | Home Depot (we just used my dad’s miter saw)
  • Carpenter’s square: Amazon | Home Depot
  • Level
  • Measuring tape
  • Socket wrench

SUPPLY LIST FOR STAINING/FINISHING

  • Pre-stain conditioner: Amazon | Home Depot
  • Gray stain (one coat): Amazon | Home Depot
  • Matte top coat: Amazon | Home Depot
  • Bunch of old rags
  • Gloves
  • 150 grit sandpaper (to do it properly, you’d start with a 150 then maybe do a 320 or something softer over it, but I’m lazy and just did the 150. Don’t judge.)
  • Patience & snacks

About the dimensions — we’re a family of tall people so we built this table and bench set a bit higher than normal heights. If you want them to be lower, just shorten the respective leg pieces accordingly.

TABLE DIMENSIONS: 115″ long x 46 1/4″ wide x 30 1/2″ high
BENCH DIMENSIONS: 96″ long x 14 1/2″ wide x 19 3/4″ high

IMPORTANT TIP WHEN BUYING LUMBER FROM THE HARDWARE STORE:

You have to find the straightest boards possible. We spent over 2 hours in the store sifting through ALL their lumber. The boards need to be straight and not warped and have no cracks if possible. Once you’ve found all your pieces, lay all the “top boards” (table top and bench top) on the floor together BEFORE you buy them and make sure that they fit together well. Sometimes two straight-ish boards won’t line up together well so you HAVE to make sure they do otherwise your table/benches will be crooked. This is the ONLY way you can use standard lumber so you absolutely can’t grab the first pieces on the shelf.

LUMBER SUPPLY LIST

  • 7 x 2x10x8 (for table top)
  • 4 x 2x8x8 (for bench tops)
  • 2 x 2x4x10 (for under frame)
  • 9 x 2x4x8 (for more frames and cross brace)
  • 7 x 4x4x8 (for bench and table legs, I think we only used 6 but we messed up a few times so we got an extra one just in case and were really glad we did)
  • 2 x 1x4x8

CUT LIST

We made as many cuts as we could all at once at the beginning of our build so that we didn’t have to keep running back and forth to the saw. We did have to make more cuts along the way especially ones that had to be measured ‘on site’ but we did as many as possible up front.

  • 2 pieces of 2x10x8 cut to 46.5″
  • 2 pieces of 2x4x10 cut to 111″
  • 5 pieces of 2x4x8 cut to 36.5″
  • 4 pieces of 2x4x8 cut to 87″
  • 6 pieces of 2x4x8 cut to 9″
  • 4 pieces of 2x4x8 cut to 6″
  • 6 pieces of 2x4x8 cut to 10″
  • 8 pieces of 4x4x8 cut to 18 1/4″
  • 2 pieces of 4x4x8 cut to 18″
  • 4 pieces of 4x4x8 cut to 43 1/2″ with 45 degree back cuts
  • 4 pieces of 1x4x8 cut to the length of the small side of the 45 degree cuts in the 4x4s above this
  • 4 pieces of 1x4x8 cut to 4″

Ok I’m going to try to explain how to build everything now – step by step. Bear with me because I’ve never done this before…

STAGE 1: PLANNING & GETTING MATERIALS

There’s a surprising amount of variety in table designs – not something we ever considered until we sat down to make one. How high should it be? How about the chairs? What’s the best width and length?

The first thing we did was find an adjustable office chair and fiddle with the height until we found a good middle ground that worked for both of us. This became the height measurement for our benches. Once we had that, we used a flat piece of wood to simulate a tabletop and figured out the perfect tabletop height for us. This will vary from person to person!

With our key measurements decided, we drew out our plans. This REALLY helps make sure you haven’t forgotten anything and keep track of big each piece should be. We also drew the table from the top-down AND the side – this is incredibly helpful as a reference while buying materials and assembling.

We’ll share the plans we came up with below.

STAGE 2: BUILDING THE BENCHES

We figured that the benches were like simple, miniature tables, so we decided to start with them as a way to get our process figured out. It was also VERY nice to be able to use the benches as work surfaces during the rest of the process!

We started with the benchtop: just two 2x8s cut to the same length and joined with Kreg Jig screws and some wood glue between the boards. We did find it easiest to do this on the ground and stood on the boards while we screwed them together to keep everything flat and even.

With the benchtop built and laying on the ground, we attached the bench legs next. We put the legs in place and re-measured everything to make sure our cuts and math were correct, then marked the placement of the legs with pencil. The legs were 4×4 cedar, attached with Kreg Jig screws on the two inside faces where they wouldn’t show. We then attached the 2×4 pieces between the legs with Kreg Jig screws into the legs and down into the underside of the benchtop. These 2×4 pieces are important for the bench’s strength, as they anchor the legs against each other, as well as to the benchtop.

We completed the first bench, and then did the second – we found this was a good way to do things in general, as we’d figure out a good work process the first time and the second one went much faster.

STAGE 3: BUILDING THE TABLE TOP

Having built the benchtops, we were well-prepared for the table-top. We spent a lot of time laying out the boards in different orders and orientations to find the best look and most even fit. When we had the order figured out, we numbered each board, and marked all the Kreg Jig screw spots, placing the screws so that there was one every six inches, alternating sides.

Make sure you do your pocket holes on the UNDERSIDE of the table top!

At this point we also placed the breadboards, and trimmed them so that everything fit snugly.

With everything fitted and labled, we drilled all of the Kreg Jig holes, then started assembling. We started with the middle board, and then worked outwards, alternating sides. Each board would get a smear of glue, we would stand on the boards to get them straight, and then screwed the board into its neighbor with a few screws in the center of the board. We did the whole tabletop that way, and attached the breadboards last. This way main planks could be fitted to the breadboards much more tightly.

The next thing we did was assemble the tabletop’s 2×4 underframe. This was done separately, again on a level floor, and again using glue and Kreg Jig screws. Two long 2x4x10s cut to 111″ pieces formed the sides, designed to support full length of the tabletop from breadboard to breadboard. The cross pieces between the 2x4x10s link the tabletop planks together, and two of them are placed exactly where the two base crosspieces will go. The pieces along the centerline give the base centerpiece a place to rest on. We laid everything out beforehand and measured for squareness and levelness, as well as measurement accuracy. Once assembled, we laid the underframe on underside of the main tabletop and screwed it into the underside of the tabletop.

The underframe is super-important as it gives the tabletop a ton of structural strength, gives a secure place to attach the base, and prevents the long planks from warping.

With the floor as a level surface and all the screw holes down beforehand, assembly went pretty quickly. We wiped away excess glue, but left the tabletop on the floor overnight while the glue dried.

STAGE 4: BUILDING THE BASE CROSSPIECES

The base crosspieces were probably the most complicated part of the whole build process. It was difficult to cut the 4x4s at a precise angle with our old saw, and everything needed to fit together quite snugly as these were a very visible part of the table. The top left pic shows how we determined the size of the 4×4 X-pieces.

We built the horizontal tops and bottoms of the crosspieces first, gluing and screwing in the pine planks to the cedar posts first, and then attaching the vertical 4×4 posts from the top and bottom using more glue and deeply-sunk 4″ screws. With that done, we fit in the 4 diagonal pieces of 4×4. These were glued and screwed directly into the center post through their face (we later covered the holes with wood filler but that’s optional), and attached them to the top and bottom pieces using glue and more deep-sunk 4″ screws from the tops and bottoms.

Then just for fun, we put the pieces we had together — just propped up — to see what they’d look like and to verify how far apart we wanted the table legs to be.

STAGE 5: BUILDING THE BASE CENTERPIECE

The base centerpiece’s top and bottom members were literally just straight-cut pieces of 4×4 cedar, and angled members were 2x4s cut at 45 degree angles on both ends and they go basically where they fit. We attached them to the center of the 4x4s with screws as shown in the plans.

We glued the vertical members in place and then screwed them first from the face down/up into the 4x4s, and then from the top and bottom through the 4x4s using deep-sunk 4″ screws.

STAGE 6: SANDING, STAINING, FINISHING

You’ll notice these pictures don’t quite line up with the timeline of the “Stages” and that’s because we got a head-start on sanding and staining after building the benches, table top, and legs, but before the centerpiece. We then stained the centerpiece right after we built it.

But basically, to begin we sanded absolutely everything down with 150 grit sandpaper. We used an old electric sander for just a few places where there was writing stamped into the wood so that was just an easier way to get it off but not necessary — you could totally do that by hand too.

We then conditioned it with this pre-stain conditioner (Amazon) and allowed it to dry for about 2 hours. Then using old (but clean) rags, we stained it with Classic Gray (Amazon) and let the stain sit for about 10 mins before wiping off all the excess, then allowing everything to dry overnight. Tip: use an old paintbrush to get the stain into hard-to-reach corners.

Finally, we top coated it with this Amazon totally matte product with no sheen.

STAGE 7: BUILDING THE BASE BRACKETS

We decided to use bolts and structural steel brackets for connecting the crosspieces to the centerpiece, since this is a pretty heavy table and the “side-to-side” wiggle is the one weak point in the structure. Just screwing probably wouldn’t be enough in the long run, since screws don’t do well with wiggle strain.

We first painted the bolts and brackets with spray-on matte black metal paint (optional because if you like the metal look then this is not necessary). Once those dried, we placed the brackets on the base centerpiece first, and marked the holes on both sides. We drilled the holes through, making sure that the holes came out at the right place on both sides of the 4x4s, and then bolted them on. With metal bracket on both sides, we only ended up using washers on the outside sides.

With the centerpiece’s brackets attached, we then stood up the crosspieces and centerpiece, made sure everything was square, level, and snug, then marked where the bracket holes fell on the crosspieces’ horizontal members. We then took everything down and drilled the holes we’d marked in the crosspieces.

STAGE 8: TABLE ASSEMBLY

With the tabletop, the base crosspieces, and the base centerpiece all assembled, we moved all the components into our dining room and assembled the table “in place.”

First, we stood up one base crosspiece and bolted it to the brackets on the base centerpiece. At this point, the base could stand up on its own, so it was easy to attach the other base crosspiece. (Tip: since the base crosspiece is exactly off the ground the same height as the 1×4, we used scrap 1×4 to prop it up while we drilled). Since we’d squared and measured everything before drilling the bolts, when we tightened the bolts with a socket wrench, the base “squared and leveled itself.”

With the base assembled, we lifted the tabletop up and placed it atop the base. Our measurements turned out to be pretty accurate, and the tabletop’s 2×4 underframe lined up almost exactly with the base’s centerpiece and crosspieces.

We secured the tabletop from below with 5 deep-sunk 4″ screws up through the base’s horizontal members: one in center of the centerpiece and one on either side of each cross-piece’s centerpost. We used some electrical tape to mark the right depth on bit we used for driving the screws, ensuring that the screw went all the way into the 2×4 frame.

And that’s pretty much it!!!

DISCLAIMER: Please be careful! Power tools, screws, saws, and improperly-built furniture can all be dangerous. Be careful, and consult with an expert when appropriate. All content provided here is for entertainment purposes only and is not expert advice. We make no claims as to the accuracy or completeness of any information here. We shall not liable for any errors or omissions in this information, nor for any losses, injuries, or damages from the use of this information. Anyone who uses these instructions or the resulting items does so at their own risk.

And again — if you’re a master carpenter, please don’t judge this harshly. I’m sure there are a lot of better ways to build a table, but this way is sturdy and level and we were able to build it without buying any crazy tools and without any special skills so we’re very happy with it!

If you plan to build one of these tables, GOOD LUCK!!
If you post a picture, please tag us on Instagram (@ahousewebuilt) so we can see!!

Or if you’re kinda thinking that this is wayyyy too much effort, here are some similar tables you can buy online: McGee & Co | McGee & Co | Wayfair | Wayfair | Pottery Barn | Overstock | Overstock.

If you have any more questions, leave me a COMMENT down below!

I’ll end with an updated picture of our table:


Our sideboard tutorial: click here
Our canvas art tutorial: click here
Our dining room sources: click here
Our DIY tutorials: click here
Explore our house: click here
Follow us on Instagram: @ahousewebuilt

Filed Under: Tutorials

How to Make Industrial Stair Railings

September 18, 2018 by admin 11 Comments

We built all our handrails ourselves using iron pipe that can be generally found at most hardware stores. This general process also works for towel bars and hanger bars (like in our Master Closet Room).

Type of materials you’ll need (make sure all your sizes match):

  • Generally, this is the stuff you’ll need: Home Depot
  • Pipe in varying lengths: Home Depot
  • Flange: Home Depot
  • Elbow: Home Depot
  • T-join: Home Depot
  • Connector: Home Depot (I couldn’t find the right size, but is the piece)
  • Hex-head lag bolts: Home Depot (Note: it’s usually 4 bolts per flange, but you’ll probably only get two bolts in a stud. For the bolts that went into drywall, we bought shorter lag bolts since they’re just decorative but should match the real bolts.)
  • Matte black spray paint for metal: Home Depot
  • Stud finder: Home Depot
  • Drill & impact driver: Home Depot

You’ll also need some metal paint to seals it:

  • Metal paint: Home Depot (can) | Home Depot (spray)

The assembly of a single railing section (or towel bar) goes like this:

  1. Flange (and bolts)
  2. Connector
  3. Elbow
  4. Rod (threaded on both ends)
  5. Elbow
  6. Connector
  7. Flange (and bolts)

If you have to have a break in the middle of your railing section (as we always did), then it goes like this:

  1. Flange (and bolts)
  2. Connector
  3. Elbow
  4. Rod (threaded on both ends)
  5. T-join + Connector + Flange (and bolts)
  6. Rod (threaded on both ends)
  7. Elbow
  8. Connector
  9. Flange (and bolts)

The assembly of a hanger bar goes like this:

  1. Flange (and bolts)
  2. Rod (threaded on both ends)
  3. Flange (and bolts)

How to build:

  1. Read the building code in your area and/or talk to your inspector. You may have to use more support pieces, or a certain thickness of pipe. Better to figure this out beforehand!
  2. Locate the studs on your wall and mark the studs you will fasten to (not all your bolts will go into studs, but each flange must be able to get 2 bolts into a stud). You’ll also want a T-join every 4′ ish.
  3. Figure out how many support pieces (T-joins + connector + flange combos) you’ll need to make your railing sturdy, and how many end pieces (elbow + connector + flange combo) you’ll need.
  4. Assemble all the necessary support and end piece combos and attach them to the wall where they’ll go with one small screw just to temporarily hold them in place. Make sure the flanges are rotated so that two holes are over a stud!
  5. Measure how long a rod you’ll need between each of your combo pieces. Make sure the T-joins and elbows are aligned! Count on 3/4″ of extra length on each end of each pipe for where it will screw in.
  6. Cut and thread all your rods to length (you need a threading machine – some hardware stores that sell this piping have it, or you can contact local trades who work with this material). You shouldn’t need more than 1/2″ of threading for each end.
  7. Clean all the rods (they’re often greasy) with rags, sand them with 150 grit, then clean them again. Don’t forget to smooth out the teethmarks where the threading machine held the rods.
  8. Take everything down from the walls and fully assemble your railing.
  9. Spray paint it with a metal paint if you choose. Spray paint all the hex-head bolts too. A trick is to screw them into something disposal (we used a piece of scrap drywall) so they are standing up straight – this makes sure you spray all sides of the heads.
  10. Once dry, screw the whole railing to the wall with the same small screw as before just to hold it in place. Once the railing is attached to the wall, step back and check it! This is your last chance to change the angle or placement.
  11. When you are happy with the placement, screw in the bolts! While you can use a socket wrench, I highly recommend buying a small bit for your handheld drill or impact driver which fits the 1/2″ hex heads. It makes it much easier!


For more of our tutorials, click here.
To explore rooms in our home, click here.
To follow our daily updates and home progress, follow us on Instagram @ahousewebuilt.

Filed Under: Tutorials

A House We Built: August 2018

August 20, 2018 by admin 4 Comments

We moved in basically the last day of July so August was our first month LIVING in our house. We still had a lot of projects to finish and the exterior was still being worked on but we had occupancy and just being able to live on site and not having to drive an hour each way was such a blessing!!

We started organizing our drawers! I spent a long time researching just the right types of organizers and finally found the ones that I think work best for our kitchen. Our shower glass was installed and I loved the way they both turned out (in our main floor and master bathrooms). Our pantry, my office, and my closet shelving made significant progress (my dad is kindly building all of these by hand). I started organizing our pantry and found the perfect containers that are airtight, dishwasher safe, pretty, and easy to open/close!!! We built a stair railing from scratch and it passed inspection which was awesome! And built a surround for our washer/dryer so that we wouldn’t have to bend down to use them every time but so that they still matched all our custom cabinetry!

Note: this blog is just a small recap of our journey. For more detailed posts and daily updates on our house building journey, please follow us on our Instagram page and for sources go to our homepage.


Filed Under: Uncategorized

A House We Built: July 2018

July 30, 2018 by admin 2 Comments

July was a super charged month because we needed to have occupancy by the end of the month since we’d given notice on our rental and absolutely had to be able to move in here. Every single day was busier than you can imagine and I was spending everyday on site all day — thank goodness I work from home!

All our shiplap was installed!!! This was a huge milestone for me because it was something I’d planned on doing since before we even specifically started designing this house!

Countertops went in! We did pure white Italian Quartz everywhere and loved the way it turned out! We also did a 3″ mitered edge on all of them and couldn’t be happier with the chunky aesthetic.

We finally got interior railings!!! Yay safety! We chose to do the simplest white pickets and white posts possible. Nobody really believed me when I kept trying to tell them that we literally just wanted a 6×6. No caps or detailing. And it turned out so beautifully!

Lighting was finalized. Our house was fully painted. Our flooring went down. Basically this month turned our house from a construction site into something that really felt like a real HOUSE.

And… WE GOT OCCUPANCY!!!!

Note: this blog is just a small recap of our journey. For more detailed posts and daily updates on our house building journey, please follow us on our Instagram page and for sources go to our homepage.

Filed Under: Uncategorized

A House We Built: June 2018

June 30, 2018 by admin 2 Comments

SO MUCH happened in June!!! Mudding and taping was finished, our house was primed, tile was laid, and our cabinetry was installed!! Huge huge huge and very exciting progress!

I honestly think one of the two most exciting things about our entire house build was the installation of our cabinetry and shiplap (next month). We did custom cabinetry in the kitchen, pantry, mudroom, laundry, bathrooms, my closet & office and couldn’t be happier with how they turned out! I wanted consistency between all the rooms so we mostly did the same colors and styles everywhere and just changed up the hardware to add a little pop of fun.

Note: this blog is just a small recap of our journey. For more detailed posts and daily updates on our house building journey, please follow us on our Instagram page and for sources go to our homepage.

Filed Under: Uncategorized

A House We Built: May 2018

May 30, 2018 by admin Leave a Comment

May was drywall month!!! Now that all our plumbing, electrical, HVAC rough ins were done, we were able to start insulating (which was not exactly a pretty phase, but one we’ll be appreciating greatly) and then it was time for drywall! After so many months of staring at wooden walls, it was so cool to see WHITE everywhere which was very helpful to us especially since we planned to paint almost all of the house white in the end. Drywall hanging actually went pretty fast but let me tell you mudding and taping took for ever. Mud and tape and mud and tape and mud and tape anddddddd you get idea 😉

Note: this blog is just a small recap of our journey. For more detailed posts and daily updates on our house building journey, please follow us on our Instagram page and for sources go to our homepage.

Filed Under: Uncategorized

A House We Built: April 2018

April 30, 2018 by admin Leave a Comment

The most exciting thing that happened in April was the installation of our stairs!!! We chose to do an unconventional stair design with no balusters and instead we did drywall kneewalls with cutaways for maximum natural light distribution. This proved to be a crazy challenge for framing but we definitely felt it was worth it because we loved all the angles! I’ve posted a cross section of our stair design below so you can compare it to the end result once that’s finished.

Note: this blog is just a small recap of our journey. For more detailed posts and daily updates on our house building journey, please follow us on our Instagram page and for sources go to our homepage.

Filed Under: Uncategorized

A House We Built: Jan/Feb/Mar 2018

March 30, 2018 by admin Leave a Comment

January was COLD. But progress was made on the house! Windows went in which was a huge deal because we spent a very long time selecting them. We chose to get triple pane fiberglass windows for maximum energy efficiency and we chose black frames on both the inside and outside and couldn’t have been happier with our decision! Not much happened on the outside other then the Tyvek going up. For the rest of it we basically had to wait for warmer weather.

Note: this blog is just a small recap of our journey. For more detailed posts and daily updates on our house building journey, please follow us on our Instagram page and for sources go to our homepage.

Filed Under: Uncategorized

  • « Go to Previous Page
  • Go to page 1
  • Interim pages omitted …
  • Go to page 7
  • Go to page 8
  • Go to page 9
  • Go to page 10
  • Go to Next Page »

Primary Sidebar

SHOP OUR HOME

Click any image below for sources from our pics!

WEBSITE ROADMAP

  • Shop Our Home
  • Sources by Room
    • All Sources & FAQs
    • Kitchen Sources
    • Pantry Sources
    • Living Room Sources
    • Dining Room Sources
    • Home Office Sources
    • Laundry Room Sources
    • Entryway Sources
    • Mudroom Sources
    • Gallery Wall Sources
    • Reading Room Sources
    • Theater Room Sources
    • Game Room Sources
    • Guest Bedroom Sources
    • Primary Bedroom Sources
    • Primary Closet Sources
    • Primary Bathroom Sources
    • Powder Bathroom Sources
    • Buffalo Check Bathroom Sources
    • Basement Bathroom Sources
    • Basement Sources
    • Stairs, Landings & Hallways
    • Paint Colors and Stain Recap
    • Cleaning Sources & Routines
  • Tutorials
    • How to Make a Staircase Gallery Wall
    • How to Make Textured Canvas Art
    • How to Install Shiplap
    • How to Build a Slat Wall
    • How to Paint an Ikea Dresser
    • How to Build Bypass Barn Doors
    • How to Build a Farmhouse Table and Benches
    • How to Build a Rustic Sideboard
    • How to Build a Slat Sideboard
    • How to Make a Sofa Pit
    • How to DIY a Faux Brick Wall
    • How to Build a Window Seat
    • How to Build a Paneled Accent Wall
    • How to DIY a Functional Play Kitchen
    • How to Stencil a Wall
    • How to Build a Round Table
    • How to Build a Console Table
    • How to Make Paper Stars
    • How to Make Paper Mache Bowls
    • How to Make Clay Links
    • How to Texture Bowls & Vases
    • How to Install Open Shelves
    • How to Make Wood Block Art
    • How to Make a Wood Bead Garland
    • How to Build Cabinet Doors
    • How to Build a Wood Countertop
    • How to DIY a Nightstand Charging Drawer
    • How to Make a Wheat Wreath
    • How to Hang Gallery Wall Frames
    • How to Stain Stairs and Paint Risers
    • How to Make Industrial Stair Railings
    • How to Build a Window Seat Cushion
    • How to Make Salt Dough Ornaments
    • How to DIY a Modern Mantel Christmas Tree
    • How to DIY a Wooden Christmas Village
    • How to Build a Wood Christmas Tree Collar Box
    • How to Make Paper Christmas Trees
  • Cats
    • Cat Room Tour & Litterboxes
    • Cat-Related Sources & Cleaning Tips
    • How to Cat-Proof Christmas Trees & Decor
    • How to Stop Cats from Scratching Furniture
    • How to Stop Cats from Playing with Decor
    • How to Train Cats and Kittens
    • How to Cope with Cat Allergies
    • How to Introduce New Kittens to Older Cats
  • Christmas
    • Christmas Decor Favorites 2023
    • How to Build a Wood Christmas Tree Collar Box
    • Neutral Christmas Present Wrapping
    • How to Make Paper Christmas Stars
    • How to Make Paper Christmas Trees
    • How to Make Salt Dough Ornaments
    • DIY Holiday Art Ideas
    • How to Cat-Proof Christmas Trees & Decor
    • How to Make Modern Tabletop Trees
    • How to Make a Wooden Christmas Village
    • Holiday Cheese & Snack Boards
    • Christmas Decor 2021
    • Christmas Decor 2020
    • Christmas Decor 2019
    • Gingerbread House & Cookies Recipe
    • Puff Tastry Christmas Tree Recipe
    • Christmas Decor 2018
  • Cleaning
    • Cleaning Sources & Routines
    • Minimalism: How To Get Started
    • Cat-Related Cleaning Tips
  • Recipes
    • Apple Turnovers Recipe
    • Baked Pumpkin Donuts Recipe
    • Banana Chocolate Chip Bread Recipe
    • Blueberry Lemon Cake Recipe
    • Cheese & Cracker Snack Boards
    • Chocolate Chip Cookie Recipe
    • Christmas Crack Recipe
    • Chocolate Crinkle Cookies Recipe
    • Cinnamon Rolls Recipe
    • Cinnamon Star Pastry Recipe
    • Coconut Curry Squash Soup Recipe
    • Creamy No-Cheese Pasta Sauce Recipe
    • Crumble Recipe
    • Easy Veggie Pasta Recipe
    • Fresh Rolls Recipe
    • Garlic Flatbread Recipe
    • Gingerbread Biscotti Recipe
    • Gingerbread House & Cookies Recipe
    • Healthy Hearty Salad Recipe
    • Homemade Bread Recipe
    • Lasagna Recipe
    • Molasses Cookies Recipe
    • Oatmeal Raisin Cookies Recipe
    • Pad Thai Recipe
    • Pesto Pasta Recipe
    • Potato Curry + Naan Bread
    • Puff Pastry Christmas Tree Recipe
    • Pumpkin Donut Bites Recipe
    • Pumpkin Loaf Recipe
    • Pumpkin Oat Muffins Recipe
    • Roasted Red Pepper Pasta Recipe
    • Rocky Road Bars Recipe
    • Vegan Bolognese Pasta Sauce
    • Vegetable Soup Recipe
  • About
    • About Us
    • Website Roadmap
    • Shop Our Home
    • Minimalism: How To Get Started
    • Privacy Policy
  • Blog

WHERE WE SHOP

Amazon

Wayfair

West Elm

Crate & Barrel

CB2

Pottery Barn

McGee & Go

Overstock

Rejuvenation

Joss and Main

All Modern

Target

Home Depot

World Market

Etsy

H&M Home

Lulu and Georgia

Serena & Lily 

Schoolhouse

Anthropologie

RECENT POSTS

  • Christmas 2023
  • Christmas Decor Favorites 2023
  • How to Make a Staircase Gallery Wall
  • Functional Play Kitchen DIY
  • Christmas Decor 2022
  • Cinnamon Rolls Recipe

Meta

  • Log in
  • Entries feed
  • Comments feed
  • WordPress.org

Footer

RECENT POSTS

  • Christmas 2023
  • Christmas Decor Favorites 2023
  • How to Make a Staircase Gallery Wall
  • Functional Play Kitchen DIY
  • Christmas Decor 2022
  • Cinnamon Rolls Recipe
  • Christmas Decor 2021
  • Cinnamon Star Pastry Recipe

SHOP OUR HOME

FOLLOW US

ON INSTAGRAM

For daily updates on our house projects and rescue kitties, follow us on Instagram @ahousewebuilt

ON SHOP.LTK

To shop our home pics daily, follow ahousewebuilt in the free SHOP.LTK app (formerly LIKEtoKNOW.it) now available from the App Store to get product sources from our pics. With this app, you can instantly shop your screenshot of any of our Instagram pics! We always link exactly what we have when available and often offer similar options as well!

Copyright © 2025 · Metro Pro on Genesis Framework · WordPress · Log in