• Skip to primary navigation
  • Skip to main content
  • Skip to primary sidebar
  • Skip to footer

A House We Built

Custom House Designed by Husband & Wife Team | Modern Farmhouse Inspired

  • Shop Our Home
  • Sources by Room
    • All Sources & FAQs
    • Kitchen Sources
    • Pantry Sources
    • Living Room Sources
    • Dining Room Sources
    • Home Office Sources
    • Laundry Room Sources
    • Entryway Sources
    • Mudroom Sources
    • Gallery Wall Sources
    • Reading Room Sources
    • Theater Room Sources
    • Game Room Sources
    • Guest Bedroom Sources
    • Primary Bedroom Sources
    • Primary Closet Sources
    • Primary Bathroom Sources
    • Powder Bathroom Sources
    • Buffalo Check Bathroom Sources
    • Basement Bathroom Sources
    • Basement Sources
    • Stairs, Landings & Hallways
    • Paint Colors and Stain Recap
    • Cleaning Sources & Routines
  • Tutorials
    • How to Make a Staircase Gallery Wall
    • How to Make Textured Canvas Art
    • How to Install Shiplap
    • How to Build a Slat Wall
    • How to Paint an Ikea Dresser
    • How to Build Bypass Barn Doors
    • How to Build a Farmhouse Table and Benches
    • How to Build a Rustic Sideboard
    • How to Build a Slat Sideboard
    • How to Make a Sofa Pit
    • How to DIY a Faux Brick Wall
    • How to Build a Window Seat
    • How to Build a Paneled Accent Wall
    • How to DIY a Functional Play Kitchen
    • How to Stencil a Wall
    • How to Build a Round Table
    • How to Build a Console Table
    • How to Make Paper Stars
    • How to Make Paper Mache Bowls
    • How to Make Clay Links
    • How to Texture Bowls & Vases
    • How to Install Open Shelves
    • How to Make Wood Block Art
    • How to Make a Wood Bead Garland
    • How to Build Cabinet Doors
    • How to Build a Wood Countertop
    • How to DIY a Nightstand Charging Drawer
    • How to Make a Wheat Wreath
    • How to Hang Gallery Wall Frames
    • How to Stain Stairs and Paint Risers
    • How to Make Industrial Stair Railings
    • How to Build a Window Seat Cushion
    • How to Make Salt Dough Ornaments
    • How to DIY a Modern Mantel Christmas Tree
    • How to DIY a Wooden Christmas Village
    • How to Build a Wood Christmas Tree Collar Box
    • How to Make Paper Christmas Trees
  • Cats
    • Cat Room Tour & Litterboxes
    • Cat-Related Sources & Cleaning Tips
    • How to Cat-Proof Christmas Trees & Decor
    • How to Stop Cats from Scratching Furniture
    • How to Stop Cats from Playing with Decor
    • How to Train Cats and Kittens
    • How to Cope with Cat Allergies
    • How to Introduce New Kittens to Older Cats
  • Christmas
    • Christmas Decor Favorites 2023
    • How to Build a Wood Christmas Tree Collar Box
    • Neutral Christmas Present Wrapping
    • How to Make Paper Christmas Stars
    • How to Make Paper Christmas Trees
    • How to Make Salt Dough Ornaments
    • DIY Holiday Art Ideas
    • How to Cat-Proof Christmas Trees & Decor
    • How to Make Modern Tabletop Trees
    • How to Make a Wooden Christmas Village
    • Holiday Cheese & Snack Boards
    • Christmas Decor 2021
    • Christmas Decor 2020
    • Christmas Decor 2019
    • Gingerbread House & Cookies Recipe
    • Puff Tastry Christmas Tree Recipe
    • Christmas Decor 2018
  • Cleaning
    • Cleaning Sources & Routines
    • Minimalism: How To Get Started
    • Cat-Related Cleaning Tips
  • Recipes
    • Apple Turnovers Recipe
    • Baked Pumpkin Donuts Recipe
    • Banana Chocolate Chip Bread Recipe
    • Blueberry Lemon Cake Recipe
    • Cheese & Cracker Snack Boards
    • Chocolate Chip Cookie Recipe
    • Christmas Crack Recipe
    • Chocolate Crinkle Cookies Recipe
    • Cinnamon Rolls Recipe
    • Cinnamon Star Pastry Recipe
    • Coconut Curry Squash Soup Recipe
    • Creamy No-Cheese Pasta Sauce Recipe
    • Crumble Recipe
    • Easy Veggie Pasta Recipe
    • Fresh Rolls Recipe
    • Garlic Flatbread Recipe
    • Gingerbread Biscotti Recipe
    • Gingerbread House & Cookies Recipe
    • Healthy Hearty Salad Recipe
    • Homemade Bread Recipe
    • Lasagna Recipe
    • Molasses Cookies Recipe
    • Oatmeal Raisin Cookies Recipe
    • Pad Thai Recipe
    • Pesto Pasta Recipe
    • Potato Curry + Naan Bread
    • Puff Pastry Christmas Tree Recipe
    • Pumpkin Donut Bites Recipe
    • Pumpkin Loaf Recipe
    • Pumpkin Oat Muffins Recipe
    • Roasted Red Pepper Pasta Recipe
    • Rocky Road Bars Recipe
    • Vegan Bolognese Pasta Sauce
    • Vegetable Soup Recipe
  • About
    • About Us
    • Website Roadmap
    • Shop Our Home
    • Minimalism: How To Get Started
    • Privacy Policy
  • Blog

admin

How to Introduce New Kittens to Older Cats

September 5, 2019 by admin 6 Comments

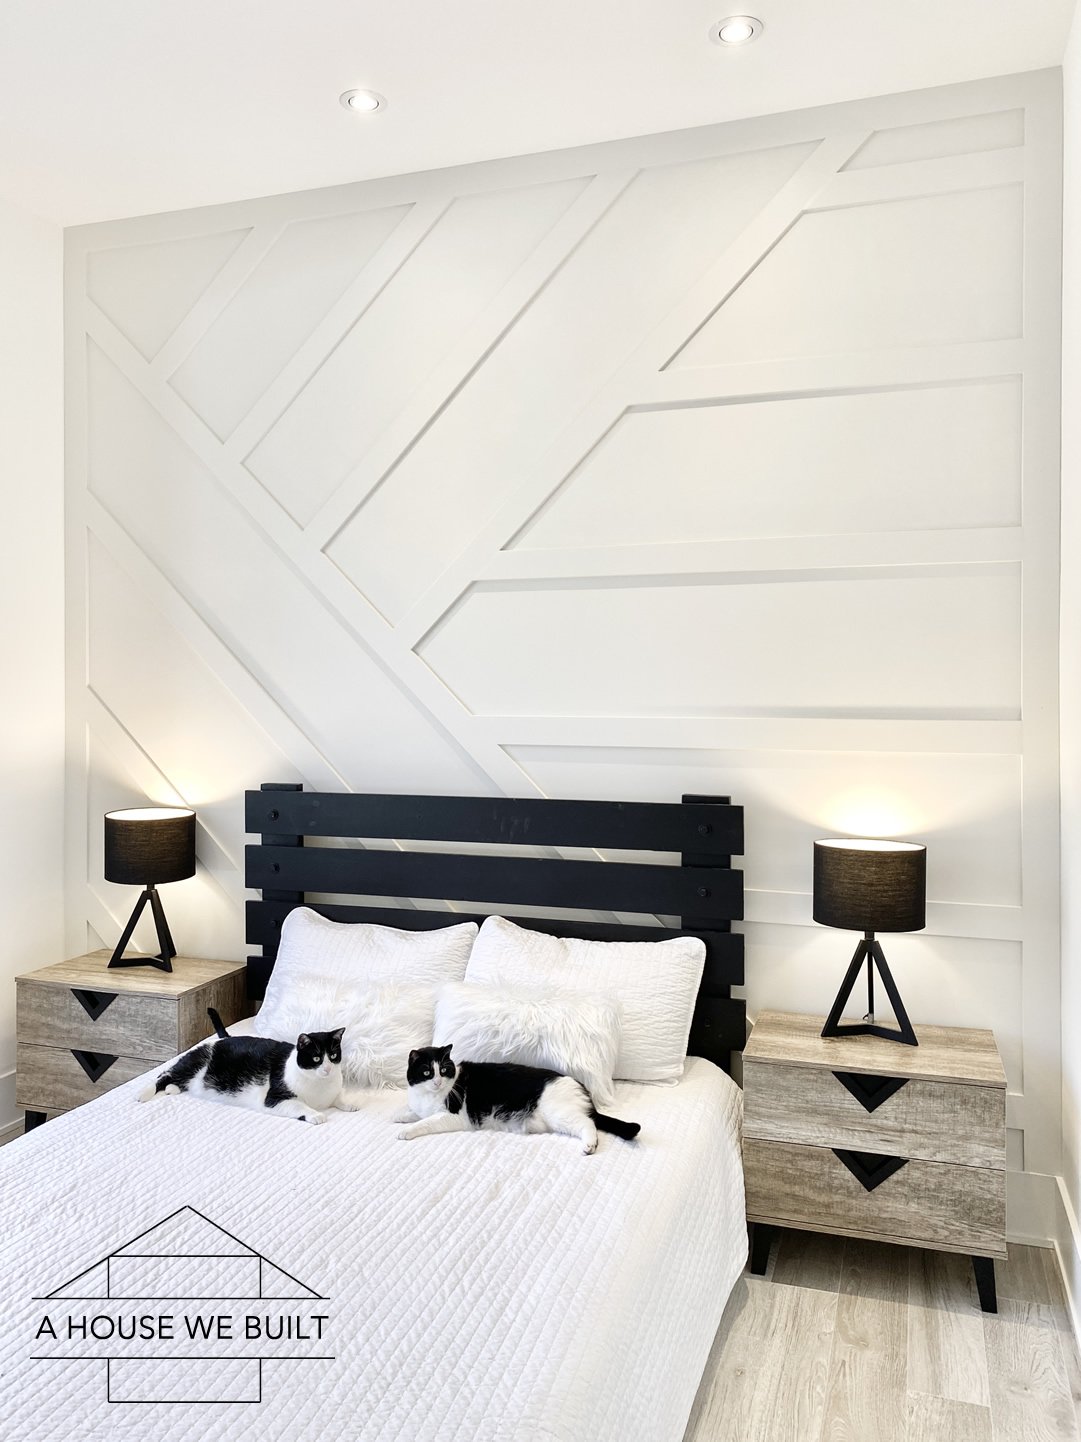
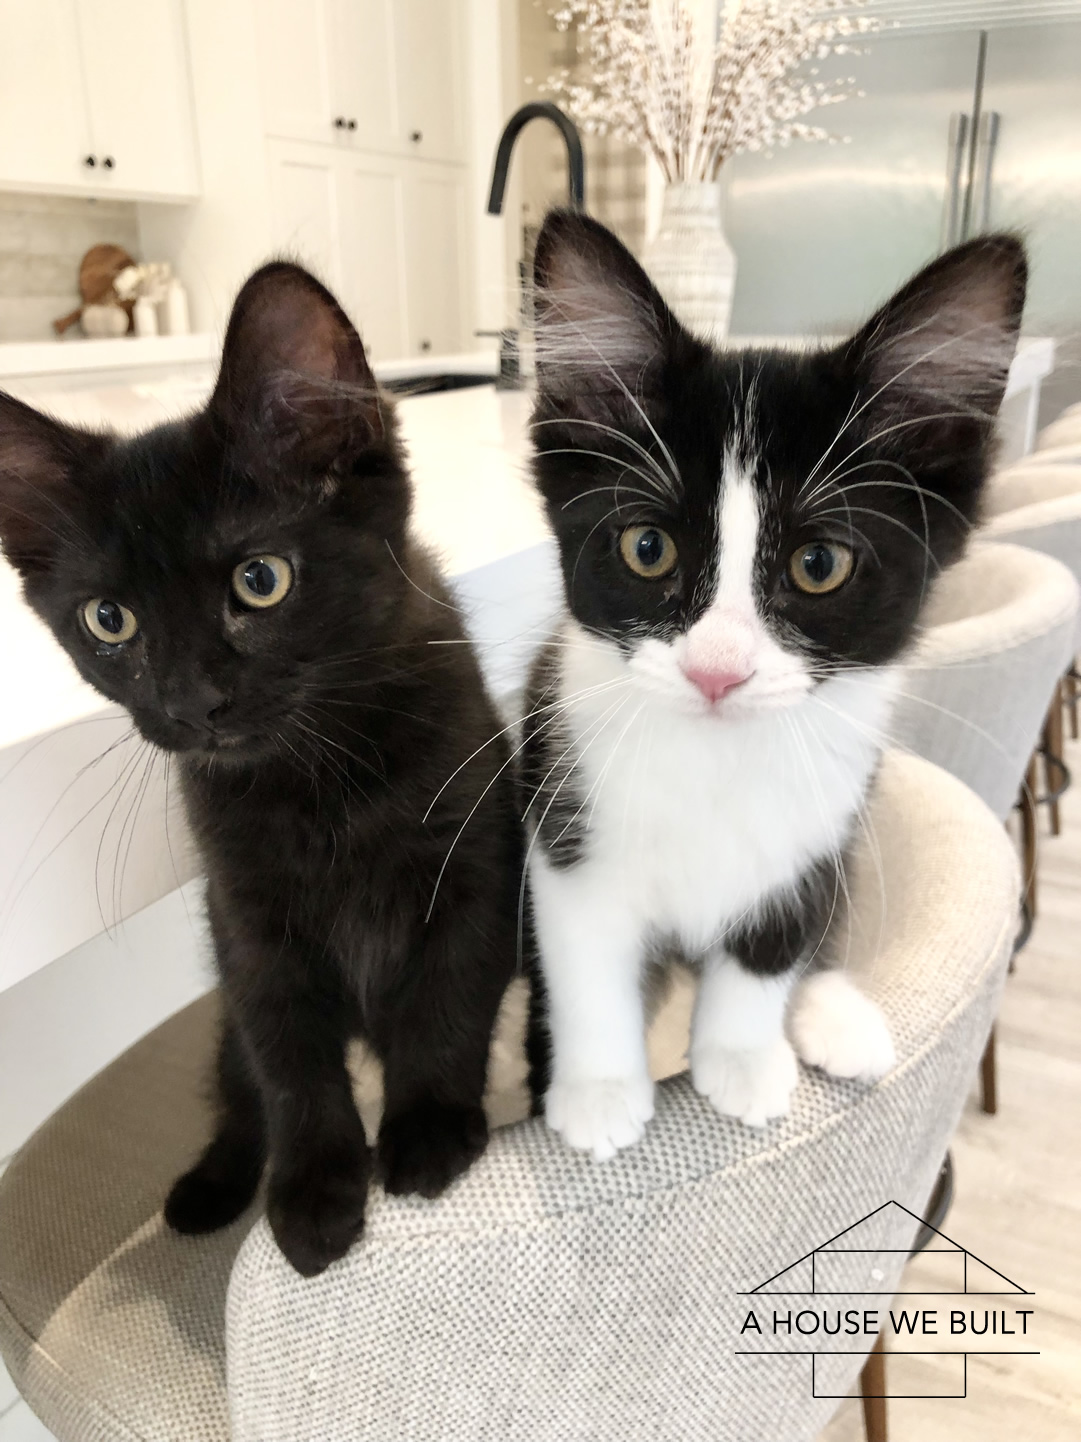
If you’re following us on Instagram, you’ll know that we recently decided to adopt two more kittens (bonded siblings) from a shelter and this meant that we had to introduce them to our existing three cats (also bonded siblings, also rescued from a shelter over a year ago) that already had made our house into their personal kingdom. So we set out to integrate these two sibling sets into one big happy family and our system worked amazingly! All our rescue cats, related or not related are bonded now!

While our big cats are well-socialized, good natured, and non-aggressive, they were also naturally incredibly wary at first of the new little fur balls we brought home and hissing and growls did occur at first. The kittens were young (12 weeks) and at the age where they were very accepting of the world around them and were super chill about the whole thing. But the older kitty crew took some convincing before they accepted the newbies without any hissing. It wasn’t love at first sight, but we took several measures to help them accept each other, bond and to help them get comfortable around each other in the most gentle way possible… and it worked! All our cats and kittens are now fully integrated into one big happy kitty family. So I’m going to share our strategy here in hopes that it might help you too in a similar situation.

First, we have a designated “cat room” for our older three cats (click here for a tour). When we got the kittens, we turned our guest bedroom into a secondary “kitten room” for our new tiny kitties. We gave them toys, food, water, litter, comfy beds, scratchers and everything they could need to be happy, comfortable, and feel safe there. Eventually we’ll merge the kittens into the cat room, but I’m waiting until the kittens are big enough to stand up for themselves if needed – not even in a bad way but literally our cats are so much bigger then the kittens that even if they play nicely they could easily overpower the kittens without meaning to, so I’ll keep the guest bedroom set up as the kitten room until they’re bigger.

Two very important points to note before starting:

  • DO NOT RUSH THE PROCESS. This process might take a few hours, more likely it will take a few days, but it could even take a few weeks -especially depending on your cats’/kittens’ background and temperaments. Just like humans, cats have personalities. Some humans make friends easier and faster than other people so just think about you’d feel being relocated to a new place, stuck in a house with other people and be expected to bond to them right away. Always try and put yourself in your pet’s shoes, it helps to gain perspective on what they’re going through. Your cats and kittens will tell you when they’re ready to move from one Stage to the next. If you rush the process, you risk making them feel uncomfortable or threatened so let them pick the pace. If you’re observing their behavior carefully, you’ll know when they’re ready for the next Stage.
  • SUPERVISE EVERYTHING until such time as you feel confident that the kittens and cats are properly integrated. Just in case something happens, it’s good for you to be there to intervene and help whoever needs it (maybe an older cat feeling overwhelmed by rambunctious kittens, or a young kitten overwhelmed by a stronger older cat). If you’re unable to supervise, then limit the initial interactions (when they’re still unsure of each other) to times where you can watch them.

I’ve broken our Integration Strategy down into Stages below. Timeline will vary. Like I said, you might go through one Stage per day, maybe one Stage every two days, maybe two Stages in one day. Ultimately your cats and kittens will tell you what they’re comfortable with and that is the only metric you should use.

STAGE ONE: we put the kittens in their kitten room and just let the cats sniff the kittens under the door. This allowed for them to get used to each others’ scents without actual encounters. I also gave the cats one of the kitten blankets to sniff, and gave the kittens one of the cat blankets and some of their toys to share the scents. (Side note: when you first bring your kittens home, pick them up and put them in the litter box a few times to show them where it is. And don’t move the box so they can learn its location.)

STAGE TWO: I opened the door but sat in the doorway and allowed any one of them to come up and sniff or watch each other “over” me if they wanted. This put me in a place from which I could fully and calmly control the encounters. Again, the kittens were very accepting, but the older cats were wary. All the cats would hiss if the kittens got within about a foot of them (but only hissing, no swiping or ear pinning, so more of a “that’s close enough, little grasshopper alien” instead of actual aggression). They were sometimes too wary to even come up to the doorway and would get like 3-4 feet close then walk away, and come back in a minute or two and get a few inches closer, walk away, come back. It was a process and I just verbally reassured them but didn’t try to rush anything. I noticed that the best thing that helped our older cats was watching the kittens. Just watching, not interacting. It’s like by watching, they learned what the kittens were and how they acted and got used to the idea of them. One of our older cats (male) was the most accepting and the quickest to relax around the kittens. I think that was 50% his super chill personality, and 50% because I let him sneak in a few bites of their tasty kitten food. (Note: I was very careful though that he never pushed them away from their food, more on this below.) Also use verbal reassurances to help your cats understand that everything about this situation is positive. Your gentle calm voice can give your cats the extra reassurance they need to feel comfortable.

STAGE THREE: I kept the kitten bedroom door open but placed a barrier across the doorway that was too high for the kittens to realize they could jump over, but low enough that our cats could hop over IF they wanted. I also placed a stool on the outside of the barrier so our cats could climb up, sit on the stool, and “watch” the kittens comfortably to get used to them without having to physically interact with them until they were ready. This was a HUGE HELP! All three of our older cats took turns at this stool. Once they’d watched enough to get comfortable, each one would also briefly jump down into the kitten room for some VERY cautious sniffing (and still occasional hisses if the kittens got more than a foot away from them, but again more warning and not outward aggression). They never stayed long but that was progress. I’d also sit and work on the guest bed whenever possible with my laptop. Our cats usually like to sit near me during the day so this both encouraged the older cats to enter the room to be with me, but also gave the kittens good socialization time and snuggles. Again, a reassuring voice can be helpful here.

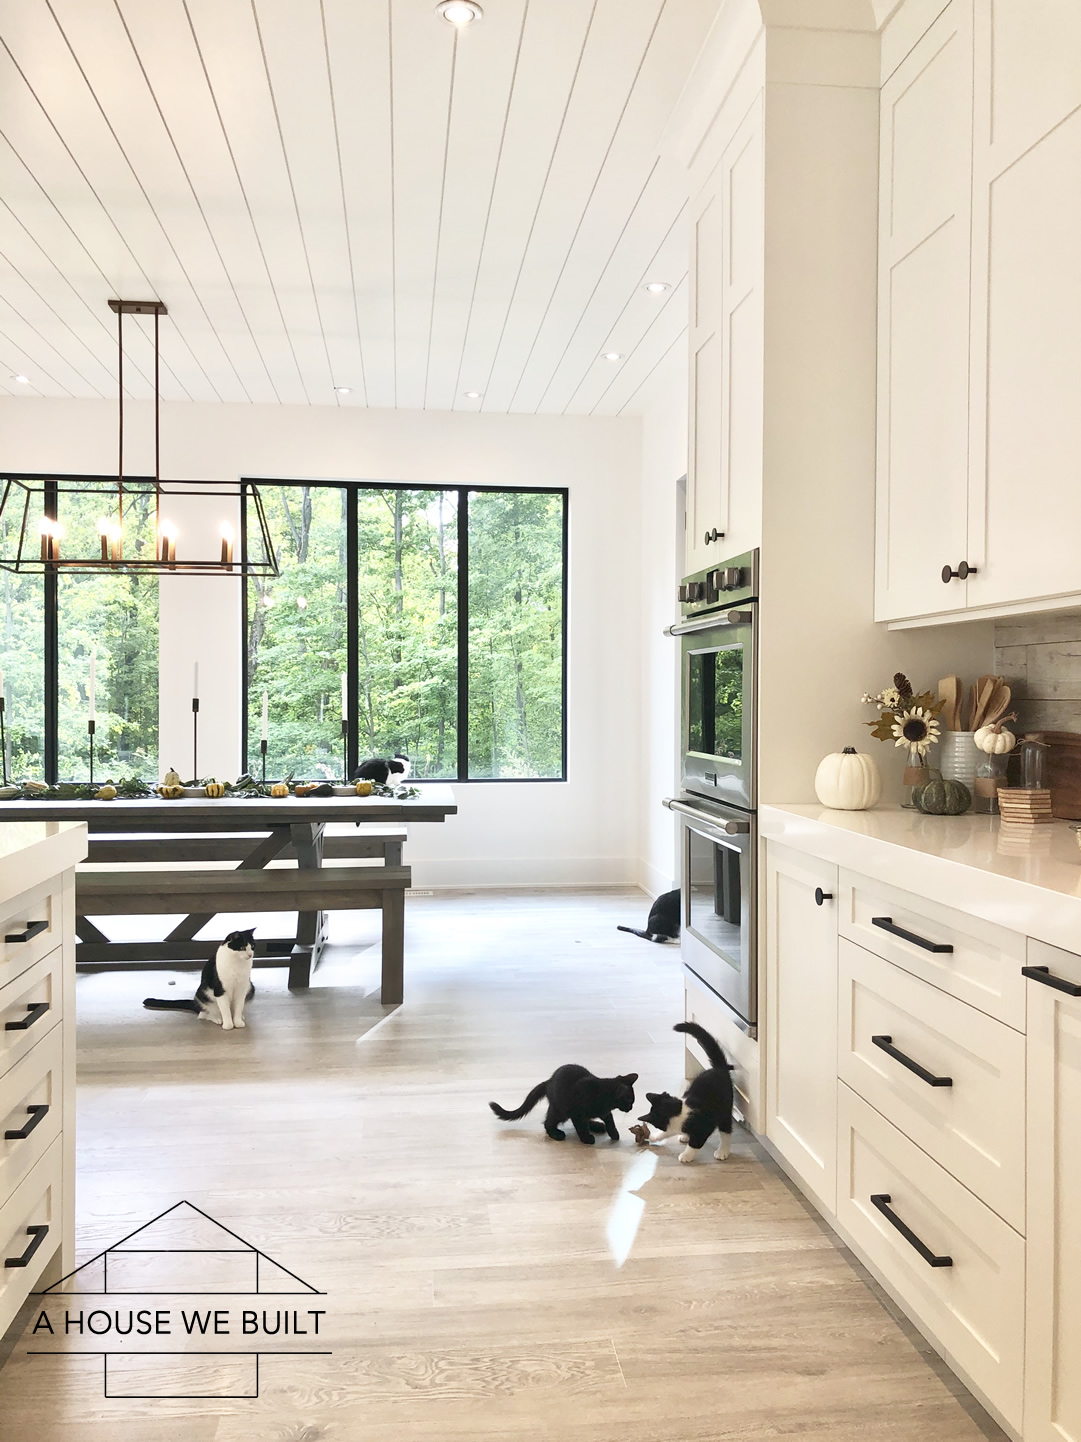
STAGE FOUR: the kittens figured out that if they took a running leap at the barrier between their room and the rest of the house they could scale it no problem but that was ok because by this point everyone was kind of used to each other’s presence (even if they weren’t best friends yet) so we kept the kitten room set up but opened the door and let the kittens explore one floor of our house. We blocked off the stairs but gave them full access to the floor they were on with the cats free as well. We found that since the cats were no longer surprised by the kittens, they were actually really nice to them while they explored around. They followed close behind them to keep an eye on them, but almost no more hissing. One important thing is that everyone wanted to try the other’s food. This is okay for a few nibbles but kittens and cats should not be eating the same food as a general rule (the formulas are different – kitten food is higher calorie, higher fat to promote growth so kittens need their own food for nutrients, and adults can gain weight on kitten food) so while it’s ok for them to have the occasional nibble, they should have distinctly separate food. It’s just important to not create any negativity around food so be very gentle in your corrections if someone goes to the wrong bowl. I would let them take a few bits then gently pick them up and walk them over to their own bowl and put them down with an encouraging voice. (Side note: I feed the cats and kittens the same brand of food, and the same flavor, just kitten vs cat formulas so even if they do sneak in a few mouthfuls of the other’s food it’s a very minimal difference.) All in all though, this stage worked well. I put the kittens back in their room for nap time to give the cats a bit of a break (kittens have a gazillion times more energy then cats so I didn’t want the cats to get annoyed with their antics). This allowed the kittens to have quiet nap/food/litter time on their own too, and it allowed the older cats to have their stair access back so they could patrol the rest of the house as they’re used to.

Litter box note during Stage Four: while kittens over 12 weeks should be litter trained (cats naturally want to do their business in sand where they can bury it so I use a sand-like self-clumping litter), because they’re exploring a whole new house, they might get confused about layout or so excited that they forget to go back to their litter box. So when they were first let out into the house, I’d pick them up and gently carry them over to their litter box every 15 minutes or so and I did this for the first day until they did their business, then I stopped bringing them back for an hour or so, and then started again after feeding them more wet foot. They got the hang of finding their way back to their room very quickly. The big cats were also very interested in the kitten’s litter box and I let them explore (and even use it) as long as the kittens were not around because I didn’t want the kittens to ever feel like they couldn’t have access to their box if they wanted it. I found the cats actually really liked to “use” the kittens’ box. I think somehow this helped with the bonding so I allowed that and just cleaned that particular box twice a day while all the exploring/litter sharing was going on. It’s important that you keep the litter boxes clean so that the cats are never put off by the box. Cats are incredibly clean creatures by nature so they’re not going to want to use a gross litter box any more than you’re going to want to use a filthy unkempt gas station bathroom. (Note: I clean the main litter boxes in our house every morning. Because we have one on every floor, their use is spread out so cleaning once a day for those litter boxes is enough.) It took the kittens several days before any of them even entered the big cats’ litterbox. I didn’t rush it or force them to use it. But I placed the litter boxes that were on the main floor of the house that the kittens were allowed to play in on opposites ends of the house so that if they were on the end of the house that had the cats’ box, that was really their best option to encourage them to use it, but I kept their kitten box accessible too. Again, don’t rush the litter box integration between cats and kittens. As long as they’re doing their business in “a” litter box, that’s enough to be happy with. The integration will just happen naturally over time.

  • Big cat litter box: white version: Amazon | dark grey version: Amazon | pearl version: Amazon (I have one of these on each floor of our house, all our cats share the boxes)
  • Kitten litter box: Amazon (I have one of these in the kitten room. I always start kittens out in this style of box because it’s very easy for them to enter. The style like the big cat’s box above has only one entry point which can be a little more confusing for a small kitten so I use the kitten box so they can easily identify it. I also always place it in a corner so that they don’t feel like they’re out in the open. If your kittens are particularly tiny, you can just put the pan out for the first week or two until they get bigger and then add the side rims when they’re bigger. The idea is that it is EASY for them to access. Do not expect them to use the big cats’ box at first, but give them access to both. We found that after about a week, when the kittens had really developed a comfort level with the big cats, they naturally started using the big cats’ litter box instead of going all the way back to theirs if the big cats’ box was closer. IMPORTANT NOTE: if you see a kitten using a cat’s litter box for the first time and your intent is for them to share it one day, quietly “guard” the kitten in the box so that the cat does not disturb them. Do this without making any sound or causing a fuss, just gently keep anyone away until they’re done their business to create A) a positive experience for the kitten, B) respect from the older cat.)

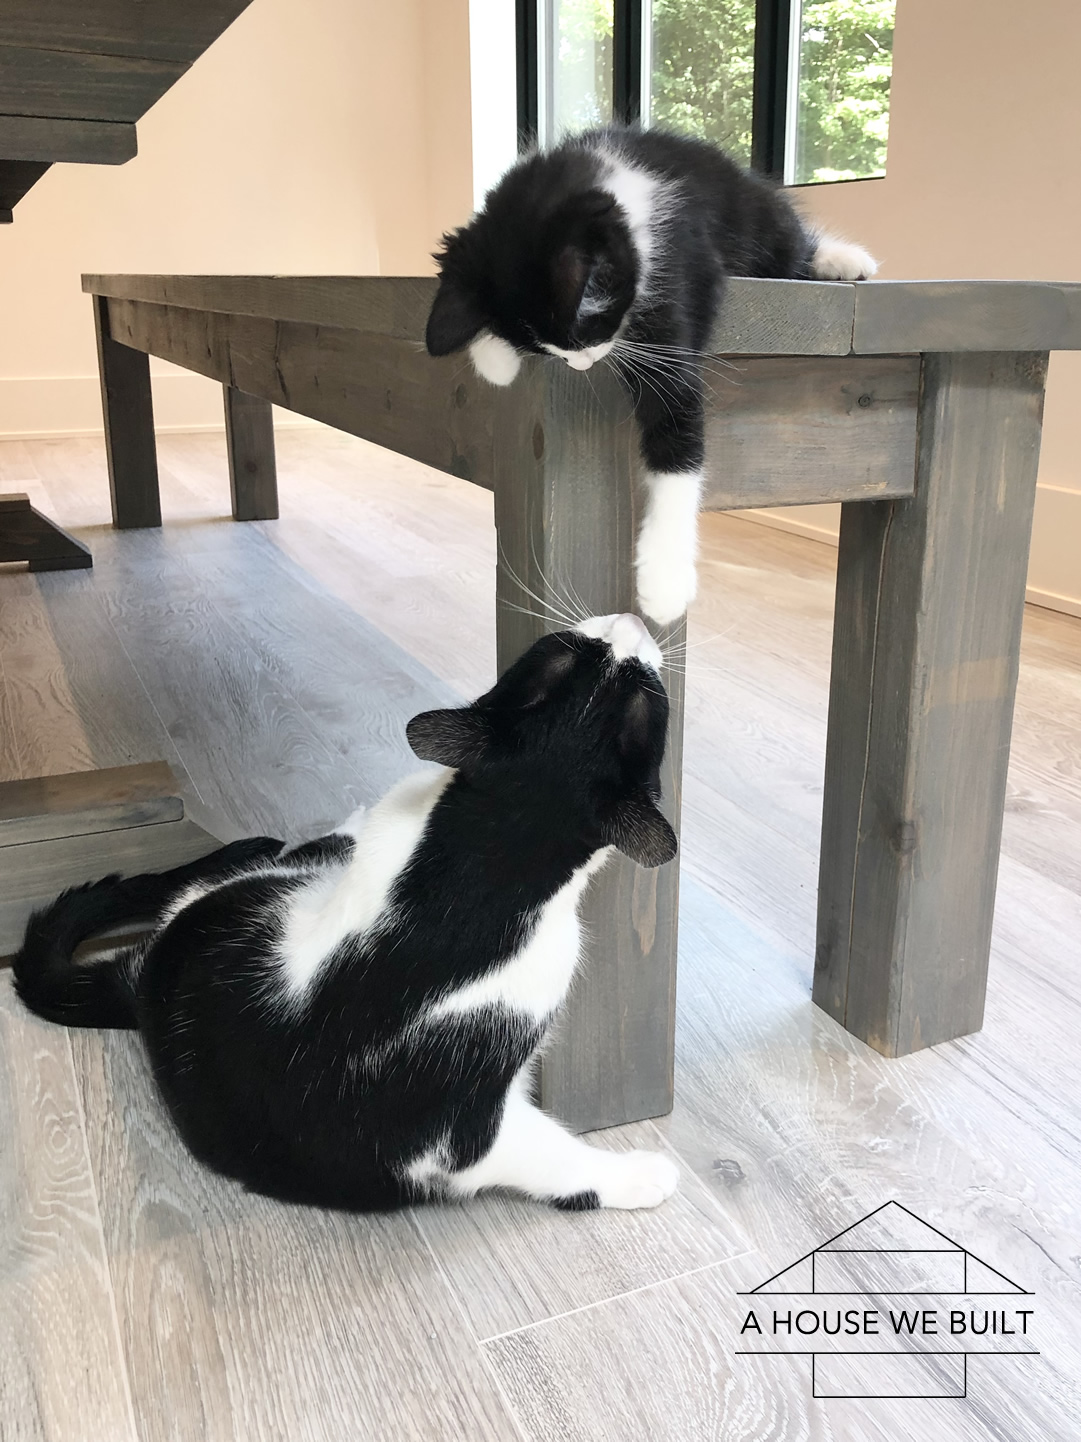
STAGE FIVE: we’d pretty much reached a normal happy state by this point. The kittens had free run of the main floor of our house (with the stairs still blocked off) but I didn’t put them ‘away’ for any periods of time during the day. I always put all the cats and kittens away in their rooms at night though (I always have dont this ever since we moved in — this makes sure that they don’t destroy anything in my sleep and gives them a comfortable safe haven during nighttime). But by this point, our older cats had gotten used to the kittens and were fully friendly! The cats mostly watched the kittens play but even occasionally (lazily) joined in. They tolerated their tails being pounced on, and even joined in some of the games swatting toys back and forth. I’d still take the kittens aside 4 times a day for wet food feedings (I give them half a can per feeding between the two of them, and they have free access to kibbles at all times), but other than that, they’d learned the layout of our house and could find their way back to their room for the litter box and everyone had finally fully adjusted and even bonded!

One last note I’ll just add: please make sure you give your older cats adequate attention, snuggles, or whatever type of affection they like during this transitional time. I mean, you should do that anyways but it’s easy to focus on the new kittens, but it’s important not to forget that during this time, the older cats need your love and reassurance that they’re not being replaced or overlooked more than ever. So take time to give them that and it’ll make them a lot more accepting of this change you brought to their lives.

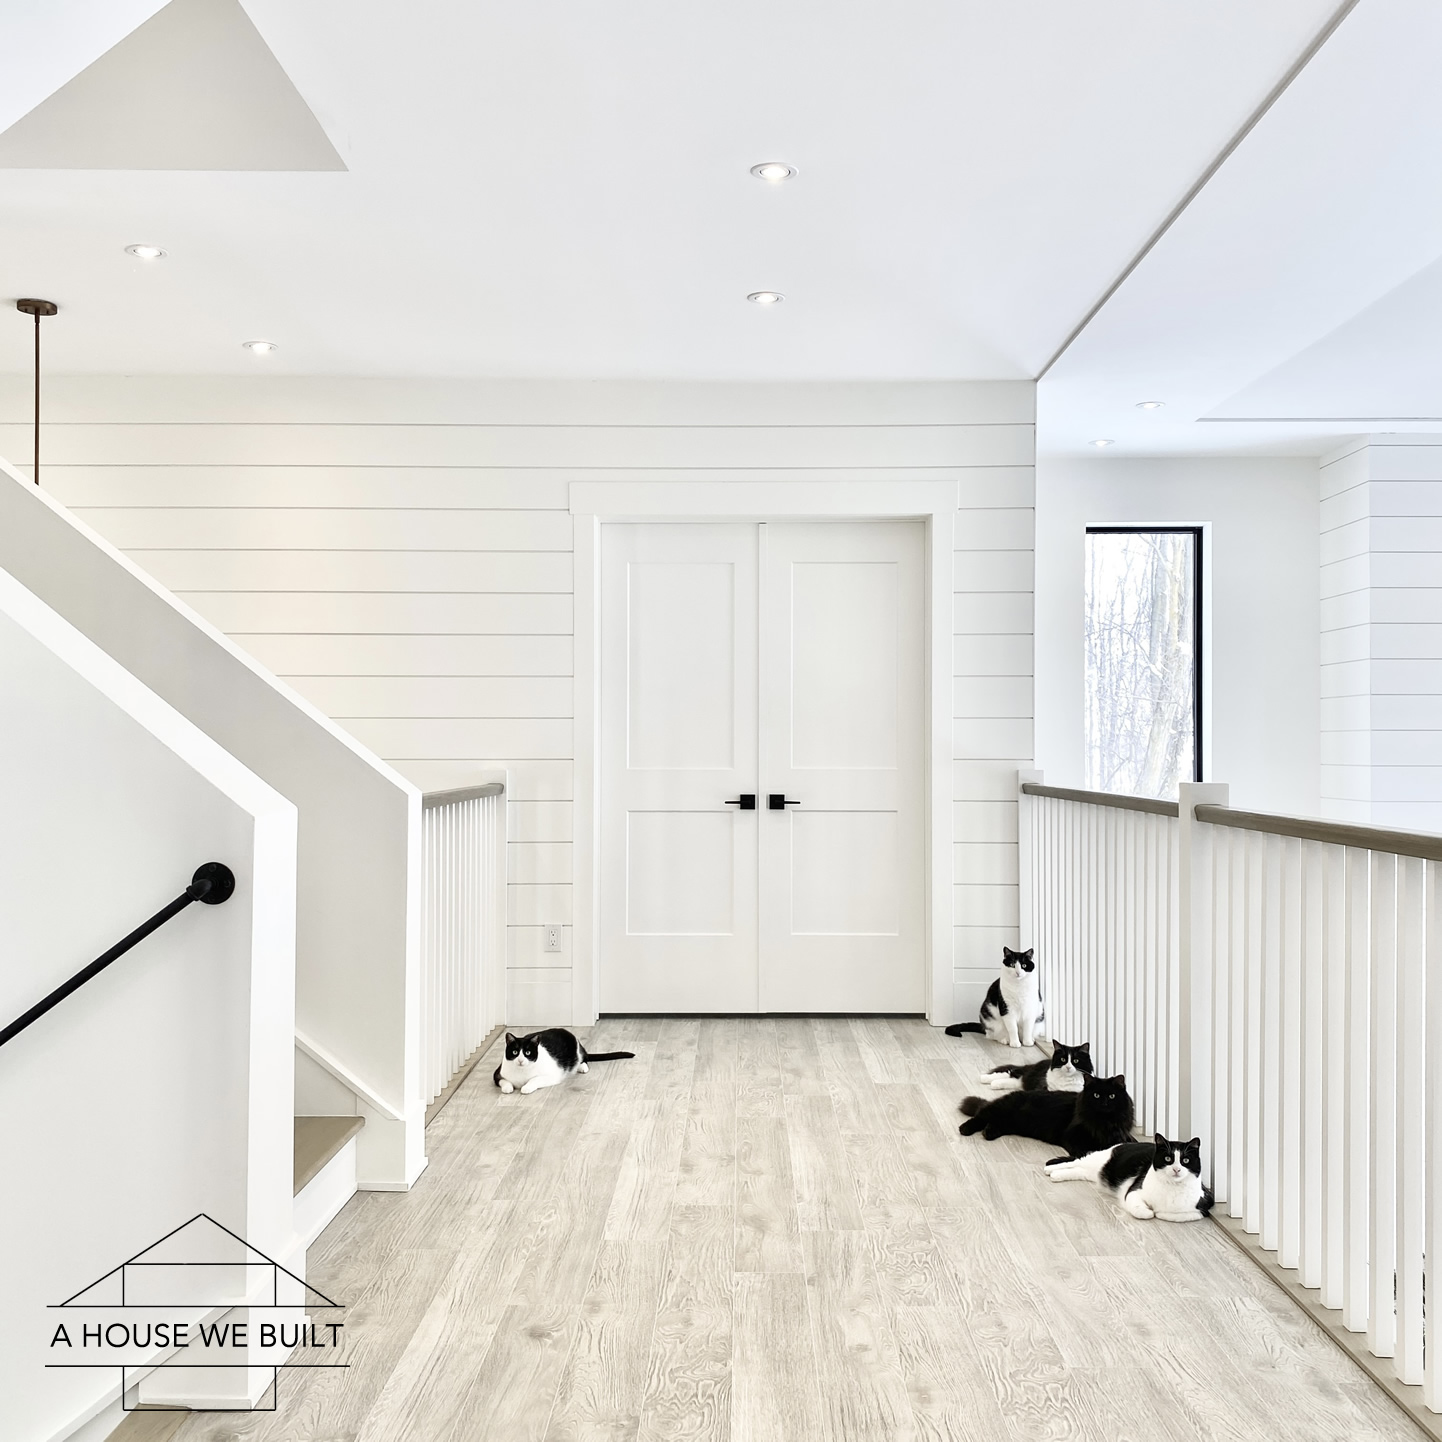
Regarding stairs and interior balconies: (What you’re about to read was written 2 months after I initially made this post. I’m editing it to tell you what we ended up doing to teach our cats to be safe around stairs and also the second floor interior balcony that overlooks our living room.) The first week we brought our kittens home, we let them play on the second floor and I quickly realized that they were so small and new to our home that they didn’t even understand what the balcony and stairs were and they’d try to weave in and out of the balusters, and simply didn’t have any fear around them because they didn’t understand that they ‘could’ fall. Since they had so much else to deal with with being introduced to a new family, new home, new big cats, we ended up keeping them completely blocked off from the stairs and second floor for over a month. I waited until they grew to be big enough that they wouldn’t accidentally slip through our second floor stair balusters and fall. When they first came home, they were tiny enough that their whiskers barely brushed the balusters and they were clumsy so I wanted to keep them safe and grounded until they grew bigger. When they got to be big enough to allow up, and after over a month of using my Cat Training Methods on our main floor to teach them the house rules, I did supervised upstairs visits with them where I’d open up the stairs, and let them explore and I’d follow close behind, ready to verbally correct them and teach them proper safety around the railings. We did this a couple times a week for a couple weeks. After about 5-6 times they learned the rules, and I’d graduate to ‘remotely supervised’ visits where I’d let them upstairs alone while keeping watch from downstairs ready to catch them or verbally correct them if needed. After a couple more times of this, they learned and now they have full access to the first and second floors and are have the training to be as safe as is reasonably possible.

Oh, and to block off the stairs, we literally just used a piece of 4×8 drywall I cut in half. One half blocks the stairs up, the other half blocks the stairs down. 4 feet is high enough that the kittens didn’t even think to jump it. The drywall is white so it’s not too ugly to look at and kinda blends into our all-white house anyway so it’s not a point of interest to them.

For feeding, I free-feed all our cats and kittens dry kibble. None of them overeat because they’ve never felt threatened around food — they know it’s always there and it always will be there if they want it so they’re pretty chill about it, and also non-territorial. I feed them a meat mixture with no grains for high protein (I’ve heard this also helps them cause less allergies because their skin stays moisturized). The big cats get one can of wet food daily (shared between them all) at night, it’s part of our going to bed routine. The kittens get about 2 cans of wet food daily – I take them aside to feed them this so the cats don’t get jealous and I feed them 1/2 can in the morning, 1/2 at noon, 1/2 at dinner, and 1/2 at night.

Anyways, I hope that helps explain how we made the transition from a house of three kitties to a house of five! Also, PLEASE if you’re planning to get cats or kittens, always adopt, and spay & neuter!! And if you’re adopting kittens, always consider keeping sibling groups of 2-3 together (unless there’s a true singleton available for adoption). Having other kittens around is huge for helping them stay entertained and happy so wherever possible, please keep kitten siblings together!

#adoptdontshop

*********

BONUS TIP #1: HOW TO ACCUSTOM KITTENS TO TV NOISE. We’re a family that doesn’t leave our TV on during the day at all – we only turn it on at night if we’re specifically sitting down to watch a movie or a show, but otherwise it’s off. Our TV also happens to be in the guest room (temporarily while we build our theater room downstairs), which happens to be the kitten room. So when we got the kittens, we tried the first night to watch a movie even super quietly but it scared them so we turned it off for several days and just let them get used to our house and the older cats without the extra noise and confusion. If you separate all the new introductions into stages for the kittens, it’ll make them acclimatize to each one better instead of getting overwhelmed. Once the kittens were fully integrated with our older cats and felt at home in our house, I decided to teach them that a big TV screen and its weird/loud noises were safe and ok and I was actually surprised by how quickly my method worked (it literally got them used to it in one night) so I thought I’d share my method.

Note: the reason I didn’t do this earlier was that since the TV was in “their” room, I didn’t want to create any negativity or associate anything scary with their room for them, especially since their room is where their litter box is so I wanted their room to be a completely safe space for them.

So I started by just sitting on the guest room bed with the TV off but with the TV remote beside me and just played with the kittens on the floor with a game I knew they loved (chasing tissue paper around the room). Once they were really into the game, I turned the TV screen on but with no sound. They both stopped and stared, ran away for a minute. But I verbally reassured them and continued shaking the toy and encouraging them to chase it, which they did. Once they were happily playing again, I turned on the volume on to the lowest level. Again, they stopped playing, stared, tried to hide. But I verbally reassured them again, and enticed them out with their toy they loved to chase, and just kept playing with them until they were totally happy and fine with the TV + noise. I also stopped playing every now and again so they’d focus on the TV, realize it was ok, I’d verbally reassure them, give them a pet, then continue the game. Each time they got comfortable, I’d raise the volume by just one tick. I was surprised that I was able to get about 20-30 ticks high with this method. Still about half the volume that we’d normally have it set to on movie nights, but that was a huge start. They actually got tired from all the playing and fell asleep nearby so I just kept the movie playing and kept ticking the sound up every few minutes and checking on them. If they woke up, I’d verbally reassure them and they’d fall asleep again.

Side note: the movie I picked for to use for this was Mary Poppins Returns because it was a movie without much violence or scary stuff. I tried Planet Earth first but they didn’t really like the animal sounds so I stopped that and switched to Mary Poppins and that worked. And after that I put on The Incredibles 2 because it had action in it but no gunfire or sharp scary sounds. It’s about slow escalation of sound.

So this took a bit of my time one evening but it was worth it because now the kittens are no longer scared of the TV and its sounds!

BONUS TIP #2: HOW TO ACCUSTOM KITTENS TO LOUD HOUSE NOISES. Around our house, we have a few things that naturally make louder noises: two examples are the vacuum and our coffee bean grinder. Both noises happen every morning so we needed these to be sounds our kittens accepted as normal, and not scary.

To put yourselves in their shoes for a minute, imaging you’re happily sitting on your couch minding your own business and then you suddenly hear this LOUD grinding outside your house, or a LOUD fan sound. Tell me you wouldn’t be worried? But as a human, you’d immediately make a lot of rational explanations. Maybe someone’s using a new gardening tool, maybe there’s a helicopter/plane flying low, maybe someone’s having car trouble, etc. You have base of explanations based on the fact that you understand the human world. Cats DON’T have this. They have no idea why someone would need to cut grass with a machine or hurtle through the sky in a noisy metal tube. They don’t understand our world, so when they hear a loud sound with no explanation it can be genuinely scary to them so what they need is reassurance that this noise is not connected to something that will affect/harm them in any way. Once they understand this, they won’t be bothered by it because it’ll no longer be a possible threat.

So, the first couple times you make that sound, you might notice them run away a little, or hide under something. Even if they’re not terrified, they’ll likely be wary. Turn it off after a few seconds and verbally reassure them. Do that a few times. If the situation allows, maybe give them a pet or some physical reassurance. DO NOT bring them closer to the sound. Let them feel safe. Ours got used to these sounds after about two days because we reassured them. (Also side note: with the vacuum cleaner, I’m extremely cautious to never ever run it too close to them, and never follow them with it so that they basically accept it as a noisy weird thing that doesn’t affect them at all.)

*********

More cat-related posts that might help:

  • Cat Room Tour: click here
  • Cat-related Sources & Cleaning Tips: click here
  • How to Stop Cats from Scratching Furniture: click here
  • Cat Training Tips: click here
  • How to Introduce New Kittens to Older Cats: click here
  • How to Cope with Cat Allergies: click here
  • Cats & Decor Tips: click here

Follow us on Instagram to keep up with our cats and kittens and home!

If you have any questions, feel free to leave me a comment and I’ll try my best to help!

Filed Under: Cats

How to Cope with Cat Allergies

September 1, 2019 by admin 2 Comments

We have five rescue cats and we found out after adopting them that my husband is allergic to cats so here are all measures we take to manage his allergies and make him comfortable living around our cats.

I should note that it is lucky coincidence that the design choices we personally love (minimal decor, no clutter, etc) perfectly align with the most allergen-free type of household so we do not sacrifice these things for the allergy situation because even without allergies, we’d make the same choices anyways.

Also, I’m not a scientist or medical professional so everything here is just sharing our own opinions and personal experience, nothing more. Also it’s worth noting what type of allergic reaction my husband has to cats: he basically starts sneezing around cats and his nose gets quite stuffy. He does not have asthma or trouble breathing, his allergy is not life threatening, and he doesn’t have a physical reaction either (no red eyes or hives etc). So we were already starting with something manageable, it was just about going the extra couple miles to make his day-to-day “normal” even though we have a house full of cats.

  1. HEPA FILTER. This is the biggest thing we did. We have a whole-house HEPA (High Efficiency Particulate Air) filter installed as part of our furnace set-up that filters all the air in our house and one of the things it traps is pet dander which is the cause of most allergies.
  2. HEPA FILTER VACUUMS. All our vacuums have HEPA filters, which greatly help remove the allergens from our home. This is our cordless handheld vacuum: Amazon | Walmart. We also have 2 robot vacuums with HEPA filters. Robot vacuum #1: Walmart | Home Depot (manual disposal). Robot vacuum #2: Walmart | Home Depot (automatic disposal).
  3. REGULAR GROOMING. This is the most important step. Without this, the whole allergy-controlling system falls apart. I groom all our cats every other day, with no exceptions. I use this tool (Amazon) and it takes very little time, probably about 3-5 minutes for all 3 cats total (our kittens don’t shed yet but when they start it might take 6-7 mins total which is still not much) and the way I remember to groom them is that it’s the last thing I do before bed. I also groom them in their Cat Room so that I’m not releasing a bunch of fur fluff into the house air. Grooming makes a HUGE impact — like seriously, if I miss a day, my husband will start sneezing the next day. But if I stay on top of my every-other-day grooming routing, no sneezing. Very important: do not hold your cat down to groom them and do not force grooming on them. Since grooming is such a regular part of their lives, it MUST be a pleasant and positive experience. So just make sure they’re in a calm state (after a play) and in a non-stressful, quiet, but smaller environment they’re comfortable in. Let them move around you and just follow them. I usually just sit in their cat room and they alternately come up to me and I groom whoever is in front of me. Sometimes, one cat gets groomed a bit more than others in one session but over time it evens out so I don’t worry about it. I focus on their backs from their neck to the base of their tail and the top of the sides of their back. This is where the most shedding comes from so don’t worry about grooming every square inch of their bodies. This regular grooming basically gets the loose hairs off them in a controlled setting and environment and keeps them from falling off on your floors and furniture and also keeps it out of your air.
  4. WIPE THE CATS DOWN. I do this with a damp microfiber cloth that I let them sniff first so it’s not a surprise to them then I gently drape the cloth over the back of their neck and wipe it down their body towards their tail in the same direction as their fur. This is something I do every morning and it just helps remove any surface dander. It’s not as invasive as giving them a bath and it only helps short term (which is why I do it each day), but if you’re respectful in how you do this it can become a little routine your cat quite enjoys. Our cats all gather around when I get the cloth out and wait their turn to be wiped down because it’s become something fun and enjoyable to them. Make sure you just use clean (ideally filtered) water – no scents, no products, no chemicals, etc.
  5. DIET. Your cat’s diet can affect their skin which in turn can affect how allergic you are to them. We feed an allergen-reducing food called LiveClear (here’s the link for it: Petco) – you can research it, but there’s real science behind the formula that neutralizes the allergens. I’ve also heard that a fully raw diet (for the cat) can do wonders for reducing allergies. We’ve never done this with our cats, but we used to feed our dog fully raw and it was amazing how much of a difference that made.
  6. REGULAR VACUUMING. I have vacuuming routines in place that cover our whole house and help keep it free from hair and dander. I do our stairs every other day, I do a quick vacuum around our main floor every day (they spend most time here) and I also vacuum their cat room daily. Then I vacuum the rest of the house (we have 4 floors) on rotation. Note: we do not have a cleaning service, but I don’t spend more than about 10-15 mins daily cleaning so as long as you’re efficient with routines, it doesn’t have to be a big deal. And this is the vacuum I use: Amazon | Walmart.
  7. HARD SURFACES. We have almost no fabric material in our home. Luckily we love a minimal aesthetic so this styling falls directly in line with what we would choose even if hubby wasn’t allergic, but basically we have leather furniture, no curtains, no rugs, no carpeting, etc. Fabric, rugs, and carpets trap and hold allergens and eliminating these from the home make a space where allergens can’t just sink in and hang out. We do have fabric barstool seats and decorative pillows etc so it’s not like we’re insanely strict about this but the no rugs, no carpeting, and no curtains is a really big help. For our Living Room Sources, click here.
  8. MINIMALISM. We’re very minimal by nature. We dislike clutter and this luckily is perfect for keeping a house allergen free because it makes it easy to clean the house. It’s so much easier to vacuum or dust if you’re not moving around a bajillion items. I naturally do decorate our home seasonally but I’m very intentional about the items I pick and I rotate them so that I never have too much “out” at once. The more minimal you keep your house, the easier it is to clean. I have written a whole detailed post on: Minimalism: How to Get Started if you want to know more about this.
  9. HAND WASHING. My husband rarely touches our cats and never holds them. While he doesn’t have a physical allergic reaction to them, still if he touches them with his hand then touches his face, it’ll trigger sneezing so he’s careful to wash his hands anytime after he touches them and, because that can get annoying, he just doesn’t touch them much. This doesn’t stop him from interacting with them. He’ll play with them with toys and they can lie down beside him for side-by-side no-touching snuggles which honestly makes most cats pretty happy.
  10. BOUNDARIES. The one place in our house our cats are not allowed free access to is sleeping bedrooms. It’s really important to keep where an allergic person sleeps as a safe haven. Plus, I just don’t have the energy to keep on top of the level of cleaning I’d need to do if the cats were in there all the time. So we keep them out of these spaces and they really don’t mind at all. The guest bedroom is the exception in our house and see the next step for how I deal with that:
  11. BED COVERS. I use these light-weight quilts (Overstock) as bed covers that go over all the bedding. They’re pretty, minimal, and act as a protective shield keeping the cats and their dander away from the duvet etc. I do this because it’s so much easier to just toss this quiltlet in the wash than it is to do all the bedding every time a cat naps on the bed. I use these in all our bedrooms as well just as an extra protection. I mean, it can’t hurt, and they’re beautiful too. Win win!
  12. LAUNDRY. I never wear any clothing I’ve touched the cats with to bed. I have a separate drawer for sleeping clothes and this prevents any transfer of allergens from clothing to sleeping area.
  13. NETI POT. Sorry if this might seem gross but it’s real life so I’m sharing. My husband does a nasal rinse twice a day. He finds it helps him a LOT and he just uses salt water. I think this is the neti pot he has: Amazon, but as you can see there are a ton of different options: Amazon.
  14. MEDICATION. My husband has allergy meds which he does NOT take regularly but he has on hand so if he does start sneezing, he can take one and it’ll clear up his symptoms for 24 hours. It’s a last resort but he probably takes about 1 or 2 per month. They’re good to have on hand just in case, however, the measures we take listed above usually eliminate the need for any medication.
  15. ROBOT VACUUMS. I’m putting this towards the end because it’s not a “necessary” step, but it is something we’ve recently found has made a big difference in very specifically removing cat hair from the floors of our house (further to normal vacuuming) – like it gets the stuff you don’t even see. I would say that if you live in a smaller house where you can easily vacuum every single bit of your floors in one go, then it’s probably not worth it to get one of these but in our situation, we have a lot of floorspace and while we have no problems with day-to-day cleaning, we were shocked (and frankly horrified) at specifically how much cat hair these roombas were able to get off our floors. Like I thought we were keeping our house clean before but apparently not! I’ll be honest, they’re not great at “normal” vacuuming (like cleaning spills, or crumbs, etc so in my opinion they’re not the kind of tool you can rely on to “take over” cleaning your house) but they’re amazing for getting cat hair off the floors so in our house we use them specifically as cat allergen controllers, otherwise we probably wouldn’t have them. We have 2 different styles of these robot vacuums for different parts of our house because of our layout. First is this one: Walmart | Home Depot (regular vacuum with manual disposal I change daily). Second is this: Walmart | Home Depot (automatic disposal).
  16. BATHS DON’T HELP. We do not bathe our cats. Cats are naturally very clean. They spend more time cleaning themselves a day than humans do so they don’t usually need our help to stay clean. And even if you bath them to remove the allergens, it just returns a few days later. Plus as a general rule cats dislike getting wet and bathing them is a stressful process (for you and the cat). And then you just have to repeat the whole awful process not to mention that washing them regularly can dry out their skin so I don’t think it’s worth it. So in my opinion, if you groom them regularly and wipe them down, and you do the other tips I mentioned above, then bathing isn’t necessary.

So these methods are how we deal with having a house full of cats and someone who is allergic to cats living in the same space. It’s taken a lot of trial and error but I’m happy to say that we’re finally at a place where we’ve created a home in which our allergic person can live with our cats with minimal issues.

Please note that this list is only what has worked for us and our allergy situation. There is no guarantee that these measures will work for a different person in a different situation. No two allergies are the same so no two solutions will be directly transferable. But these are definitely tips to consider or try!

If you’re unsure whether you’re allergic to cats, consider visiting your local shelter and ask to spend some time in one of the adult cat rooms. This is a win-win because it gives some shelter kitties a bit of love while allowing you to see if you’re allergic to them without bringing a cat home without knowing. Be sure you interact with adult cats over a year old, not kittens. Sometimes kittens don’t trigger allergies the same way cats do. This is not always true, but it’s best to ‘allergy test’ yourself with adult cats to be sure.

If you find out that you’re allergic to adult cats, consider visiting your local shelter and asking to specifically interact with some young kittens only (under 4 months old) because kittens don’t always trigger “cat allergies”. For example, my husband did not show any signs of being allergic to our cats until they grew in their adult coat. So if you’re not allergic to kittens but really love cats, then the good news is that you can sign up to be a foster with your shelter! This means you’ll provide a temporary home and care for kittens who either need socialization or who are too young to be adopted. Your shelter will have more information. But this could be an amazing way to save lives, be around kittens, but avoid allergies.

Given everything you’ve read above, if you’re curious about the types of furniture we chose to use due, check out the following links:

  • Whole house sources: click here
  • Living room sources: click here
  • Kitchen sources: click here
  • Master bedroom sources: click here
  • Guest bedroom sources: click here

More cat-related posts that might help:

  • Cat Room Tour: click here
  • Cat-related Sources & Cleaning Tips: click here
  • How to Stop Cats from Scratching Furniture: click here
  • Cat Training Tips: click here
  • How to Introduce New Kittens to Older Cats: click here
  • Cats & Decor Tips: click here

Filed Under: Cats

Roasted Red Pepper Pasta Recipe

August 31, 2019 by admin Leave a Comment

This recipe was a happy accident. I was craving a pasta dish that was creamy but not super cheesy, and vegetable-y but not tomato based soooooo… I kinda just threw a bunch of things that sounded right to me in a blender and it turned out so delicious that I decided to write the recipe down to make again!

In a pan on medium heat, cook the following for about 3-4 minutes:

  • 3 cloves garlic, minced
  • 2 medium yellow/white onions, chopped

Then add in:

  • 1 tsp paprika
  • 1 tsp red chili flakes
  • 1 tsp salt
  • 1 tsp ground pepper
  • 3 tbsp tomato paste

Stir over the heat for another 1-2 minutes, remove from heat, and set aside.

To a large blender, add the following:

  • 20-25 oz roasted red peppers (I used the jarred kind)
  • 1 heaping cup grated pecorino romano cheese (or parm)
  • 1/2 cup loose fresh basil leaves
  • 1/2 cup of milk (I used unsweetened soy milk)
  • The whole onion/garlic/herb/tomato paste mixture you just made

Then just blend it on high until it’s a pure creamy mixture!

Serve mixed into paste with fresh basil and fresh grated pecorino romano (or parm) on top! Some halved fresh cherry/grape tomatoes would also be a nice side garnish, and so would some fresh garlic bread!

Additional resources:

  • For more recipes, click here
  • For our kitchen sources, click here
  • For our pantry sources, click here
  • For our dining room sources, click here

Filed Under: Recipes

How to Make a Wheat Wreath

August 26, 2019 by admin 6 Comments

I made these fluffy natural wheat wreaths to decorate our house for summer and fall and I had so much fun doing it that I’ll definitely be making more over the coming years. This was my first time making them so I wasn’t even sure it would work properly but it totally did so I thought I’d share my process here.

Here are some ready-made similar wheat wreaths: Pottery Barn | Amazon | Wayfair | Target.

What you’ll need:

  • Paddle wire: Amazon
  • Wire cutters: Amazon
  • Wreath form: Amazon
  • Wheat bundles/stems: Amazon | Amazon | Etsy

Before starting, I chose to cut my wreath form into two. I felt the 4-rowed version was a little much and cutting them down to 2-rows each got me 2 wreaths from one form. I did this by using my wire cutters to cut the support pieces between the rings (you can see a bit of my wreath form ring in the pic below).

As for quantity of wheat, to make the wreaths in the picture at the top of the page, it took a bundle of wheat stems about as big as I could hold with my fingers touching. The way I bought them didn’t specify how much quantity I got and I didn’t feel like counting individual stems but if you make a circle with your hands, that’s how much wheat I used. I know that’s not super accurate but it’ll give you an idea. Also, you can make yours fluffier or more minimal depending on what you like so you might use more/less stems.

Next, I recommend you lay out all your wheat so that you can see what you’re working with. You want to create these small bunches of wheat that are pretty together. Each small bunch of stems should be around 1/2″ in width (see middle pic below). The stems should look good together so each little bundle is pretty. And you’ll just keep making these bunches throughout the whole wreath making process.

Instructions to make the wreath:

  1. Wrap your paddle wire (Amazon) around the wreath form a few times to secure it. You will never cut your paddle wire until the very end so the whole wreath is made with one long length of wire!
  2. Grab one of those little wheat bunches, hold them tight and lay them across your wreath form at a slight angle (little less than 45 degrees) either inward or outward and wrap the paddle wire tight around them and the wreath form about 5-6 times. Pull tight, but not too tight (you don’t want to snap the wire or cut through the stems).
  3. Snip off the extra wheat stems about 1.5 inches below the wire. I just used my wire cutters for this.
  4. Grab the next small bundle and this time alternate the angle. So you want to go: inward, outward, inward, outward, the whole way around (see picture).
  5. Once you get to the end of the wreath you’ll need to be careful about ending it so that it looks whole. Really it just involved patience and careful placement of your final bundles. I found it was helpful to snip off the stems of the bundles before wiring them in so that they were more maneuverable. But if you have trouble with this part, don’t worry. You can place a big bow on this section and nobody will ever know!

And that’s it!

Again, if you’d rather not make one, there are lots of available wheat wreaths you can order online. I’ve rounded up a list here: Kirklands | Pottery Barn | Amazon | Wayfair | Target .

Follow us on Instagram @ahousewebuilt.
For more of our DIY tutorials, click here.
To explore the other rooms in our house, click here.

Filed Under: Tutorials

Summer Decor 2019

August 26, 2019 by admin Leave a Comment

As things change throughout the year, I do little recaps of the looks I’ve previously styled here so that you can easily go back in time and source a look you love as easily as possible.

  • Round mirror: Amazon | Wayfair | Urban Outfitters (same mirror)
  • Mantle: real barn beam
  • Fireplace: Amazon | Walmart
  • Large white vase (mantle right side): Crate & Barrel
  • Fern stem (in large white vase): Crate and Barrel | Similar: Wayfair | Smaller: West Elm
  • Smaller white vase (mantle left side, similar): West Elm
  • Grass stems (in smaller vase): West Elm (I have 2 of them together)
  • Wood vases: McGee & Co | Wayfair | Hayneedle | Walmart
  • Geometric candle holders (similar): Amazon | Wayfair (lg) | Wayfair (sm)
  • Mantle: real hand-hewn barn beam (no link available)
  • Fireplace: Amazon | Walmart

Filed Under: Past Decor

Hearty Vegetable Soup Recipe

August 12, 2019 by admin 2 Comments

This hearty vegetable soup is absolutely delicious and for whatever reason every single year our family goes through a phase of craving it and we’ll literally make it like 5-6 times in a row (or honestly, sometimes more). It’s healthy, yummy, and very easy to make so I hope you enjoy it!

Note: I like to prep all the ingredients first – so I chop everything, drain & rinse canned goods, measure out the broth and spices etc and put them into bowls by the stovetop and start cooking after everything is prepped. I’ve made it both ways (prepping as I go, or prepping-then-cooking) and personally I find the process smoother if I prep prior to cooking. You don’t have to do it like that, but just sharing my way 🙂

Add the following ingredients to a large pot on med-high heat and cook for about 5 minutes, stirring frequently.

  • 2 tbsp olive oil
  • 2 large onions (diced)
  • 6 cloves garlic (diced, not crushed)
  • dash of salt

Add in the following ingredients and cook for about 5 minutes, stirring frequently.

  • 3 celery stalks (diced)
  • 3 medium carrots (diced)
  • 2 medium potatoes (diced)

Add in the following herbs/spices and stir everything together for 1 minute.

  • 2 tsp salt (1 tsp works too, I just like 2)
  • 1 tsp dried oregano
  • 1 tsp dried parsley
  • 1 tsp dried basil
  • 1 tsp red chili flakes
  • 1 tsp fresh ground black pepper (up to 2 tsp for an extra kick)
  • 1/2 tsp dried rosemary
  • 1/2 tsp dried thyme
  • 1/2 tsp garlic powder

Add in the following liquids and stir until combined.

  • 4 cups vegetable broth
  • 1 cup water
  • 2 tbsp soy sauce
  • 1 tbsp honey

Add in the following ingredients and stir until combined.

  • 3.5 cups canned diced or crushed tomatoes
  • 1.5 cups canned/frozen corn
  • 1.5 cups canned kidney or black beans (drained & rinsed)
  • 1.5 cups fresh/frozen chopped green beans – optional, but tasty
  • 1.5 cups canned lentils (drained & rinsed) – optional, but I like it and it’s healthy

(Note for all the canned stuff: honestly, you don’t need to measure this so if your can is a little more or a little less than my measurements, don’t worry. Just try to stick to the ratios. It’ll taste great either way!)

Add in the following:

  • 2 bay leaves (select whole leaves so they’re easy to fish out after)

Bring to a boil, then cover the pot, reduce heat to low, and simmer for 40 minutes. When done, taste the potatoes and carrots to make sure they’re soft enough.

Remove from heat, remove the bay leaves, and add in the following ingredients:

  • Juice of 1 lemon
  • 1-2 cups fresh parsley or cilantro (chopped)

Stir everything together and enjoy!!

Optional things I’ve added successfully:

  • Broccoli: if you’re going to add these, chop the fresh florets into even sized chunks and add them to the soup half-way through the simmer (around 20 minutes in) so that they don’t overcook.
  • Pasta: if you decide to add pasta, I recommend cooking it separately, then add it in after the soup is fully done cooking and removed from heat. Also, if you have leftover soup that you refrigerate, all the broth will get soaked up by the pasta. Don’t worry! Just add water when it’s ready to be heated up again and there’s enough flavor in the soup that that water will turn to broth as it’s heated.

Recommend to serve it with:

  • Roughly grated parmesan or pecorino romano cheese
  • Fresh crusty bread & butter or our favorite Garlic Flatbread recipe

Additional resources:

  • For more recipes, click here
  • For our kitchen sources, click here
  • For our pantry sources, click here
  • For our dining room sources, click here

Filed Under: Recipes

How to Build a Console Table

June 24, 2019 by admin 23 Comments

We built another table!! It all started because I wanted a console table for our foyer and couldn’t decide on which one to purchase and I spent so long thinking about it that finally I just decided to design and build my own and here we are. The basic concept of this table is quite simple, it’s just 4 rows of 4×4 lumber cut at 45 degree angles and glued and bolted together with steel brackets and chunky bolts.

If you don’t feel like going through all the trouble of building one yourself but you like this look, there are several similar ready-made tables available online and I’ve linked a bunch of them here if you’re interested: West Elm | Wayfair | Wayfair | Wayfair | Wayfair | McGee & Co | Crate & Barrel | Overstock | Overstock.

But if you do feel like building one yourself, here’s how we built ours.

Materials list:

  • 6 x 4x4x8 lumber (we used cedar)
  • 8 x L-brackets (we used ones that were 6″ in each direction)
  • 4 x 3/18 x 4 1/2″ hex bolts
  • 4 x nuts that fit the above bolts
  • 16 x 3/8 x 2″ shorter lag bolts
  • 12 x 3/8 x 2 1/2″ longer lag bolts
  • 36 washers that fit these bolts
  • 22 x 3 1/2 wood screws
  • Wood glue: Home Depot (or, we used PL: Home Depot)

Stain & paint list:

  • Pre-stain conditioner: Amazon (don’t skip this step!!)
  • Gray stain (one coat): Amazon
  • Matte top coat: Amazon
  • Matte black metal paint: Home Depot

Tools list:

  • Miter saw (ours is like this: Home Depot)
  • Carpenter’s square: Amazon | Home Depot
  • Power drill: Amazon | Home Depot
  • Impact driver: Amazon | Home Depot
  • Socket wrench
  • 150 grit sandpaper
  • 3-5 clean rags
  • Sharp pencil
  • Measuring tape

How to build:

  1. Paint all your hardware and allow to dry while you build. Note: for the underside brackets, you’ll have to paint the inside of the brackets too.
  2. Cut all your lumber to size. I had 4 x 58″ top pieces, and 8 x 35″ leg pieces. I cut everything straight (90 degree) first and then marked all my 45 degree cuts after. This made it easier for me. I recommend laying all your pieces out beside each other so you can choose which pieces of lumber you want where since they’re likely to have individual markings/graining.
  3. Sand edges with 150 grit sandpaper.
  4. Assemble your top + 2 side lumbers into single pieces as shown in the diagram with wood screws (we pre-drilled about halfway through each wood piece) and used glue between each piece as well for added strength.
  5. Sand top/bottom/sides with 150 grit sandpaper.
  6. Condition, stain, and top coat the wood. Follow instructions on the cans, but generally it’s condition, wait 2 hours, stain, wait 6-8 hours, top coat, wait 6-8 hours. Do NOT skip the pre-stain conditioner (Amazon), just stir well, then use a rag to apply it and rub it in. Next is stain, I used one coat of this color: Amazon, STIR IT WELL with a stir stick AND a paint brush but do not shake the can, then apply with paintbrush, rub it in with one rag, then wipe off the excess with another rag. Finally the top coat, just apply it with a paint brush (make sure you get a matte one like this: Amazon).
  7. Pre-drill everything and bolt it all together as shown in the diagram. As you can see in the pics, we did ours upside down on a raised platform (i.e. a wagon lol) just because it was easier.
  8. I used a small paint brush to touch up all the black metal paint (this type of paint: Home Depot) but this is optional. I just think it makes it look better.

If all of this seems like way too much work to you, then again you can also check out all of these ready-made tables that are similar to the style we built and require a zillion percent less effort to acquire 😛 : West Elm | Pottery Barn | Wayfair | Crate & Barrel | McGee & Co.

As always, please be super careful using any tools and take all appropriate safety measures! And a further disclaimer: we’re not pro furniture builders, we just figured this out as we went so we’re only sharing our experience, nothing more!

For sources and similar items from our entryway/foyer go here: Entryway/Foyer Sources Page

Filed Under: Tutorials

Fresh Rolls Recipe

May 11, 2019 by admin Leave a Comment

These fresh rolls are one of our favorite meals to make — we often make them on special occasion days like Mother’s Day and Father’s Day. They’re fresh and tasty and the best part is you can make each one exactly how you like (kind of how pizza toppings can be totally modifiable) so they’re a hit with almost everyone!

We don’t go by a recipe and each time we make them they’re slightly different, but I’ll share the general idea and you can also modify it to suit your own taste.

The wraps are these round rice paper discs, about the size of a small dinner plate. They come in packages about an inch thick and they’re hard like pasta when you buy them. To make the wraps, we just fill a large pie plate with warm water (as warm as you can bear to touch) and fully immerse one of the rice paper wraps in the water for about 30 seconds to a minute until it is completely and totally soft. Then gently lay it out on a cutting board, or actually we just use dinner plates, and put your favorite ingredients lengthwise in the middle while leaving about 2 inches of empty space at the top and bottom, when all your toppings are in just fold in the two ends, then tuck in one side and roll the rest of the way (kind of like a burrito, but longer).

Note: these do not stay fresh long as the rice paper wraps dry very quickly so what we do is we actually prep all the filling ingredients at once, then lay them out in the middle of the table, and everyone gets a plate and just assembles, eats, assembles, eats etc, until they’re full… so it’s a very interactive and involved meal which we find to be so much fun, even though it’s a lot of work! They take a bit of skill to learn how to wrap so you’ll definitely have to help younger kids or new-to-this-food adults, but it’s such a fun family experience to make these so it’s worth the mess! And, they’re super healthy!

Our wraps are most commonly filled with these ingredients:

  • Lettuce (I core the stems and cut them into strips)
  • Avocado (thin slices)
  • Cucumber (thin sticks)
  • Bell pepper (thin sticks)
  • Fresh cilantro (de-stemmed)
  • Fresh mint (de-stemmed)
  • Baked tofu (I cut extra-firm tofu blocks into strips, drizzle over a bunch of soy sauce, sesame oil, and thick teriyaki sauce and bake at 400 until they’re a bit crispy.)

For sauces we use the following (we’ve found it’s less messy to spoon the sauces inside the wraps instead of dipping into them):

  • Sweet chili sauce (I just buy this)
  • Peanut sauce (I make this by mixing peanut butter, soy sauce, a smidge of sesame oil, hoisin sauce/teriyaki sauce, and sriracha/hot sauce until it’s the right consistency for dipping)

Other optional fillings:

  • Egg (if you beat them up with some soy sauce and make them kinda like a crepe in a pan on the stove, then cut them into strips, they make a great addition to the rolls)
  • Mango strips
  • Fresh Basil
  • Shredded carrot
  • Thin rice noodles (we kinda consider this a waste of space in the wrap but some people love it)

And that’s it!! For a full list of our kitchen sources, click here!

Filed Under: Recipes

How to Hang a Gallery Wall

May 7, 2019 by admin 6 Comments

Our hallway gallery wall – frame source & size: Amazon – is one of my favorite features in our house and one of the most common questions I get asked about it on our Instagram page is how we chose where to hang them so I’ve shown a pic here with the “before” to help answer that!

My favorite method is to use wrapping paper (I buy these huge rolls of 100% recycled paper: Amazon) to cut out templates that are the exact same size as my frames. Then I tape the templates to the wall with frog tape (Amazon) that won’t damage the paint and play around with the configuration, height, and spacing until I’m happy with the look.

Once you’re happy with the spacing and configuration, check them for level and measure the spaces between the frames, height off the floor, etc to make sure that everything is even and level.

To help get your holes in the exact right place, once you’ve finalized the placement of your template frames, mark the exact spot on your template where the hanger is located on your frame. This way you can check them for level (and check the distance between the holes etc) without writing on your walls.

Doing these templates before hanging the frames is such a great way to make sure you’re going to be happy with the end result and it gives you a lot of freedom to move things around while you decide.

We hang our frames with screws right into the wall, and we use drywall anchors if there isn’t a stud.

I absolutely adore gallery walls! They’re a great way of adding both a personal touch to your home while showcasing memories and also essentially acting as an art piece!

Here are our frame sources and they’re linked to our sizes 🙂

RECTANGULAR FRAME GALLERY WALLS (HALLWAYS):

  • Black frames (main floor): Amazon | Similar: Target | West Elm | Michaels | Wayfair
  • Gold frames (basement): Amazon | Similar: Wayfair | CB2

SQUARE FRAME GALLERY WALLS (ENTRYWAY + SLAT WALL):

  • Large square frames (slat wall): Crate & Barrel | Similar: Pottery Barn | West Elm | Michaels | Amazon
  • Small square frames (entryway): West Elm | Similar: Target

You may also be interested in our tutorial on how to make a staircase gallery wall!

Filed Under: Tutorials

Spring Decor 2019

April 30, 2019 by admin 2 Comments

As things change throughout the year, I do little recaps of the looks I’ve previously styled here so that you can easily go back in time and source a look you love as easily as possible.

Mantle decor sources:

  • Round mirror: Amazon | Wayfair | Urban Outfitters (same mirror)
  • Mantle: real barn beam
  • Fireplace: Amazon | Walmart
  • Tall geometric white vase: Amazon | Short matching vase: Amazon
  • Eucalyptus stems (greenery in geometric vase): Amazon | Similar: Pottery Barn
  • Spiky greenery: Crate & Barrel
  • White/grey vase (similar): West Elm
  • Geometric candle holders (similar): Amazon | Wayfair (lg) | Wayfair (sm)
  • Wood vases: McGee & Co | Wayfair | Hayneedle | Walmart

Filed Under: Past Decor

Pesto Pasta Recipe

April 7, 2019 by admin 2 Comments

One of our favorite meals to make when we don’t have time to really cook is Pesto Pasta. Making the actual pesto takes less than 10 minutes and you can store a bunch of it in the fridge or even freezer for those days when you just want a fast hot meal. We often make it even healthier by blending in a bunch of kale (you don’t even notice it’s there for those of you who aren’t fans of kale) and we really love serving it with just pasta, chopped tomato, and a little pecorino romano cheese on top!

To make the pesto, you basically just blend up the following items. If this is your first time making pesto, you can follow the recipe. But I’ve made it so many times now that I actually just eyeball the ingredients based on how much fresh basil I have on hand (that is what determines the quantity of pesto I make).

Pesto ingredients (half this or double it as you see fit):

  • 2 cups loose fresh basil leaves (not packed down)
  • 1/3 cup olive oil (basically you want enough so that the mixture blends up nicely. Add more or less as needed)
  • 2 large handfuls grated Pecorino Romano cheese (or Parm)
  • 1/3 cup pine nuts (we like to roast them lightly in a cast iron pan to bring out the flavor, but watch them carefully and stir frequently as they can over-roast and turn black in the blink of an eye)
  • 2-5 garlic cloves (depending on preference)
  • 1/2 tsp salt
  • 1/4 tsp ground black pepper
  • Optional: half a head (or more) of kale leaves (minus stalks) or even baby spinach. You’ll never notice the taste difference and it makes it healthier. Our preference is to use kale and I’ve done as much as a whole head of it depending on the quantity of pesto. Basically just watch it as it blends, as long as it blends down all the way, you’re good to add more, if it starts to get chunky, then you’ve added enough. You may need to drizzle in a bit more olive oil as you blend the kale.

I usually start with blending the basil + olive oil. Then add the cheese + garlic and blend. Then add the pine nuts + salt/pepper and blend more. And finally add the kale (and add in more olive oil as needed to make it blend smoothly). Blend until it has the consistency of a grainy smoothy.

Relevant kitchen sources:

  • Matte black drawer pulls (long): Amazon
  • Matte black drawer pulls (short): Amazon
  • Matte black knobs: CB2
  • White cotton wreath: Amazon | (similar option: Wayfair)
  • Rectangular cutting board: Amazon
  • Utensil crock (white/tan): Wayfair
  • Glass & twine vases (different sizes set): Amazon
  • Tupperware sets: Amazon | Amazon

For a full list of our kitchen sources, click here!

Filed Under: Recipes

How to Build a Window Seat Cushion

April 2, 2019 by admin 10 Comments

My dad built this amazing window seat cushion for my home office that I absolutely love! It’s comfortable, customizable, and totally DIY-able, so I’m going to show you the basic steps of how to make one here. We also used this technique to create the window seat for the cabinetry we built in our master bedroom.

Materials:

  • High Density Upholstery Foam: Amazon
  • Dacron: Amazon
  • 1/2″ Plywood or MDF: Home Depot | Home Depot |
  • Staple gun: Home Depot
  • Fabric: any kind you want

Instructions:

  • Cut plywood to about 1/4 on each side smaller than the final size you need.
  • Cut foam to the same size as the plywood.
  • Cut dacron to size allowing for several inches of overlap underneath as well as the inches of the depth of the foam – so about 8 inches bigger than the plywood on each side.
  • Assemble the parts upside down: first lay out the dacron, then the foam, then the plywood
  • Start with one staple in the middle of each side, stretching slightly. Then staple each side alternately, working toward the corners.
  • For the corners, just try to make them as clean as possible – just like wrapping a present.
  • After you’re done the stapling the dacron, then do the same with the fabric. The dacron and fabric should be stapled separately.

Other sources from the pics in this post:

  • Decorative pillows: Amazon | Amazon | Amazon | Amazon
  • Black light fixtures: Wayfair (they call it bronze, but it’s black)
  • Fireplace: Overstock | Amazon
  • Coffee table (metal base): Target | Walmart
  • Stool (in the corner): West Elm
  • Shiplap: Tutorial & Info
  • Paint colors: BM Simply White + SW Dorian Gray.


For our daily progress, follow us on Instagram @ahousewebuilt.
To explore the other rooms in our house, click here.
For our more of our tutorials, click here.

Filed Under: Tutorials

  • « Go to Previous Page
  • Go to page 1
  • Interim pages omitted …
  • Go to page 5
  • Go to page 6
  • Go to page 7
  • Go to page 8
  • Go to page 9
  • Go to page 10
  • Go to Next Page »

Primary Sidebar

SHOP OUR HOME

Click any image below for sources from our pics!

WEBSITE ROADMAP

  • Shop Our Home
  • Sources by Room
    • All Sources & FAQs
    • Kitchen Sources
    • Pantry Sources
    • Living Room Sources
    • Dining Room Sources
    • Home Office Sources
    • Laundry Room Sources
    • Entryway Sources
    • Mudroom Sources
    • Gallery Wall Sources
    • Reading Room Sources
    • Theater Room Sources
    • Game Room Sources
    • Guest Bedroom Sources
    • Primary Bedroom Sources
    • Primary Closet Sources
    • Primary Bathroom Sources
    • Powder Bathroom Sources
    • Buffalo Check Bathroom Sources
    • Basement Bathroom Sources
    • Basement Sources
    • Stairs, Landings & Hallways
    • Paint Colors and Stain Recap
    • Cleaning Sources & Routines
  • Tutorials
    • How to Make a Staircase Gallery Wall
    • How to Make Textured Canvas Art
    • How to Install Shiplap
    • How to Build a Slat Wall
    • How to Paint an Ikea Dresser
    • How to Build Bypass Barn Doors
    • How to Build a Farmhouse Table and Benches
    • How to Build a Rustic Sideboard
    • How to Build a Slat Sideboard
    • How to Make a Sofa Pit
    • How to DIY a Faux Brick Wall
    • How to Build a Window Seat
    • How to Build a Paneled Accent Wall
    • How to DIY a Functional Play Kitchen
    • How to Stencil a Wall
    • How to Build a Round Table
    • How to Build a Console Table
    • How to Make Paper Stars
    • How to Make Paper Mache Bowls
    • How to Make Clay Links
    • How to Texture Bowls & Vases
    • How to Install Open Shelves
    • How to Make Wood Block Art
    • How to Make a Wood Bead Garland
    • How to Build Cabinet Doors
    • How to Build a Wood Countertop
    • How to DIY a Nightstand Charging Drawer
    • How to Make a Wheat Wreath
    • How to Hang Gallery Wall Frames
    • How to Stain Stairs and Paint Risers
    • How to Make Industrial Stair Railings
    • How to Build a Window Seat Cushion
    • How to Make Salt Dough Ornaments
    • How to DIY a Modern Mantel Christmas Tree
    • How to DIY a Wooden Christmas Village
    • How to Build a Wood Christmas Tree Collar Box
    • How to Make Paper Christmas Trees
  • Cats
    • Cat Room Tour & Litterboxes
    • Cat-Related Sources & Cleaning Tips
    • How to Cat-Proof Christmas Trees & Decor
    • How to Stop Cats from Scratching Furniture
    • How to Stop Cats from Playing with Decor
    • How to Train Cats and Kittens
    • How to Cope with Cat Allergies
    • How to Introduce New Kittens to Older Cats
  • Christmas
    • Christmas Decor Favorites 2023
    • How to Build a Wood Christmas Tree Collar Box
    • Neutral Christmas Present Wrapping
    • How to Make Paper Christmas Stars
    • How to Make Paper Christmas Trees
    • How to Make Salt Dough Ornaments
    • DIY Holiday Art Ideas
    • How to Cat-Proof Christmas Trees & Decor
    • How to Make Modern Tabletop Trees
    • How to Make a Wooden Christmas Village
    • Holiday Cheese & Snack Boards
    • Christmas Decor 2021
    • Christmas Decor 2020
    • Christmas Decor 2019
    • Gingerbread House & Cookies Recipe
    • Puff Tastry Christmas Tree Recipe
    • Christmas Decor 2018
  • Cleaning
    • Cleaning Sources & Routines
    • Minimalism: How To Get Started
    • Cat-Related Cleaning Tips
  • Recipes
    • Apple Turnovers Recipe
    • Baked Pumpkin Donuts Recipe
    • Banana Chocolate Chip Bread Recipe
    • Blueberry Lemon Cake Recipe
    • Cheese & Cracker Snack Boards
    • Chocolate Chip Cookie Recipe
    • Christmas Crack Recipe
    • Chocolate Crinkle Cookies Recipe
    • Cinnamon Rolls Recipe
    • Cinnamon Star Pastry Recipe
    • Coconut Curry Squash Soup Recipe
    • Creamy No-Cheese Pasta Sauce Recipe
    • Crumble Recipe
    • Easy Veggie Pasta Recipe
    • Fresh Rolls Recipe
    • Garlic Flatbread Recipe
    • Gingerbread Biscotti Recipe
    • Gingerbread House & Cookies Recipe
    • Healthy Hearty Salad Recipe
    • Homemade Bread Recipe
    • Lasagna Recipe
    • Molasses Cookies Recipe
    • Oatmeal Raisin Cookies Recipe
    • Pad Thai Recipe
    • Pesto Pasta Recipe
    • Potato Curry + Naan Bread
    • Puff Pastry Christmas Tree Recipe
    • Pumpkin Donut Bites Recipe
    • Pumpkin Loaf Recipe
    • Pumpkin Oat Muffins Recipe
    • Roasted Red Pepper Pasta Recipe
    • Rocky Road Bars Recipe
    • Vegan Bolognese Pasta Sauce
    • Vegetable Soup Recipe
  • About
    • About Us
    • Website Roadmap
    • Shop Our Home
    • Minimalism: How To Get Started
    • Privacy Policy
  • Blog

WHERE WE SHOP

Amazon

Wayfair

West Elm

Crate & Barrel

CB2

Pottery Barn

McGee & Go

Overstock

Rejuvenation

Joss and Main

All Modern

Target

Home Depot

World Market

Etsy

H&M Home

Lulu and Georgia

Serena & Lily 

Schoolhouse

Anthropologie

RECENT POSTS

  • Christmas 2023
  • Christmas Decor Favorites 2023
  • How to Make a Staircase Gallery Wall
  • Functional Play Kitchen DIY
  • Christmas Decor 2022
  • Cinnamon Rolls Recipe

Meta

  • Log in
  • Entries feed
  • Comments feed
  • WordPress.org

Footer

RECENT POSTS

  • Christmas 2023
  • Christmas Decor Favorites 2023
  • How to Make a Staircase Gallery Wall
  • Functional Play Kitchen DIY
  • Christmas Decor 2022
  • Cinnamon Rolls Recipe
  • Christmas Decor 2021
  • Cinnamon Star Pastry Recipe

SHOP OUR HOME

FOLLOW US

ON INSTAGRAM

For daily updates on our house projects and rescue kitties, follow us on Instagram @ahousewebuilt

ON SHOP.LTK

To shop our home pics daily, follow ahousewebuilt in the free SHOP.LTK app (formerly LIKEtoKNOW.it) now available from the App Store to get product sources from our pics. With this app, you can instantly shop your screenshot of any of our Instagram pics! We always link exactly what we have when available and often offer similar options as well!

Copyright © 2025 · Metro Pro on Genesis Framework · WordPress · Log in