• Skip to primary navigation
  • Skip to main content
  • Skip to primary sidebar
  • Skip to footer

A House We Built

Custom House Designed by Husband & Wife Team | Modern Farmhouse Inspired

  • Shop Our Home
  • Sources by Room
    • All Sources & FAQs
    • Kitchen Sources
    • Pantry Sources
    • Living Room Sources
    • Dining Room Sources
    • Home Office Sources
    • Laundry Room Sources
    • Entryway Sources
    • Mudroom Sources
    • Gallery Wall Sources
    • Reading Room Sources
    • Theater Room Sources
    • Game Room Sources
    • Guest Bedroom Sources
    • Primary Bedroom Sources
    • Primary Closet Sources
    • Primary Bathroom Sources
    • Powder Bathroom Sources
    • Buffalo Check Bathroom Sources
    • Basement Bathroom Sources
    • Basement Sources
    • Stairs, Landings & Hallways
    • Paint Colors and Stain Recap
    • Cleaning Sources & Routines
  • Tutorials
    • How to Make a Staircase Gallery Wall
    • How to Make Textured Canvas Art
    • How to Install Shiplap
    • How to Build a Slat Wall
    • How to Paint an Ikea Dresser
    • How to Build Bypass Barn Doors
    • How to Build a Farmhouse Table and Benches
    • How to Build a Rustic Sideboard
    • How to Build a Slat Sideboard
    • How to Make a Sofa Pit
    • How to DIY a Faux Brick Wall
    • How to Build a Window Seat
    • How to Build a Paneled Accent Wall
    • How to DIY a Functional Play Kitchen
    • How to Stencil a Wall
    • How to Build a Round Table
    • How to Build a Console Table
    • How to Make Paper Stars
    • How to Make Paper Mache Bowls
    • How to Make Clay Links
    • How to Texture Bowls & Vases
    • How to Install Open Shelves
    • How to Make Wood Block Art
    • How to Make a Wood Bead Garland
    • How to Build Cabinet Doors
    • How to Build a Wood Countertop
    • How to DIY a Nightstand Charging Drawer
    • How to Make a Wheat Wreath
    • How to Hang Gallery Wall Frames
    • How to Stain Stairs and Paint Risers
    • How to Make Industrial Stair Railings
    • How to Build a Window Seat Cushion
    • How to Make Salt Dough Ornaments
    • How to DIY a Modern Mantel Christmas Tree
    • How to DIY a Wooden Christmas Village
    • How to Build a Wood Christmas Tree Collar Box
    • How to Make Paper Christmas Trees
  • Cats
    • Cat Room Tour & Litterboxes
    • Cat-Related Sources & Cleaning Tips
    • How to Cat-Proof Christmas Trees & Decor
    • How to Stop Cats from Scratching Furniture
    • How to Stop Cats from Playing with Decor
    • How to Train Cats and Kittens
    • How to Cope with Cat Allergies
    • How to Introduce New Kittens to Older Cats
  • Christmas
    • Christmas Decor Favorites 2023
    • How to Build a Wood Christmas Tree Collar Box
    • Neutral Christmas Present Wrapping
    • How to Make Paper Christmas Stars
    • How to Make Paper Christmas Trees
    • How to Make Salt Dough Ornaments
    • DIY Holiday Art Ideas
    • How to Cat-Proof Christmas Trees & Decor
    • How to Make Modern Tabletop Trees
    • How to Make a Wooden Christmas Village
    • Holiday Cheese & Snack Boards
    • Christmas Decor 2021
    • Christmas Decor 2020
    • Christmas Decor 2019
    • Gingerbread House & Cookies Recipe
    • Puff Tastry Christmas Tree Recipe
    • Christmas Decor 2018
  • Cleaning
    • Cleaning Sources & Routines
    • Minimalism: How To Get Started
    • Cat-Related Cleaning Tips
  • Recipes
    • Apple Turnovers Recipe
    • Baked Pumpkin Donuts Recipe
    • Banana Chocolate Chip Bread Recipe
    • Blueberry Lemon Cake Recipe
    • Cheese & Cracker Snack Boards
    • Chocolate Chip Cookie Recipe
    • Christmas Crack Recipe
    • Chocolate Crinkle Cookies Recipe
    • Cinnamon Rolls Recipe
    • Cinnamon Star Pastry Recipe
    • Coconut Curry Squash Soup Recipe
    • Creamy No-Cheese Pasta Sauce Recipe
    • Crumble Recipe
    • Easy Veggie Pasta Recipe
    • Fresh Rolls Recipe
    • Garlic Flatbread Recipe
    • Gingerbread Biscotti Recipe
    • Gingerbread House & Cookies Recipe
    • Healthy Hearty Salad Recipe
    • Homemade Bread Recipe
    • Lasagna Recipe
    • Molasses Cookies Recipe
    • Oatmeal Raisin Cookies Recipe
    • Pad Thai Recipe
    • Pesto Pasta Recipe
    • Potato Curry + Naan Bread
    • Puff Pastry Christmas Tree Recipe
    • Pumpkin Donut Bites Recipe
    • Pumpkin Loaf Recipe
    • Pumpkin Oat Muffins Recipe
    • Roasted Red Pepper Pasta Recipe
    • Rocky Road Bars Recipe
    • Vegan Bolognese Pasta Sauce
    • Vegetable Soup Recipe
  • About
    • About Us
    • Website Roadmap
    • Shop Our Home
    • Minimalism: How To Get Started
    • Privacy Policy
  • Blog

admin

Gingerbread Biscotti Recipe

December 15, 2021 by admin Leave a Comment

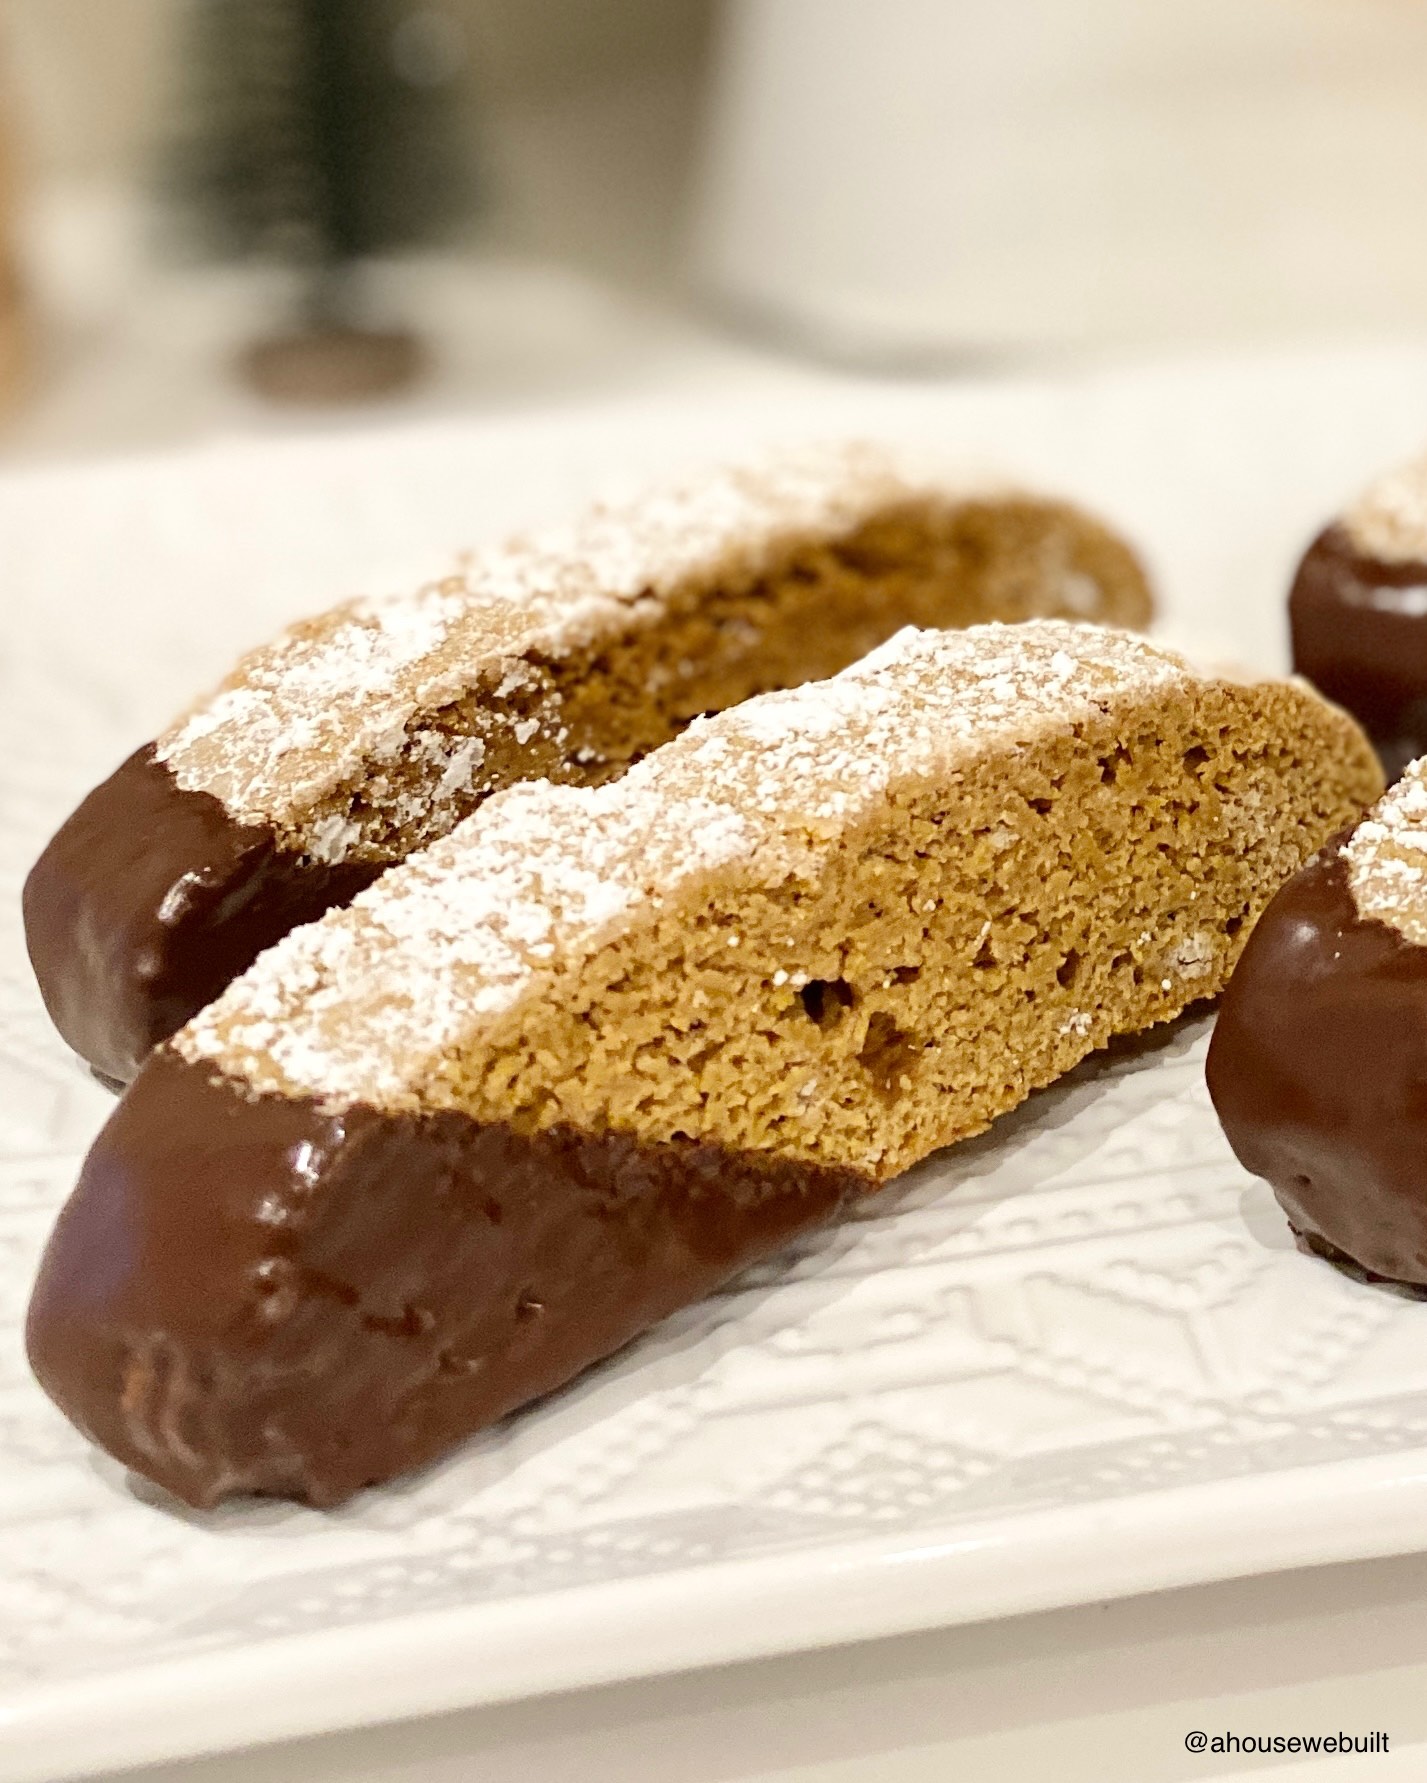
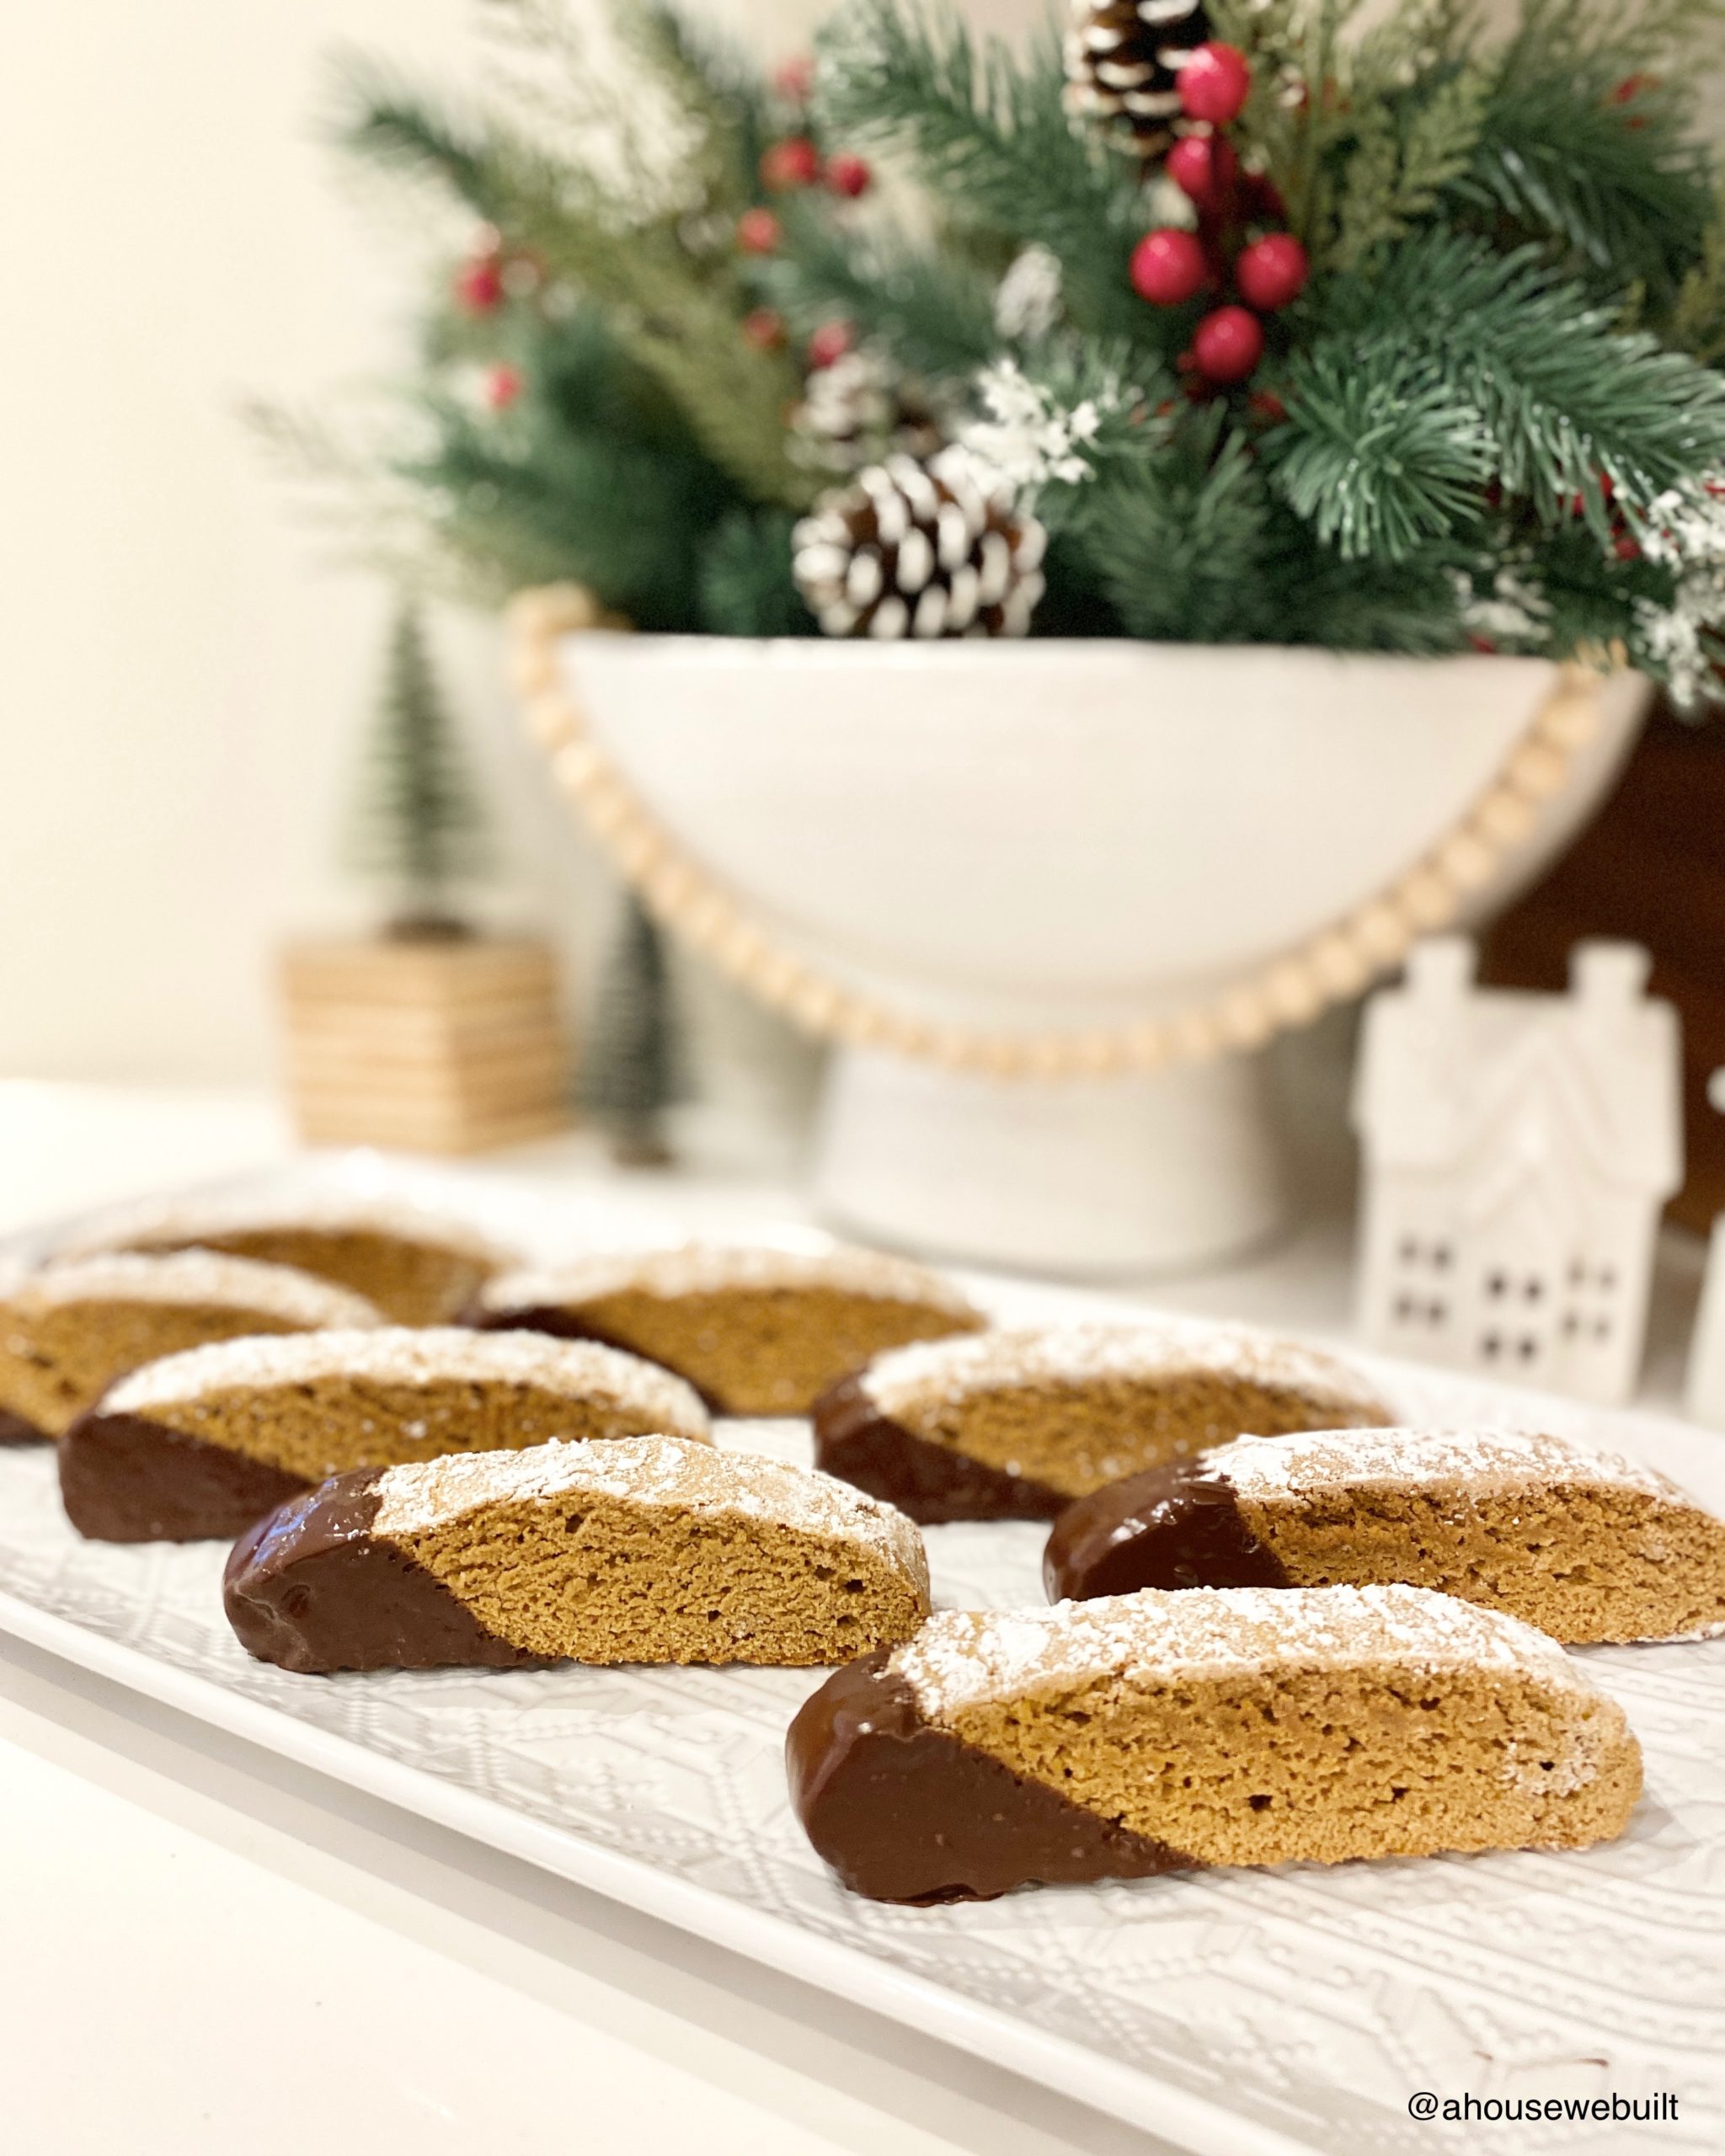
I made biscotti for the first time and it turned out really well so I’ll share the recipe here! Since I’m in the middle of my Christmas bake-a-thon, I went for a gingerbread biscotti dipped in chocolate for extra yum!

Dry ingredients:

  • 2 cups flour
  • 1 tsp baking powder
  • 1 tsp cinnamon
  • 3/4 tsp ginger
  • 1/2 tsp nutmeg
  • 1/4 tsp cloves

Wet ingredients:

  • 2 eggs
  • 1/8 cup molasses
  • 1/4 cup sunflower oil or melted butter
  • 3/4 cup brown sugar
  • 1 tsp vanilla

Extra ingredients:

  • Large spoonful icing sugar
  • 1/2 cup chocolate chips
  • 1 tbsp coconut oil or melted butter

Instructions:

  1. Preheat oven to 350*.
  2. Mix all dry ingredients together, then all wet ingredients, then combine the two. I just mixed them in a bowl with a fork – no fancy equipment needed.
  3. Line a baking sheet with parchment paper and transfer the dough onto it (just in a heap).
  4. Wet your hands with water (they really have to be fully wet), then gently press the dough into a rectangular shape that’s about 3/4 inch high. My final dough form was about 10 inches x 5 inches.
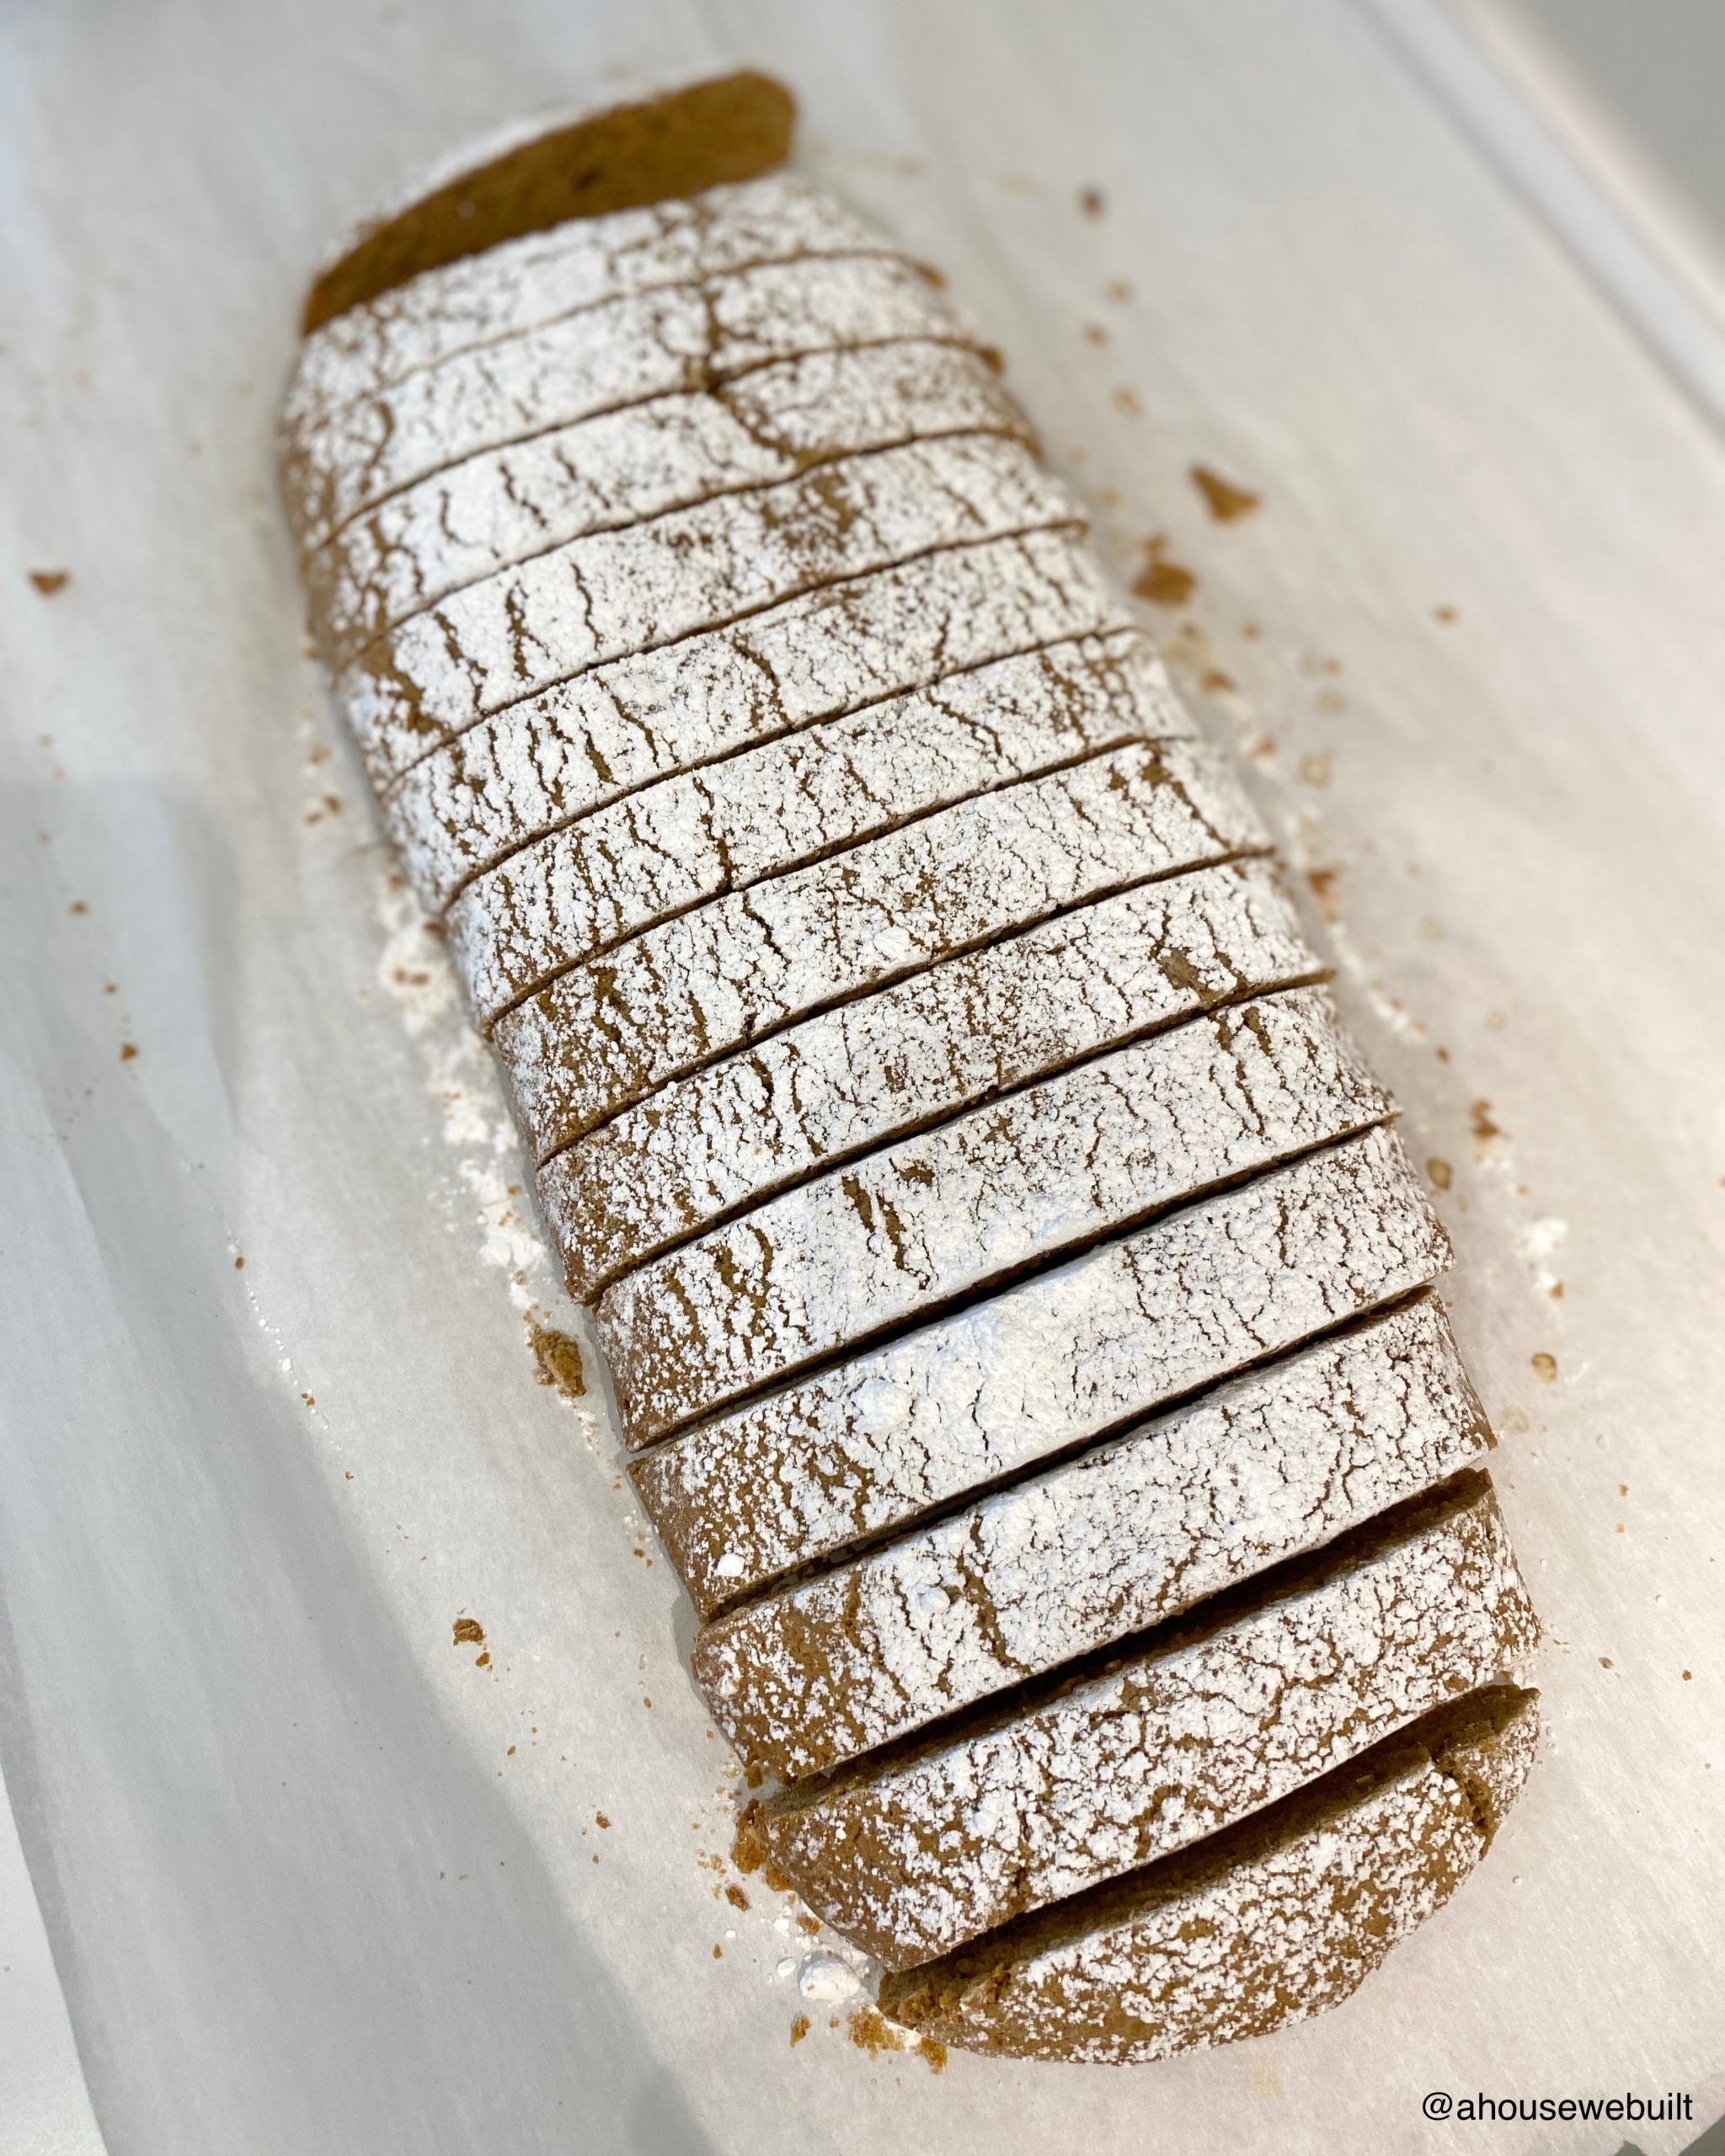
  5. Sift some icing sugar on top of your dough (enough to cover it).
  6. Baking for 25 minutes at 350*.
  7. Remove from oven and let cool for 15 minutes. Also reduce oven to 300*.
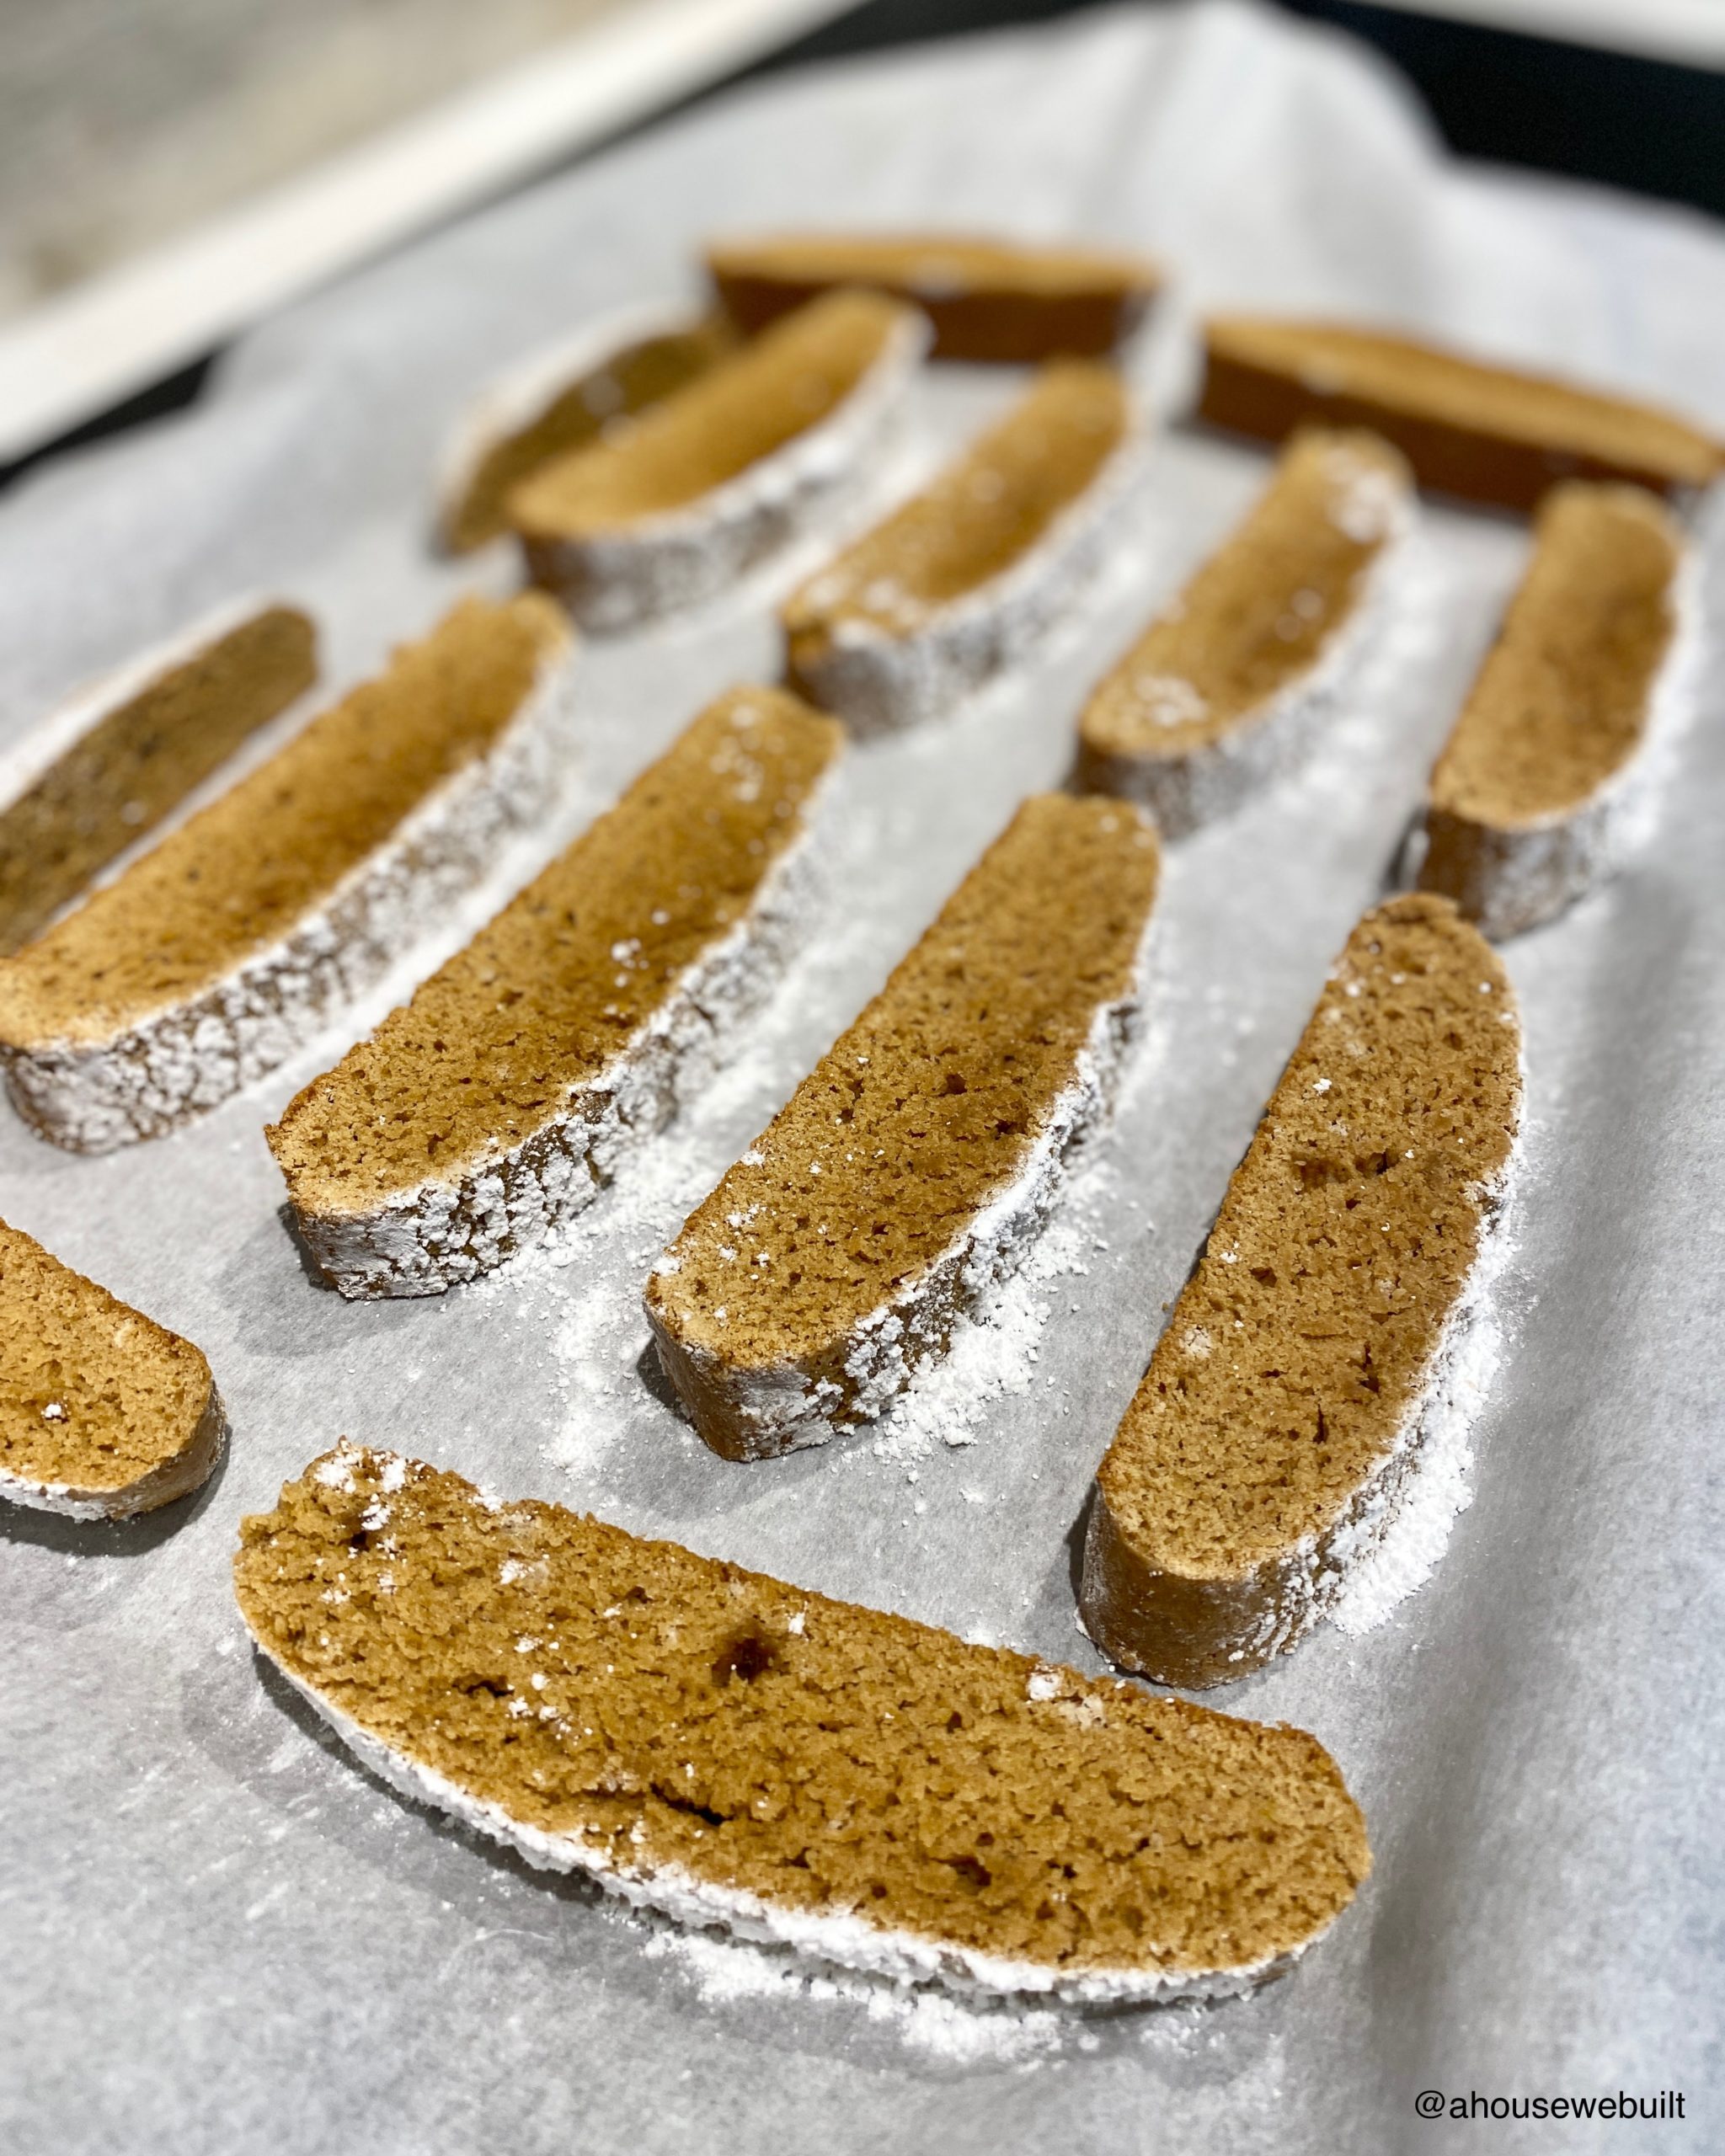
  8. Gently use a bread knife to cut your dough into 3/4″ slices. Make sure your pieces are even sizes.
  9. Place the slices on their side on a baking sheet and bake for 10 more minutes.
  10. Flip the pieces over to the other side and bake for another 10 minutes.
  11. Remove from oven and let cool completely. As soon as you can handle them, I recommend transferring them to a wire rack and standing them up so they can cool on all sides.
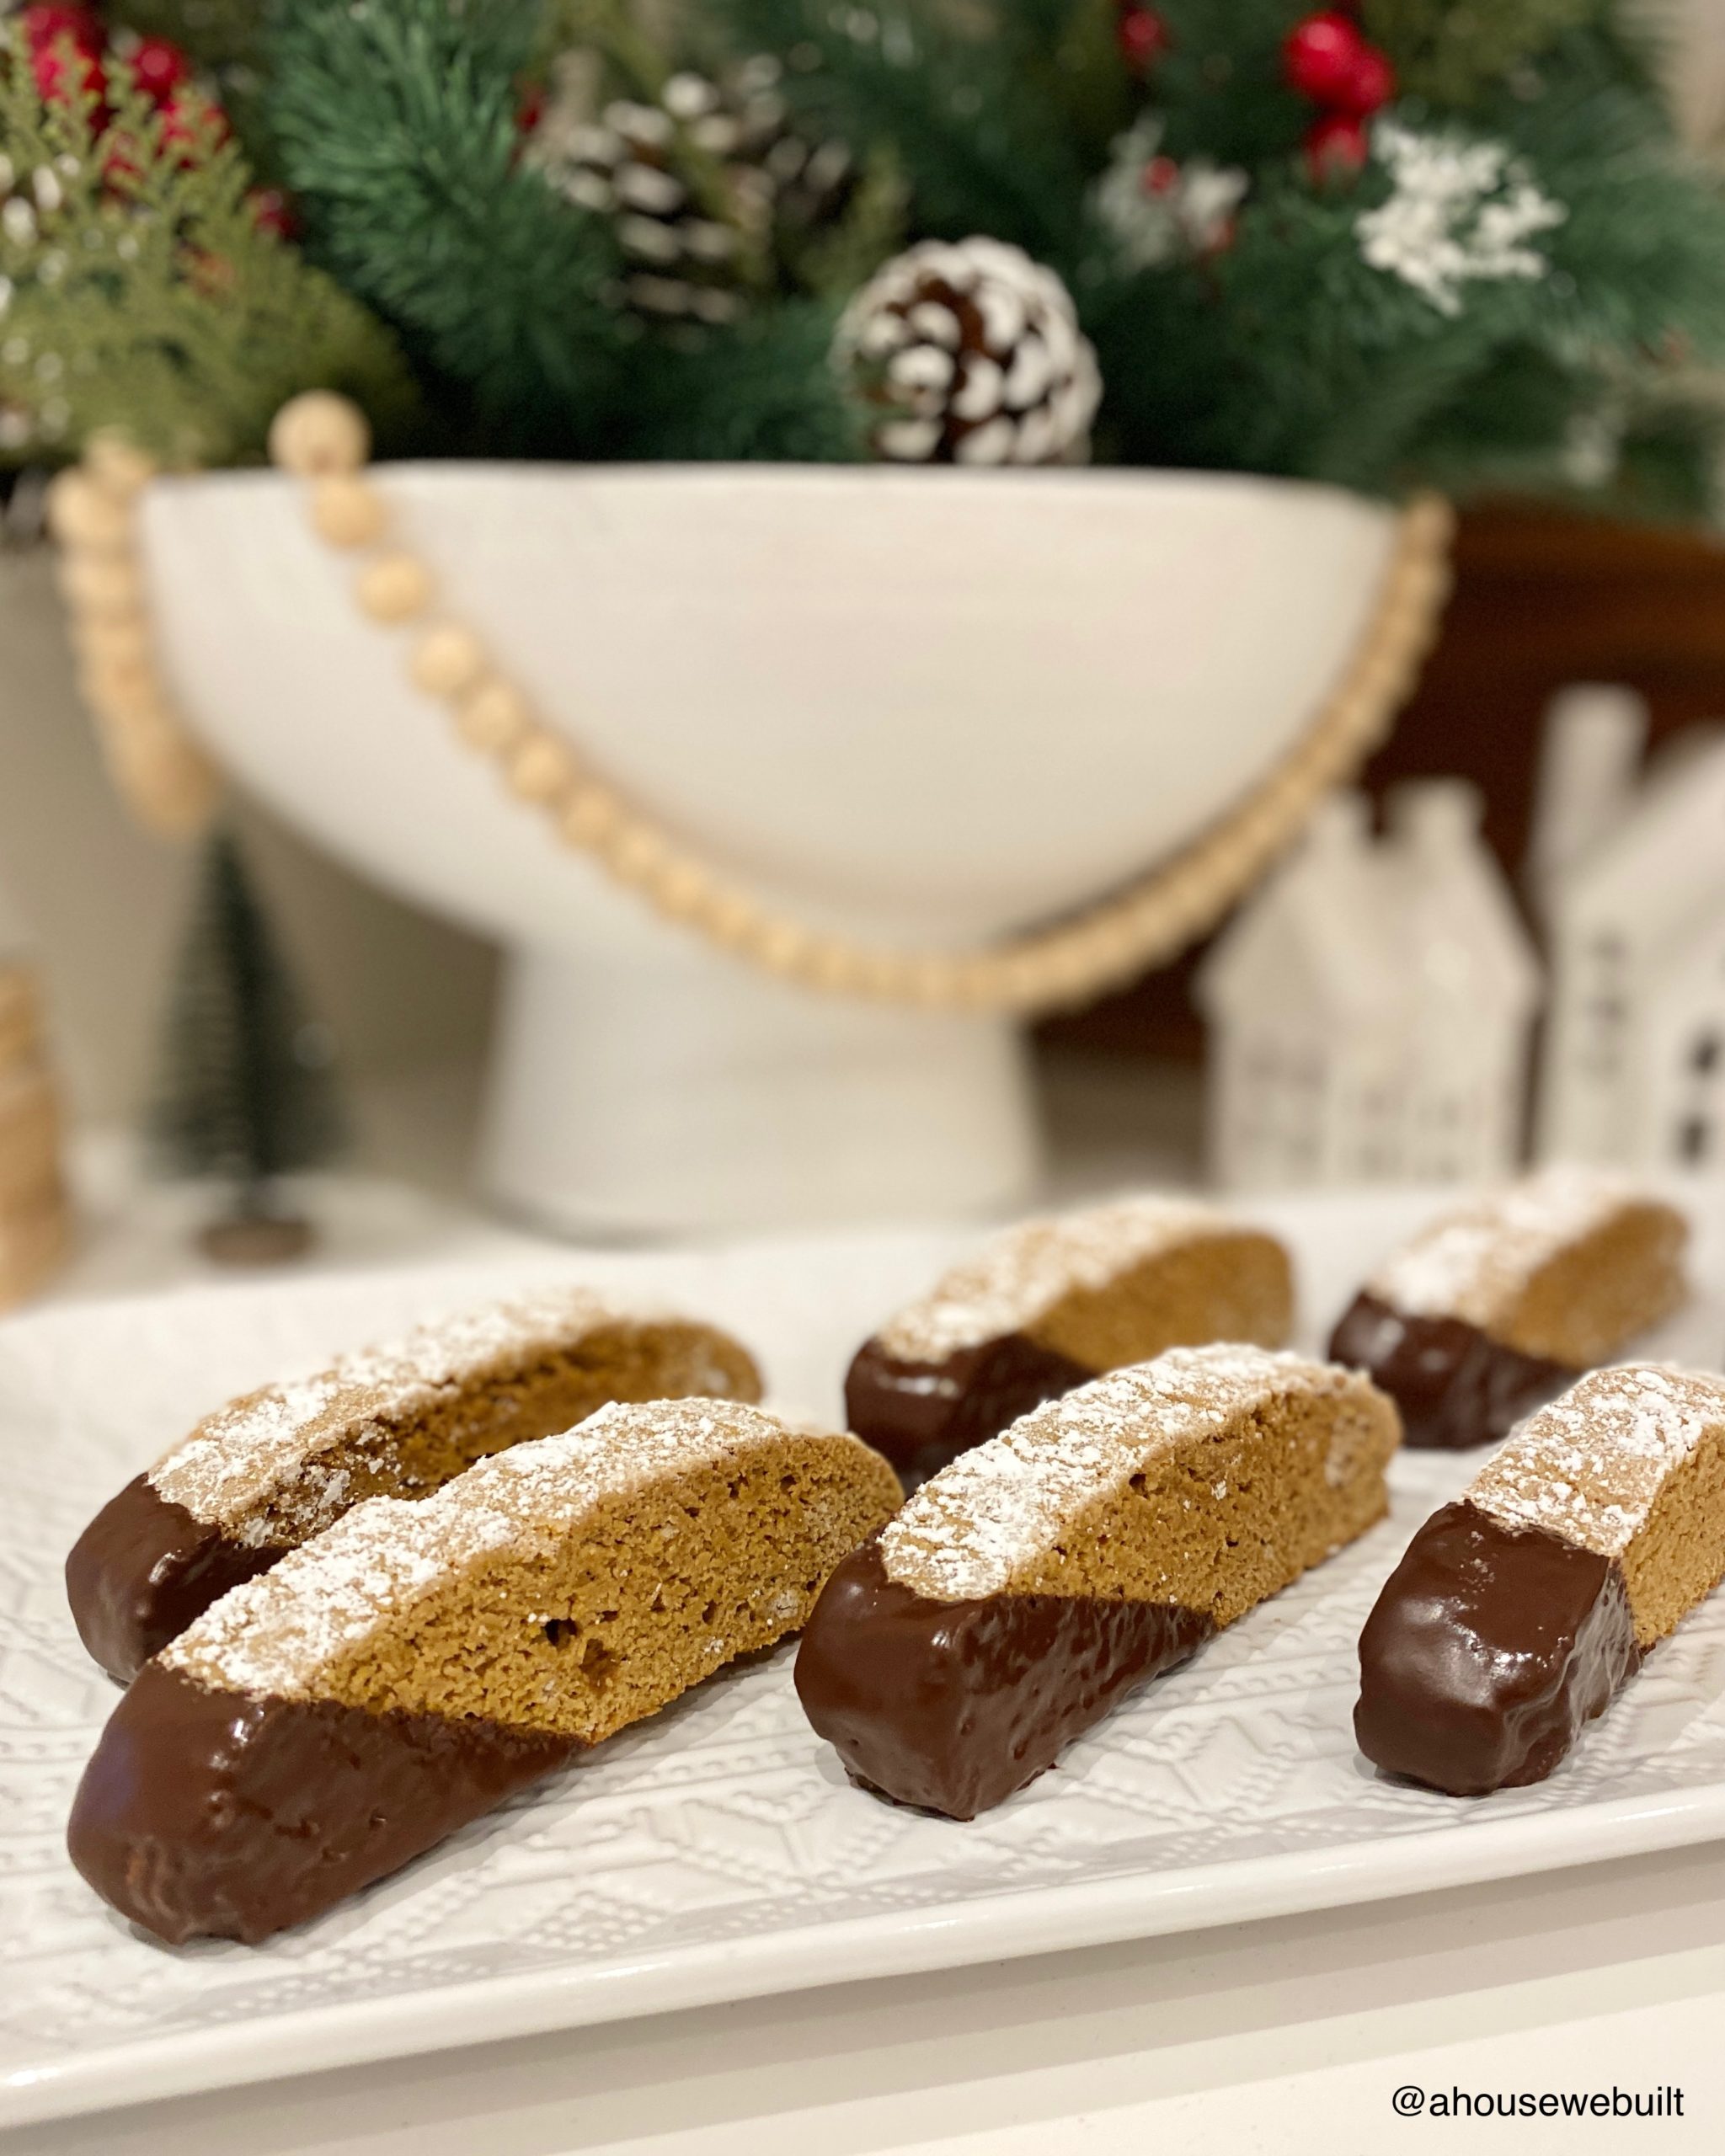
  12. Once the biscotti are fully cool, you can either eat them as they are or take it to the next level and dip them in melted chocolate. To do this, just melt up some chocolate chips with a spoonful of coconut oil in the microwave. I did 30 second increments, stirring in between (about 3 times).
  13. Dip one end of each biscotti in the melted chocolate (or drizzle on top if you prefer).
  14. Allow the chocolate coating to fully cool before serving. (I put my chocolate covered biscotti into the freezer on a flat tray for 5 minutes to make the chocolate set faster.)

And that’s it! It’s really quite easy and they taste delicious! ENJOY 🙂

For all our recipes, click here.
To shop our home pics, click here.
To explore rooms in our house, click here.
Follow us on Instagram to see our daily posts here: @ahousewebuilt.

Filed Under: Recipes

How to Make Paper Stars from Lunch Bags

November 10, 2021 by admin 2 Comments

We made these huge paper stars for Christmas decor out of lunch bags and I’m going to share how to make them in this tutorial! They’re beautiful and pretty easy to make, with a bonus of being recyclable!

MATERIALS:

  • Natural paper bags: Amazon (8-12 bags = 1 star)
  • White paper bags: Amazon
  • Black paper bags: Amazon
  • Craft glue stick: Amazon
  • Heavy duty scissors
  • Stapler

*Note: the way you get different size stars is simple to use different sized lunch bags. The size of your star will always be double the length of the bag you use so to get a 12″ star you need to use 6″ bags etc.

INSTRUCTIONS:

  1. Glue your bags on top of each other. In the pictures above, I’ve indicated where to glue with a marker. Each star will need about 8-12 bags depending the size. Allow the glue to dry fully before moving on. The glue has to hold well for these stars to work.
  2. Cut out your design. I found the cutout design shown in the bottom left pic above worked best but you can get super creative with it. Note that cutting through these is hard work because you have to make it through all the bags so it’s definitely a task for an adult with heavy duty scissors.
  3. Grab the two outer bag pieces and slide them around until they touch, then secure them together with more glue and I found that two staples per star helped hold it in place as it dried (one staple at the outer edge and another as far in as my stapler could reach).

Alternative option: You could pre-cut all the individual paper bags (using the first one you cut as a template for the rest of them) before you glued all the bags together. This would make the cutting easier.

How to hang the stars: I use little command hooks (Amazon) to hang the stars on my walls without causing damage. Just be sure to follow the removal instructions they come with exactly and always test one out somewhere hidden first. I’ve never had any issues removing them though!

For more Christmas posts, click here.
For more DIY tutorials, click here.
To explore our house, click here.

To shop our home pics, click here.
Follow us on Instagram to see our daily posts here: @ahousewebuilt.

Filed Under: Christmas, Tutorials

Neutral Christmas Present Wrapping

November 1, 2021 by admin 2 Comments

Keeping in line with my minimal style, I love Christmas presents that are naturally wrapped with neutral colors, and I know there are lots of different ways to do this, but right now, this is the wrapping method I’m loving most so I thought I’d share all the details on how I created these look because it’s SO easy!

See the bottom of this post for cute gift tag ideas. I drew each one by hand in about 5 seconds and it’s another fun way to DIY personalize gift tags. The trick is don’t overthink it and just go for it!

Wrapping paper:

  • Natural kraft wrapping paper: Amazon | Walmart | Walmart
  • Black kraft wrapping paper: Amazon | Walmart

Gift tags (see bottom of post for my personalizations):

  • Rectangle Gift Tags: Amazon | Walmart
  • Round gift tags: Amazon | Walmart

Labels (print any message you want for a personalized touch):

  • Label maker: Amazon | Walmart | The Container Store
  • Label refills: Amazon (black) | Amazon (multicolor)

Burlap (I like to use this under ribbon or twine as a statement base):

  • Striped burlap 3.5″: Amazon | Walmart
  • Natural burlap ribbon: Amazon | Walmart
  • Black burlap ribbon: Amazon | Walmart

Ribbon (I prefer simply colors and will often reuse the ribbon to prevent waste):

  • Black satin ribbon: Amazon | Michaels
  • White satin ribbon: Amazon | Michaels

For the rest of our mantel decor, click here.
For more Christmas-related posts, click here.
For more of our DIY tutorials, click here.
To explore the other rooms in our house, click here.

To shop our home pics, click here.
Follow us on Instagram to see our daily posts here: @ahousewebuilt.

Filed Under: Christmas

DIY Holiday Art Ideas

October 30, 2021 by admin Leave a Comment

I love filling our home with artwork we’ve made ourselves and the holidays are no different! So this isn’t so much a “tutorial” as it is just sharing an easy idea for a way to add a personalized festive touch to your home at Christmas with materials you probably already have on hand!

For the square gallery wall in our Living Room (left), I drew a bunch of different Christmas trees on white cardstock in pencil then traced over them with a permanent marker to create minimal Scandinavian-style holiday art. For the vintage frames in our Game Room (right), I used black cardstock and a white marker.

  • Gallery wall frames: Crate & Barrel
  • White cardstock: Michaels | Amazon | Walmart
  • Black cardstock: Michaels | Amazon | Walmart
  • White marker: Michaels | Amazon | Walmart

Examples of other DIY art we’ve made for our home:

  • Textured Canvas Art in our Dining Room
  • Wood Block Art in our Basement
  • Painted Canvas Art in our Guest Bedroom

Other easy DIY Christmas tutorials we’ve done:

  • How to Make Paper Stars from Lunch Bags
  • How to Make Paper Christmas Trees
  • How to Make Salt-Dough Ornaments
  • How to Make Modern Wooden Tabletop Trees
  • How to Make a Minimal Wooden Christmas Village

___________________________________
To shop our home pics, click here.
To explore the other rooms in our house, click here.
Follow us on Instagram to see our daily posts here: @ahousewebuilt.

Filed Under: Christmas

How to Paint an Ikea Dresser

October 25, 2021 by admin 8 Comments

Repainting and refinishing an Ikea dresser is an easy project that can really elevate its look! We recently repainted the dresser shown above to this gorgeous deep muted green color and it totally transformed it.

This tutorial is specifically for the Ikea Hemnes line because this is the only line of their furniture I’ve ever repainted so I can’t know for sure if their other lines would have the same repainting process or not. But the reason I like this particular line is that the unit is made from real wood and is quite good quality.

It was so easy to refinish this dresser that I wasn’t planning to make a tutorial and didn’t take pics along the way, but I’ve been asked for the process so I’m going to share that here along with my tips and tricks.

WHAT YOU’LL NEED:

  • Sandpaper (one sheet): Home Depot | Amazon
  • Paint (half a quart): I used SW Ripe Olive in Satin *
  • Clear top coat (half a quart): Home Depot (matte) | Amazon (satin)
  • Microfiber roller (x2): Home Depot | Amazon
  • Paint tray (x1): Home Depot | Amazon
  • Chip brushes: Home Depot | Amazon
  • Ikea Hemnes dresser

*Paint note: I just used normal wall paint. Btw, Satin & Pearl are the same.

STEP ONE: ASSEMBLE THE UNIT

You want your dresser fully assembled (minus the knobs) before you start painting it. Build the frame and drawers, but don’t install the drawers. Lay them out somewhere to paint with the drawer fronts facing up.

STEP TWO: SANDING

The only parts of the dresser you need to paint are the body/frame (meaning: top, both sides, front, and feet) and drawer fronts, so those are also the only parts you’ll need to sand.

Using a 120 grit paper, just lightly sand over every surface you’ll be painting by hand. Don’t use an electric sander, don’t press too hard, don’t over-sand. The idea is just to lightly rough up the surface so that it’s more accepting of the paint. The whole process of sanding should take like 5-10 mins tops.

STEP THREE: PAINTING

In total, you’ll want to do 2 coats of paint, allowing at least a few hours between coats for drying.

I used a brush for the edges and corners, and a small microfiber roller for the flat surfaces. (Side note: I always use disposable paint brushes. I have a fancy paint brush but I honestly hate cleaning it so I prefer to use chip brushes. They’re a little harder to work with though if you’re new to painting so you might want to work with a better quality brush if you’re not yet as practiced with getting a smooth paint surface.)

You want to work on one surface at a time – meaning you should paint the edges and corners first, then immediately roller that flat surface. The goal is to use your brush to get into all the places that the roller can’t go, but the microfiber roller is what’s going to give you that lovely smooth finish so you want to paint as much as possible with the roller. Sometimes that means painting with the brush first to get the paint into the edges/corners, then going over it with the roller for that nice smooth texture. So don’t do aaaaaall your edging first, then aaaaaall your rollering next because it’ll dry as you work and instead you want your brush strokes and roller lines to meld into each other on each surface to create a perfectly smooth finish.

The goal of painting any cabinetry is to get the smoothest surface you can. A few tips:

  • Lightly feather all your brush strokes
  • Don’t use too much paint, you can always add more
  • Watch for drips and feather them out immediately
  • Always paint in the same direction with long even light brush/roller strokes
  • Aim for no streaks and even coverage

If there’s a side of your dresser that is going to be less visible, I recommend starting with painting that side since you can learn a bit on it and perfect your technique before moving to the more visible sides.

Paint the top surface last as it’s the hardest part to get perfectly smooth and painting the other smaller surfaces and getting them smooth will help you get the hang of the process.

After the first coat has dried, run your hand over the surfaces. If it feels smooth to the touch, you can do your second coat of paint without sanding. If it feels (or looks) rough, then consider doing a light sanding in between coats. Just use the same sandpaper as before, super light sand by hand over everything.

After the second coat, allow to dry overnight before moving forward.

STEP FOUR: TOP COAT

Technically, this is optional. You don’t “have” to top coat your dresser. I’ve built lots of cabinetry that I never top coated so it’s not something you’ll always need to do. However, I wanted this dresser to be easily wipeable and more hardy to bumps and scratches so I decided to top coat the whole thing.

The reason I top coated the entire dresser (instead of just the top surface for example) was to ensure an even finish over the whole unit, especially since my paint was Satin, but my top coat was Matte.

Top coats come in many different finishes, my preference is this triple thick matte one: Home Depot.

I always apply top coat with disposable paint brushes only. Same as with painting, I do one surface at a time in full and try to work fast so that I can get each surface fully covered before it starts to dry because you really want an even coating. (Note: it sometimes go on cloudy, but will dry clear.)

The hardest part will be the top of the dresser because it’s single biggest surface and you need to get an even coating on the whole thing. Once you’ve covered the whole thing, you should be able to lightly run your brush over your work, feathering your brush strokes into each other and ensuring it’s perfectly covered. Watch for drips along the sides too!

Allow this to dry overnight at least.

Next you can choose to either lightly sand and do another top coat, or just leave it. I chose to do a sand & second coat.

STEP FIVE: HARDWARE

If you’ve come this far, I suggest swapping out the hardware (knobs) for something unique and personal. There’s nothing wrong with the hardware this dresser comes with (in fact, they’re quite good quality) but I just think that hardware is kind of like jewelry and it’s a great and fun way to personalize your dresser.

A few styles/colors I love:

  • Black knobs: Amazon | CB2
  • Wood knobs: Amazon
  • Gold knobs: Amazon | CB2
  • Hex knobs: Amazon | CB2
  • Leather knobs: Amazon | CB2
  • Marble knobs: CB2 | CB2

Tip: If your hardware comes with screws that are too long, just add a few small washers on the screw from the inside of the drawer to take up the extra space without being seen. I needed 2 washers/knob.

SIMILAR DRESSER OPTIONS

If you like this look but are not into DIY, I found a few dresser options in a similar muted green color like the one I chose for this project: Crate & Barrel| Crate & Barrel | Crate & Barrel

STENCIL SOURCE & TUTORIAL

  • Stencil source: Amazon | Walmart
  • Stencil tutorial: How to Stencil a Wall

OTHER SOURCES FROM THIS ROOM

  • Blanket ladder: West Elm | Macy’s
  • Wire basket: H&M Home
  • Tall vase: Crate & Barrel
  • Dried stems: Crate & Barrel
  • Chevron vase: Crate & Barrel
  • Tan vase with hole: H&M Home
  • Chair: Wayfair | Similar: World Market
  • White wall paint color: BM Simply White
  • Gray wall paint color: BM Classic Gray

 
For more of our DIY tutorials, click here.
To explore the other rooms in our house, click here.

Filed Under: Tutorials

Fall & Halloween Decor 2021

September 25, 2021 by admin 2 Comments

HALLOWEEN DECOR:

  • Bats: Amazon | Amazon *See note below
  • Black birds: Amazon | Amazon
  • Skeletons: Michaels | Michaels
  • Pumpkins: Pottery Barn | Crate & Barrel
  • Branches (similar): Crate & Barrel
  • Gauze: Amazon
  • Witch hats: Amazon

Left pic is my home office room. Middle is our basement. Right is our primary bedroom.

Note about the bats: I use rolled up scotch tape to stick them to my walls instead of the sticky backing they come with. In my experience, the scotch tape easily comes off without damaging the paint.

FALL DECOR:

Living room:

  • Curvy vase (left side): H&M Home
  • Sculptural piece (left side): H&M Home
  • Cream florals (left side): Michaels
  • Dark thistle florals (left side): Michaels
  • Geometric vase (right side): H&M Home
  • Wood pedestal (right side): McGee & Co
  • Faux pampas grass (right side): CB2
  • Mudcloth pillows: H&M Home
  • Pillows in basket: H&M Home | Similar: Anthropologie

Dining room:

  • Tall feathery stems: CB2
  • Black planter: Target | Similar: Crate & Barrel
  • Circular vase: Crate & Barrel
  • Chevron vase: Crate & Barrel
  • Tall linear vase: Crate & Barrel
  • Natural dried stems: Crate & Barrel
  • Fall stems (in circular vase): Michaels
  • Stone candle holders: Crate & Barrel
  • Wood links: Bloomist

To shop our home pics, click here.
To explore rooms in our house, click here.
Follow us on Instagram to see our daily posts here: @ahousewebuilt.

Filed Under: Past Decor

Homemade Bread Recipe

September 17, 2021 by admin Leave a Comment

We make homemade bread almost every week around here and I thought I’d share our recipe! I say “our” rather loosely here because this is my husband’s recipe. He makes it himself and I just enjoy the results!

This bread basically tastes like a hearty white country bread. It has amazing texture and chew – it’s not too light and not too heavy, and is great fresh or toasted. You can also add seeds for extra healthiness!

Ingredients:

  • 6 1/2 cups (1000g) bread flour or all-purpose flour, sifted
  • 2 3/4 cups water, warm (~110F)
  • 1 tbsp active dry yeast
  • 1 tbsp salt
  • Optional: 1/2 cup ground flax seeds and/or 1/2 cup roasted sunflower seeds

Tools:

  • Stand mixer: Crate & Barrel
  • Dutch oven: Crate & Barrel | Amazon

How to make the dough:

  1. Sift flour and add to mixer bowl. Sprinkle in the salt. (If you’re doing the option with the extra seeds, add them in now with flour.)
  2. Warm the water in the microwave and then stir in the yeast, vigorously! Wait till the yeast forms a foamy layer on top.
  3. Slowly pour in the yeast-water while mixing on low until fully incorporated.
  4. Blast mixer at medium/high for a few minutes to develop gluten. Dough should again be smooth and stretchy and only slightly sticky. You should only handle it with slightly wet hands and it should not stick to them very much. If it is sticky, add a little flour (1 tbsp at a time) until you’re able to handle it without sticking. If it is too dry and there’s flour sitting at the bottom of the bowl that isn’t incorporating, then add a little water (1/2 tsp at a time). Everyone’s flour will be a little different so you have to adapt a little depending on your flour.
  5. Cover dough and let rise for ~2 hours at room temperature – until at least doubled in size.
  6. Uncover the dough and gently fold it over itself a few times, bringing it down in volume. BE GENTLE! Use water on your hands if sticky, not flour.
  7. Cut the dough in half – forming two smaller doughs, each of which will become one loaf as per the instructions below.
  8. Re-cover doughs and store in the fridge. You have two choices at this point:
    A) Let dough sit in fridge overnight, or even for several days. This builds sourdough flavors.
    B) Remove from fridge after ~2 hours, when the dough has again roughly doubled in size.
    Either way, when you take a dough out of the fridge, it will be time to start the baking process.

How to bake the bread:

  1. Remove dough from fridge.
  2. Gently transfer dough to an oiled mixing bowl and gently coax it into a loaf-ish shape, folding a few more times if you think your dough can handle it. Cover dough and allow it to warm to room temperature (should take around 2 hours). Dough should rise a bit more during this time. You know it’s done when the loaf is approximately the size of a loaf of bread and jiggles when you wiggle it. In terms of time, around two hours. You can float the bowl with the dough in a larger bowl with warm water to speed it up if you’re short on time.
  3. While you wait, preheat oven to 450 convection bake with a dutch oven inside.
  4. When the oven is ready and the dough is room temperature, oil the dutch oven and GENTLY transfer dough to it. Slash the top of the loaf with a razor, mist it with water if you are feeling fancy, then cover the dutch oven, and bake in oven for 15 min.
  5. Remove cover from dutch oven and cook for 15 minutes more to brown the top of the loaf.
  6. When the 15 mins are up and the loaf is a nice golden-brown, remove dutch oven from oven, remove loaf from dutch oven, and allow loaf to cool on wire rack for ~45 minutes.
  7. Eat loaf.

Kitchen sources from the pic above:

  • Drawer pulls (long): Amazon
  • Drawer pulls (short): Amazon
  • Knobs: CB2
  • Wreath (similar): CB2
  • Cabinetry: custom made, color BM Simply White
  • Backsplash: wood-look tile
  • Counters: white quartz

For all our recipes, click here.
To shop our home pics, click here.
To explore rooms in our house, click here.
Follow us on Instagram to see our daily posts here: @ahousewebuilt.

Filed Under: Recipes

Pumpkin Loaf Recipe

September 5, 2021 by admin Leave a Comment

This is a quick, easy, and delicious loaf recipe for when you’re craving all things cinnamon spice, pumpkin, and fall, but you don’t have a lot of time to bake. Prep only takes about 5 minutes and doesn’t require any fancy equipment, then it just bakes til done! Also, it makes your home smell AH-MAZING!!!

Note: I literally just mix the ingredients in a bowl with a fork so you don’t need to use a mixer!

  1. Preheat oven to 350 convection bake.
  2. Mix all your dry ingredients together in a bowl:
    – 1 3/4 cup flour
    – 1 tsp baking soda
    – 1 tsp salt
    – 2 tsp cinnamon
    – 1/2 tsp nutmeg
    – 1/2 tsp ginger
    – 1/4 tsp cloves
  3. Mix all your wet ingredients together in another bowl:
    – 2 eggs
    – 1/4 cup milk
    – 1/3 cup white sugar *
    – 1/3 cup brown sugar *
    – 1/2 cup oil or melted butter
    – 1 1/2 cup canned pumpkin

    Note about the sugar: I generally put a bit less sugar than average in my loaves because I don’t like them too sweet. You can increase sugars to 1/2 cup each if you prefer. I’ve done it both ways.
  4. Combine wet and dry ingredients together and mix. Then add extras:
    – Option: 1 cup raisins
    – Option: 1 cup chocolate chips
    – Option: 1 cup crushed walnuts
  5. Transfer to a greased glass loaf pan.
  6. Bake at 350 for 60 minutes (until the poke test comes out clean).
  7. Allow the loaf to cool for an hour before cutting into it.
  8. Topping options if you want to fancy it up a notch:
    Option 1: drizzle a thick glaze of powdered sugar & milk over the top
    Option 2: drizzle some melted chocolate (a mix of white/dark would be pretty)
    Option 3: brush the top with oil/melted butter while still warm and coat the top with cinnamon sugar
    Option 4: simple icing also always works

Sources:

  • White pedestal bowl: CB2 | Similar: Pottery Barn
  • White flower stems: Amazon
  • White pumpkin: Michaels
  • Coasters (similar, same source): Crate & Barrel
  • Loaf pan: Amazon
  • Log serving platter (similar): Amazon

For all our recipes, click here.
To shop our home pics, click here.
To explore rooms in our house, click here.
Follow us on Instagram to see our daily posts here: @ahousewebuilt.

Filed Under: Recipes

Summer Decor 2021

August 21, 2021 by admin Leave a Comment

Please note: the items listed are only the specific summer decor items (that are no longer displayed in those rooms). Anything not listed here means that it is still currently in use in that room and you can visit each dedicated room sources page for those current sources.

Living Room:

  • White vase (left side): Crate & Barrel
  • White flowers (left side): Michaels
  • Greenery (left side): Crate & Barrel
  • Wood vases: McGee & Co | Similar: Wayfair
  • Tall vase (right side): Crate & Barrel (newer version of mine)
  • Palm greenery (right side): Michaels
  • More Living Room Sources

Basement Bathroom:

  • Palm stem (similar): Michaels | Michaels
  • Fiscus stem: Michaels
  • More Basement Bathroom Sources

Entryway:

  • Metal vases: Crate & Barrel (lg) | Crate & Barrel (med)
  • Faux pampas grass: CB2
  • More Entryway Sources

To shop our home pics, click here.
To explore rooms in our house, click here.
Follow us on Instagram to see our daily posts here: @ahousewebuilt.

Filed Under: Past Decor

How to Build a Window Seat

April 3, 2021 by admin Leave a Comment

 
We built this window seat in our primary bedroom from scratch and I’m going to share how we did it here. This is intended to provide general information on how we designed and built this part of our home. I’ve included all relevant sources throughout the post and there’s also a sources recap at the bottom.

This vaulted window wall opposite our bed had been on my mind ever since we first designed our home and I’d been running over possibilities for what to do with this space and I had SO many different ideas that I loved but it wasn’t until I came up with this window seat design that I had my “AHAH!!! moment” and just knew this was what we should do. So, it all started with a little sketch I drew one night…

… which I then then developed into a digital sketch (see below) of my idea to create a long window seat bench with a row of wide/deep drawers underneath it for linen storage. While we have created many storage spaces around our home, we actually did not have a specific place in our bedroom for extra pillows, sheets, etc and from a practical perspective this storage would help our home organization.

On the two sides of the window seat would be two larger cabinets with shelving inside. We also planned to frame out our window with the same wide boards as we use for our baseboard to give it a bold frame almost as though it were wall art. Then, we would add board and batten trim all the way up to the ceiling as a finishing touch. Finally, we planned to paint everything white on white on white (walls, cabinets, trim, window seat) with bold matte black hardware and window accents, and neutrally patterned throw pillows.

Paint color: BM Simply White in matte

So the first step to building this window seat project was to create the under-frame (left pic below). We made this out of 2x8s so that the cabinetry would be raised to the same height as our baseboards.

Next, we built the frames of the two taller side cabinets on either side of the window seat out of 3/4″ MDF. We laid them face down on the floor so that the front pieces would be perfectly flush.

We cut all the cabinet and drawer MDF (not including trim) with a light-weight worm drive circular saw.

Circular saw: Home Depot | Amazon
Brad nailer: Home Depot | Amazon
2x8x8 boards: Home Depot
3/4″ MDF panel: Home Depot

We made an important consideration regarding airflow in our design because we had two floor vents located underneath the two side cabinets and air circulation is very important in our home (since we have a whole-house particulate filter always running to help with cat allergies), so we needed to to incorporate the vents into our cabinets without restricting airflow. We accomplished this in two ways:

First, we created two front-facing vents underneath the side cabinets in the 2×8 frame. But we didn’t stop there. We also built in hidden air ducts in both the side cabinets and later on we used a 1.5″ drill bit to drill holes on the top of the cabinets to allow the air to also flow upward while being aesthetically pretty.

In the left-side cabinet, we brought the back of the cabinet forward by 6″ (see the middle pic above) to allow the air to flow up from the vent behind the cabinet and out the top. In the right-side cabinet, we boxed it in on the side instead of the back. I should note that we built the right-side duct incorrectly at first and then had to move it backwards 4″ because I totally forgot to allow room to hang the door hinges. Oops. You can see it incorrect in the left pic below, but then fixed in the middle pic below.

Once our side cabinet frames were built, we built the drawer frames. Since our window seat was longer than 8-ft, we built them in two sections: a 3-box unit and a 2-box unit. We used 3/4″ MDF for the top and bottom pieces and far left/right verticals. Then for the middle verticals, we layered 3 x 1/2″ pieces to create 1 1/2″ widths (3/4″ for each drawer side). So left to right, the 3-box frame went 1 x 3/4″ vertical, 3 x 1/2″ verticals, 3 x 1/2″ verticals, 2 x 1/2″ verticals. Then left to right, the 2-box frame went 1 x 1/2″ vertical (to get sandwiched up to the other box’s 2 x 1/2″ vertical to create one 3 x 1/2″ vertical section that would secure the 3-box and 2-box frames together), 3 x 1/2″ verticals, 1 x 3/4″ vertical on the right.

Finally, we added a 3/4″ cover panel made from two pieces to create the full 8-ft length. For stability, we staggered the joins so for the boxes, the 3-box frame was on the left and the 2-box frame was on the right meaning the join was towards the right side. So for the cover panel, we put the full 8-ft piece on the right and the smaller filler piece on the left so that the join would be over the left side instead.

Brad nailer: Home Depot | Amazon
1/2″ MDF panel: Home Depot
3/4″ MDF panel: Home Depot

Next I started building the drawer fronts and cabinet doors shaker style out of 1/2″ MDF backer panels with 1/4″ MDF trim pieces glued on top to create an overall thickness of 3/4″ for each drawer front/cabinet door. I went with a 3″ wide strip of 1/4″ trim to create all my shaker panels and just ripped the panels down on our table saw (I think you can buy 3″ strips too but it’s much less cost effective).

I have a tutorial here for shaker doors: How to Build Cabinet Doors.

1/2″ MDF panel: Home Depot
1/4″ MDF panel: Home Depot
Table saw: Home Depot | Amazon

To calculate the size of my drawer fronts, I just gave them all 1/8″ clearance on all sides. I cut the 1/2″ MDF backer panels to size first and dry fit them in front of the drawer/cabinet boxes to be sure I’d cut them all accurately before moving forward to the shaker trim. It’s easiest to fix the sizing now if needed.

Regarding the trim pieces for the X-detailing on the drawer fronts… I’ll be honest, we’ve built a lot of things at this point, but calculating angles still makes my head spin so I’m not even going to explain how I did it but it basically just involved wayyyyyy more math than I like to do in my day-to-day life.

I also built the 4 tall cabinet doors at the same time but didn’t really take pictures of it because they’re pretty basic shaker panels: 1/2″ MDF backer with 1/4″ MDF trim around all 4 sides in 3″ widths.

I cut everything for all the doors/drawer front before assembling and dry fit them all to make sure that each door/front’s trim pieces fit, then I labeled all the pieces so that I knew which ones went together.

To assemble the drawer fronts and doors, I used construction adhesive to glue the trim onto the backer panels and I literally just used cans from our pantry to weight down every join (so one can over each join) overnight so that everything would dry flat. I did this right in the middle of our living room floor and find this “can-weight” method is much easier than clamping everything down in my opinion.

Once all the doors/fronts had dried overnight, I took the cans off them and instead used the cans as “lifts” underneath the doors/fronts to elevate them. Then I wood-fillered all the seams on the fronts and along every side. After the wood filler had dried, I sanded them all down until they were perfectly smooth.

Construction adhesive: Home Depot | Amazon
Wood filler: Home Depot | Amazon
Putty knife: Home Depot | Amazon
Sandpaper: Home Depot

When I was finished making all the doors/fronts, I took them to the window seat and dry-fit them along where they would eventually go juuuuuuuust to make double sure that everything fit perfectly (because sometimes the wood filler can add extra width to the panels if they’re not sanded down all the way).

Next, it was time to paint. I always brush/roller everything. I have a paint sprayer (a pretty nice one too) but for the life of me I cannot summon the willpower or patience to clean it so I always prefer to brush/roller.

The trick to brush/rollering well is to make sure you never let your brush work dry without rollering over top it to smooth out the lines. So I use the brush to get into all the nooks and crannies, but then roller overtop right away to give everything a nice finished edge. So I use the brush and roller in combination with each other at the same time. My preference is always to use microfiber rollers.

Microfiber roller: Home Depot
Roller refills: Home Depot
Paint tray: Home Depot
Paint: BM Simply White in matte

Another paint tip: paint the backs first, but do not paint the edges when you paint the back! Just paint the flat backs of the panels alone. Then, once the backs are dry, flip them over and paint the edges at the same time as when you paint the fronts. That way you will never have any accidental drips on the front.

Around the same time, we also built the drawer boxes out of 1/2″ MDF. They’re pretty basic boxes – literally just 4 sides and a bottom nailed together. I also sealed all the drawer boxes with my favorite matte top coat use everywhere because I wasn’t planning to paint them and I wanted to seal the MDF.

Matte top coat: Amazon | Home Depot

Next, we cut the cover panels for the two side cabinets and attached them 3/4″ proud of the cabinet frames to allow for the cabinet doors (which are 3/4″) to be flush with the cover panels. We also cut the trim pieces for between the cabinets and the walls. Then I wood filler and sanded all the seams.

Finally, this was when we drilled the holes for the vents on top of the cabinets – because the holes are really only in the cover panels. I just laid the holes out in an even pattern.

I caulked where needed and then painted all the cabinet frames with a brush/roller. Painting is pretty self-explanatory so I won’t go into much detail. I did 2-3 coats everywhere and lightly sanded the final coat.

Paint: BM Simply White in matte

Side note: we built the shelving in this cabinet to exactly fit our various bedroom throw pillows 😀

Next, we pre-drilled the holes for the drawer hardware. I like to pre-drill for hardware before installing the drawers, but do all the door hardware after installing the doors.

Drawer hardware: Amazon

There’s a step here I didn’t photograph because… well, it was late and I was tired and just forgot. But next we attached the drawer slides and installed the drawer boxes. Then, we attached the drawer fronts to our newly-installed drawer boxes. And finally we attached the hardware. VERY exciting moment!

Drawer slides: Home Depot | Amazon

Door installation was next. We use this awesome door hinge drilling jig from Kreg Jig which makes door installation pretty easy. Still… SO much math, but it definitely makes it doable!

Kreg Jig hinge jig: Home Depot | Amazon
Power drill: Home Depot | Amazon
Hinges: Home Depot | Amazon
Door hardware: Amazon

Basically, first you drill the holes for the hinges, then you attach one side of the hinge to the door, and the other to the cabinet. Then you attach both hinge sides to each other. Measure thrice, drill once!

Confession: I actually miscalculated the middle drawer handle (I seriously have no idea how – I must have just been sleep-deprived) so I had to uninstall it, fill the holes in, re-drill and re-attach the handle. Even up close you literally can’t tell but I feel like it’s a good reminder that everybody makes mistakes and that’s ok.

Then we installed the door hardware and sat back to admire our work!

At this time, we also framed out our window (see the 3 pics above) out of 1×8 MDF with mitered corners. I set the trim 1/8″ back from the window box to create a little detail and really love how it turned out.

1×8 MDF trim: Home Depot
Miter saw: Home Depot | Amazon

Around our home, most of our windows have drywall returns but the few that have shiplap around them also have this 1/8″ setback so we wanted this one to have the same feeling. Our window was longer than the trim pieces I had on hand, so you’ll notice I had to splice some pieces together at the corners. But by the time I wood-fillered, sanded, and painted the trim, you’d never know just by looking at it.

One of our rescue kitties and Lead Project Snoopervisor, Chai, came to inspect our progress on his new nap spot. He gave everything a thorough sniff-down and also tested our drawers. He was very thorough.

Next, I decided to build a “curb” at the edge of the window seat because I just felt it needed an extra piece of trim to really give it a finished look, and I also wanted a sort of lip that the window seat cushion would sit “in” to prevent it from sliding forward. So I used my table saw to rip down a piece of wood into two strips: a 1/4″ x 3/4″ strip that I attached to the face, and a 1″ x 3/4″ strip that I attached on top of that. Then I wood-fillered, sanded, and painted it. It basically looked like one fancy trim piece in the end.

Board & batten time!

Doing B&B on an angled ceiling involved more angle math (*sobs quietly*) but here’s how I did it: First, I attached the two ceiling trim pieces – fully glued and nailed in. Then I cut short test pieces of trim to move around until I found a spacing I was happy with. Then I started with the middle two pieces and worked my way outward from there. I cut as I went instead of trying to calculate everything all at once. The good thing is that since my vertical trim pattern was an exact mirror image on the left and right sides, each pieces on the left + right sides was exactly the same length as the one on the opposite side (just reversed).

As I cut my pieces, I would dry-fit them into place and once they were good, I used painter’s tape to secure them into place but did not glue or nail them!!! This allowed me to dry-fit the entire wall all at once and be positive I was happy with every board placement before officially attaching them. When I was done cutting and happy with the positioning, I took them down one by one and glued/nailed them.

1×3 MDF trim (for B&B): Home Depot
Miter saw: Home Depot | Amazon
Paneling adhesive: Home Depot | Amazon
Brad nailer: Home Depot | Amazon

Once my B&B trim was installed, I used wood filler between any joins, and caulked every single seam between trim + drywall. Then I painted it all and… all the “major construction” parts of this project were DONE!!!! Chai, our previously mentioned Lead Project Snoopervisor, came in to inspect our work.

Caulk: Home Depot | Amazon

It’s so much fun to see a design that I literally sketched out on a pad of paper come to life!!

Next up: window seat cushion. We made this one using the same technique as the window seat in my home office room that my dad built. Here’s our tutorial for: How to Build a Window Seat Cushion

First, we used steel brackets to attach two pieces of MDF together since our bench is longer than 8-ft.

The cushion itself has 4 layers: a 1/2″ MDF base, then several inches of high-density foam, and a cover layer of dacron to round out the edges that create the cushion, then a separate fabric layer on top.

We built it upside down so first we laid the dacron on the floor, then placed the HD foam over it, then the MDF. Then carefully folded the dacron over the edges, making sure to pull it firmly to remove any wrinkles and stapled it to the MDF. The order to staple is: first, start with the two short sides, then do the two long sides, then finish with the corners. Next, lay your fabric on the floor with the “nice” side face down, and place your dacron/foam/MDF cushion face down on top of it and repeat same the process of stapling the fabric to the MDF (in the same order as you did with the dacron around the cushion).

1/2″ MDF panel: Home Depot
High-density foam (similar): Amazon
Dacron (similar): Amazon
Heavy duty stapler: Home Depot

Finally, I added in a some fun accent throw pillows to complete this space! I’ve sourced as much as possible below and also found lots of similar available options as well.

Natural rectangle pillow: H&M Home | Similar: Urban Outfitters | Wayfair | Wayfair
Patterned square pillows (similar): Wayfair | Anthropologie | Wayfair | H&M Home
Gray rectangle pillow (similar): McGee & Co | Urban Outfitters

Btw, if you’re wondering why our white paint color varies so much from picture to picture, it’s because I took these pictures at all different times of day over several weeks – some pictures were taken on sunny days, rainy days, morning, evening, some with natural light only, some with interior light… so all the different whites you see in the pics is a great example of how much range this paint color has. The final set of pictures above were taken with natural lighting only on a cloudy overcast day (almost no sun).

The color is BM Simply White and here’s a recap of all paint colors in our house.

Sources recap:

Raw materials sources:

  • 3/4″ MDF panel: Home Depot
  • 1/2″ MDF panel: Home Depot
  • 1/4″ MDF panel: Home Depot
  • 1×8 MDF trim: Home Depot
  • 1×3 MDF trim: Home Depot
  • 2×8 wood boards: Home Depot
  • High-density foam (similar): Amazon
  • Dacron (similar): Amazon

Construction materials:

  • Wood filler: Home Depot | Amazon
  • Microfiber roller: Home Depot
    Roller refills: Home Depot
  • Matte top coat: Amazon | Home Depot
  • Paneling adhesive: Home Depot | Amazon
  • Construction adhesive: Home Depot | Amazon
  • Caulk: Home Depot | Amazon

Tool sources:

  • Circular saw: Home Depot | Amazon
  • Table saw: Home Depot | Amazon
  • Miter saw: Home Depot | Amazon
  • Brad nailer: Home Depot | Amazon
    2x8x8 boards: Home Depot
  • Kreg Jig hinge jig: Home Depot | Amazon
  • Power drill: Home Depot | Amazon
  • Heavy duty stapler: Home Depot

Hardware sources:

  • Cabinet hardware: Amazon
  • Cabinet hinges: Home Depot | Amazon
  • Drawer hardware: Amazon
  • Drawer slides: Home Depot | Amazon

Pillow sources:

  • Natural rectangle pillow: H&M Home | Similar: Urban Outfitters | Wayfair | Wayfair
  • Patterned square pillows (similar): Wayfair | Anthropologie | Wayfair | H&M Home
  • Gray rectangle pillow (similar): McGee & Co | Urban Outfitters


For more of our tutorials, click here.
To explore the other rooms in our house, click here.
For our daily progress, follow us on Instagram @ahousewebuilt.

Filed Under: Tutorials

How to Build a Slat Sideboard

March 4, 2021 by admin 2 Comments

We built this slat sideboard for our basement foyer and I’m going to share how we made it in this tutorial! The doors of our sideboard were inspired by this Crate & Barrel sideboard and this Overstock console. However, they were the wrong size for our space (one was too big, the other was too small) and both weren’t quite the style we wanted, so we decided to build one that was the right size/style for our home.

Our sideboard is 60″ long x 15 3/4″ wide x 33 1/4″ tall with 8″ mid-century modern legs. The body is made from painted MDF and our slat cabinet doors are made from stained wood over MDF panels.

RAW MATERIALS NEEDED:

  • 4 x 8″ cabinet legs: Amazon
  • 2 x 5/8″x4’x8′ MDF: Home Depot (for the cabinet body – note that you can alternatively use 3/4″ MDF for this part, but you’ll need to just adjust the measurements accordingly as a result)
  • 1 x 1/2″x4’x8′ MDF: Home Depot (for the backer panel and door panels)
  • 7 x 1x2x8 boards: Home Depot (what I used for the slats)
  • ALTERNATIVE A | 11-12 x 1/4″x2’x4′ boards: Home Depot (flatter slat option)
  • ALTERNATIVE B | 11-12 x 1/2″x2’x4′ boards: Home Depot (medium slat option)
  • 4 x inset hinges suitable for the thickness of your doors: see note below

VERY IMPORTANT NOTE REGARDING HINGES! Seriously, do not go forward with this project before choosing your door thickness carefully. I ended up having to go to a specialty cabinet supply place to get fancy non-standard hinges for extra thick doors because I didn’t consider this before starting. Oops!

My door panels are 1 1/4″ thick (3/4″ from the 1x2s on 1/2″ MDF). If you’re unable to find the hinges for a 1 1/4″ door or just don’t want to go on a wild hinge chase, I suggest one of these alternatives:
A) use 1/4″x2″ strips (Home Depot) on 1/2″ MDF to create a 3/4″ door with these hinges (Amazon).
B) use 1/2″x2″ strips (Home Depot) on 1/2″ MDF to create a 1″ door with these hinges (Amazon).

CONSTRUCTION MATERIALS NEEDED:

  • Wood filler: Home Depot (and putty knife)
  • Construction adhesive: Home Depot (and caulk gun)
  • Painter’s tape: Home Depot | Amazon

PAINTS/STAINS NEEDED:

  • Black paint: I used BM Black Panther (matte)
  • Stain: I used Special Walnut (Home Depot)
  • Matte top coat: Amazon | Home Depot

TOOLS NEEDED:

  • Miter saw: Home Depot | Amazon (to cut the slats)
  • Table saw: Home Depot | Amazon (to cut the MDF)
  • Nailer: Home Depot | Amazon (and 1″ and 2″ nails)
  • Hinge Jig: Home Depot | Amazon (to prep doors to receive hinges)
  • Measuring tape: Home Depot | Amazon
  • Carpenter’s square: Home Depot | Amazon
  • Chip brush: Home Depot (disposable brush for the top coat)
  • Microfiber roller: Home Depot (and paint tray)
  • Sandpaper: Home Depot

DESIGN:

INSTRUCTIONS:

BODY | The body or frame or shell of this sideboard is created from 8 pieces of MDF – essentially 2 rectangles inside each other or doubled up. If you have access to thicker MDF (1″ or 1.5″ thickness) then you could use this instead but I was working with 5/8″ MDF and I wanted a thicker shell than that so I decided to double it up to create a shell that was 1 1/4″ thick (which is 5/8″ x 2). Here’s how to make it:

  1. Cut your 5/8″ MDF to size for the box. You will need:
    – 2 pieces 15 3/4″ x 60″ (outer box, top/bottom)
    – 2 pieces 15 3/4″ x 24″ (outer box, left/right sides)
    – 2 pieces 15 3/4″ x 58 3/4″ (inner box, top/bottom)
    – 2 pieces 15 3/4″ x 22 3/4″ (inner box, left/right sides)
  2. Cut your 1/2″ MDF to size for the backer panel. You will need:
    – 1 piece 22 3/4″ x 57 1/2″
  3. Create the outer box as per my design template. Use constriction adhesive and 1″ brad nails to attach the MDF and make sure your box is square using a carpenter’s square as a guide.
  4. Create the inner box inside the outer box as per my design template. We started with the long sides, then did the short sides. Use construction adhesive across the whole panel to laminate the inner and outer boxes together and nail it (1″ nails) from the inside so the holes don’t show from the outside. Use clamps if necessary to hold the sides together (we only needed them in one spot).
  5. Attach the backer panel inside your box with construction adhesive and 2″ nails.
  6. Allow the box to dry overnight.
  7. Wood filler in all the seams between board and nail holes.
  8. Allow to fully dry, then sand all the wood filler smooth.
  9. Paint the box black. I also ran a line of painters tape inside the box 2 1/2″ in from the edge and painted that too because the doors will be inset 1/8″ and they’re quite thick so I wanted to create a nice clean line where the paint ended. You could also paint the entire interior if you choose.
  10. Allow to fully dry, then as an optional final step, I (matte) top coated the top only since our cats are probably going to jump all over this and that will make the finish more durable.
  11. Attach the legs to the bottom of the cabinet wherever looks best to you. Mine are placed at 12″ in from the sides and 2 1/2″ in from the front and back.

DOORS | The doors are two panels of the same size with reversing horizontal and vertical slats. So they’re kind of opposites of each other in many ways. Here are the instructions to create the doors:

  1. Cut your 1/2″ MDF panels to size. You will need:
    – 2 pieces 28 1/2″ x 22 1/2″ (creating 2 door panels with ~ 1/8″ gap on all sides)
  2. Paint the two door panels black on both sides and all edges.
  3. Stain your 1x2x8s and allow them to dry.
  4. Cut your 1x2x8s to size. You will need:
    – 2 pieces 28 1/2″ (Door A horizontals)
    – 10 pieces 19 1/2″ (Door A verticals)
    – 2 pieces 22 1/2″ (Door B horizontals)
    – 8 pieces 25 1/2″ (Door B verticals)
    – use the cutoffs to make 18 small spacer pieces (approx 1-3″ each)
  5. Dry-fit slats over both door panels as per my design template to be sure everything fits.
  6. Glue and nail your slats to the panels. Start with the 4 perimeter pieces, then use the many little cutoff spacer pieces to separate your slats evenly across the whole door panel. Remember, the two doors are opposites of each other so Door A has full-length top/bottom horizontals with verticals in between them, and Door B has full length left/right verticals with horizontals between.
  7. Top coat the slats at the end to seal the stain. I just did the flat surface on top, no sides.
  8. Decide which way you want to hang the doors. There are two options:
  9. Hinges. Attach as per manufacturer’s instructions. We use this Kreg Jig to drill the holes in the doors for the hinges. I recessed my doors 1/8″ into the cabinet.
  10. At the very end, I decided to add a support piece in the middle which doubled as a doorstop and also prevented any sagging. I didn’t think the top would bend, which is why I didn’t do this earlier, but it did sag about 1/16″ so the support piece did help. Mine was 13 3/4″ deep x the full height of the inside of my sideboard. I probably should have done this earlier but hey it all worked out!

And that’s it! Here’s our finished sideboard:

SIMILAR OPTIONS:

If you don’t feel like making one from scratch but you love this look, here are similar options:

  • Similar sideboard (larger than ours): Crate & Barrel
  • Similar sideboard (all black/wood): West Elm
  • Similar consoles (smaller than ours): Overstock | Wayfair
  • Similar coffee table: Wayfair
  • Similar end table: Wayfair

And just for fun, here’s our new sideboard all styled:

Sources:

  • Round mirror (same mirror, multiple sources): Wayfair | Amazon | Home Depot | Urban Outfitters
  • Light fixture: Wayfair | Overstock
  • Geometric vases: West Elm | Similar: West Elm | West Elm
  • Leaf stems: Crate & Barrel
  • Board & batten wall trim: Home Depot
  • Black/natural baskets: West Elm
  • Stone candle holders: Crate & Barrel
  • Large wood links: Bloomist
  • White round vase (similar): CB2 | West Elm | Pottery Barn
  • Gallery wall frames (gold): Amazon | Similar: CB2 | Wayfair
  • Wood art piece (reflected in mirror): Tutorial: How to Make a Wood Block Art Piece
  • Wood spheres (reflected in mirror): McGee & Co
  • Barn doors: Tutorial: How to Build Bypass Barn Doors
  • Shiplap: Tutorial: How to Install Shiplap
  • Stairs: Tutorial: How to Stain & Paint Stairs
  • Railings: Tutorial: How to Make Industrial Stair Railings


For more of our tutorials, click here.
To explore rooms in our home, click here.
If you liked this project, check out our Slat Wall Tutorial and Rustic Sideboard Tutorial.
To follow our daily updates and home progress, follow us on Instagram @ahousewebuilt.

Filed Under: Tutorials

How to Stencil a Wall

February 17, 2021 by admin Leave a Comment

I stenciled a wall in our basement bathroom and it was SO EASY! The whole project took me only about an hour to do and quickly transformed an otherwise blank background wall into something really fun!

Edit: I also recently stenciled a second wall (details on that space here) so I’ll just insert those pic so you can see an option with black stencil lines. I used the same stencil so this tutorial applies to both projects.

I wasn’t planning to do a tutorial for this project because stenciling is actually so easy. But since I had previously expected it would be wayyyyy harder, I hope this tutorial helps you see how fast and easy it is!

This is the stencil I used: Amazon | Walmart.

The best thing about stenciling is that it transforms a space with JUST PAINT! No power tools, no cutting, no nailing, no “building” required… if you change your mind in a couple years, just paint back over it! It’s versatile, easy, and honestly it’s the type of project most anyone can do even if you’re not very handy.

STENCILS | Stencils come in all shapes, sizes, and styles. You *can* do this without a stencil by using painter’s tape to tape off a pattern or even free-handing your pattern, but I wanted an even pattern I could repeat quickly and easily so I decided to use a stencil. Here are some of my favorite herringbone looks:

  • Large herringbone stencil: Amazon | Walmart (what I used)
  • Smaller herringbone: Amazon (alternative option)
  • Brush strokes herringbone: Amazon (alternative option)
  • Vertical wall herringbone: Amazon (alternative option)
  • Straight lines: Amazon (so many fun possibilities with this)

If you’re wondering how I chose this pattern to do, I’ve just always loved herringbone and chevron patterns as shown in both our barn doors in our basement hallway, and my home office desk space.

WHAT YOU’LL NEED:

  • Stencil: Amazon | Walmart
  • Painter’s tape: Amazon
  • Small microfiber roller & tray: Amazon
  • Matte wall paint: just a sample-size bottle. I used BM Simply White on BM Classic Gray wall

HOW TO STENCIL:

  1. Use painter’s tape to stick your stencil to the wall, starting at the ceiling. You can either start it in the center of the room and move outward to the two sides, or start at one side and stencil your way across. I recommend measuring your wall-to-stencil dimensions to be sure you are happy with where your stencil pattern ends, then adjust where you start your pattern accordingly.
  2. Using a very, very, very dry microfiber roller, roll over your stencil to imprint the pattern on your wall. Seriously, you just need the tiiiiiniest amount of paint – like so little paint that it dries in less than a minute. Using a dry roller also prevents bleeding when applied to a smooth wall/surface. I also recommend rollering only in an up-down direction (you want to prevent yourself from pushing the paint under the stencil which can happen if you paint in multiple directions).
  3. Wait about 1 minute, then gently remove your stencil and reattach it to the wall below the first one – it will have little guides to help you repeat the pattern. You basically want to overlap it slightly so that your next stencil section is a proper continuation of the first section.
  4. Stencil a column down the wall, then move to the sides and cover the rest of your wall.

A FEW TIPS:

  • The surface you’re going to stencil should be smooth. Stenciling does not work well over textured walls as the texture won’t allow the stencil to sit flush on the wall and the paint will bleed.
  • Use a matte paint to stencil with. You really only need a tiny amount of paint – like a sample size paint can would have been enough for a wall many times the size of the one I did.
  • I recommend using a roller, but you can also use a paint brush if you don’t have a roller – just again make sure it’s very, very dry. I did try using a sponge too in one section and it did not work well.
  • If you’re wondering like I did about how to keep reusing a stencil that has just been painted over, don’t worry. If you’re using a very dry brush, the paint dries in less than a minute so pretty much by the time you’re ready to move the stencil, it’s already dry.
  • Before you start, test the stencil somewhere other than your “good” wall just to get the hang of it.
  • The type of stencil I used was simple straight lines but it was hard to get into the corner with it so I just used painter’s tape to tape off the last part of the pattern manually rather than bend my stencil.
  • Cleaning the stencil is very important. If you take good care of them, they can last years. The best way I found to do it was to take a damp cloth and wipe the whole stencil down just to get it wet, then use a putty knife (like this: Amazon) to just scrape it down. This technique removed all the paint very quickly and just needs a final wipe down after to remove all the paint scrapings.

This was such an easy project that I wasn’t planning to do a tutorial for it so I didn’t take many progress pictures. But I hope these tips help answer any questions or give you the nudge to try stenciling!

Other sources from this bathroom:

  • Lighting: West Elm | Similar: Wayfair
  • Oval mirror: Amazon | Wayfair
  • Black drawer pulls: Amazon
  • Wall-mounted faucet: Home Depot | Walmart (similar)
  • Vase: Crate & Barrel
  • Wood counters: How to Build Wood Countertops Tutorial
  • Shiplap: How to Install Shiplap Tutorial

For our daily progress, follow us on Instagram @ahousewebuilt.
To explore the other rooms in our house, click here.

Filed Under: Tutorials

  • « Go to Previous Page
  • Go to page 1
  • Go to page 2
  • Go to page 3
  • Go to page 4
  • Interim pages omitted …
  • Go to page 10
  • Go to Next Page »

Primary Sidebar

SHOP OUR HOME

Click any image below for sources from our pics!

WEBSITE ROADMAP

  • Shop Our Home
  • Sources by Room
    • All Sources & FAQs
    • Kitchen Sources
    • Pantry Sources
    • Living Room Sources
    • Dining Room Sources
    • Home Office Sources
    • Laundry Room Sources
    • Entryway Sources
    • Mudroom Sources
    • Gallery Wall Sources
    • Reading Room Sources
    • Theater Room Sources
    • Game Room Sources
    • Guest Bedroom Sources
    • Primary Bedroom Sources
    • Primary Closet Sources
    • Primary Bathroom Sources
    • Powder Bathroom Sources
    • Buffalo Check Bathroom Sources
    • Basement Bathroom Sources
    • Basement Sources
    • Stairs, Landings & Hallways
    • Paint Colors and Stain Recap
    • Cleaning Sources & Routines
  • Tutorials
    • How to Make a Staircase Gallery Wall
    • How to Make Textured Canvas Art
    • How to Install Shiplap
    • How to Build a Slat Wall
    • How to Paint an Ikea Dresser
    • How to Build Bypass Barn Doors
    • How to Build a Farmhouse Table and Benches
    • How to Build a Rustic Sideboard
    • How to Build a Slat Sideboard
    • How to Make a Sofa Pit
    • How to DIY a Faux Brick Wall
    • How to Build a Window Seat
    • How to Build a Paneled Accent Wall
    • How to DIY a Functional Play Kitchen
    • How to Stencil a Wall
    • How to Build a Round Table
    • How to Build a Console Table
    • How to Make Paper Stars
    • How to Make Paper Mache Bowls
    • How to Make Clay Links
    • How to Texture Bowls & Vases
    • How to Install Open Shelves
    • How to Make Wood Block Art
    • How to Make a Wood Bead Garland
    • How to Build Cabinet Doors
    • How to Build a Wood Countertop
    • How to DIY a Nightstand Charging Drawer
    • How to Make a Wheat Wreath
    • How to Hang Gallery Wall Frames
    • How to Stain Stairs and Paint Risers
    • How to Make Industrial Stair Railings
    • How to Build a Window Seat Cushion
    • How to Make Salt Dough Ornaments
    • How to DIY a Modern Mantel Christmas Tree
    • How to DIY a Wooden Christmas Village
    • How to Build a Wood Christmas Tree Collar Box
    • How to Make Paper Christmas Trees
  • Cats
    • Cat Room Tour & Litterboxes
    • Cat-Related Sources & Cleaning Tips
    • How to Cat-Proof Christmas Trees & Decor
    • How to Stop Cats from Scratching Furniture
    • How to Stop Cats from Playing with Decor
    • How to Train Cats and Kittens
    • How to Cope with Cat Allergies
    • How to Introduce New Kittens to Older Cats
  • Christmas
    • Christmas Decor Favorites 2023
    • How to Build a Wood Christmas Tree Collar Box
    • Neutral Christmas Present Wrapping
    • How to Make Paper Christmas Stars
    • How to Make Paper Christmas Trees
    • How to Make Salt Dough Ornaments
    • DIY Holiday Art Ideas
    • How to Cat-Proof Christmas Trees & Decor
    • How to Make Modern Tabletop Trees
    • How to Make a Wooden Christmas Village
    • Holiday Cheese & Snack Boards
    • Christmas Decor 2021
    • Christmas Decor 2020
    • Christmas Decor 2019
    • Gingerbread House & Cookies Recipe
    • Puff Tastry Christmas Tree Recipe
    • Christmas Decor 2018
  • Cleaning
    • Cleaning Sources & Routines
    • Minimalism: How To Get Started
    • Cat-Related Cleaning Tips
  • Recipes
    • Apple Turnovers Recipe
    • Baked Pumpkin Donuts Recipe
    • Banana Chocolate Chip Bread Recipe
    • Blueberry Lemon Cake Recipe
    • Cheese & Cracker Snack Boards
    • Chocolate Chip Cookie Recipe
    • Christmas Crack Recipe
    • Chocolate Crinkle Cookies Recipe
    • Cinnamon Rolls Recipe
    • Cinnamon Star Pastry Recipe
    • Coconut Curry Squash Soup Recipe
    • Creamy No-Cheese Pasta Sauce Recipe
    • Crumble Recipe
    • Easy Veggie Pasta Recipe
    • Fresh Rolls Recipe
    • Garlic Flatbread Recipe
    • Gingerbread Biscotti Recipe
    • Gingerbread House & Cookies Recipe
    • Healthy Hearty Salad Recipe
    • Homemade Bread Recipe
    • Lasagna Recipe
    • Molasses Cookies Recipe
    • Oatmeal Raisin Cookies Recipe
    • Pad Thai Recipe
    • Pesto Pasta Recipe
    • Potato Curry + Naan Bread
    • Puff Pastry Christmas Tree Recipe
    • Pumpkin Donut Bites Recipe
    • Pumpkin Loaf Recipe
    • Pumpkin Oat Muffins Recipe
    • Roasted Red Pepper Pasta Recipe
    • Rocky Road Bars Recipe
    • Vegan Bolognese Pasta Sauce
    • Vegetable Soup Recipe
  • About
    • About Us
    • Website Roadmap
    • Shop Our Home
    • Minimalism: How To Get Started
    • Privacy Policy
  • Blog

WHERE WE SHOP

Amazon

Wayfair

West Elm

Crate & Barrel

CB2

Pottery Barn

McGee & Go

Overstock

Rejuvenation

Joss and Main

All Modern

Target

Home Depot

World Market

Etsy

H&M Home

Lulu and Georgia

Serena & Lily 

Schoolhouse

Anthropologie

RECENT POSTS

  • Christmas 2023
  • Christmas Decor Favorites 2023
  • How to Make a Staircase Gallery Wall
  • Functional Play Kitchen DIY
  • Christmas Decor 2022
  • Cinnamon Rolls Recipe

Meta

  • Log in
  • Entries feed
  • Comments feed
  • WordPress.org

Footer

RECENT POSTS

  • Christmas 2023
  • Christmas Decor Favorites 2023
  • How to Make a Staircase Gallery Wall
  • Functional Play Kitchen DIY
  • Christmas Decor 2022
  • Cinnamon Rolls Recipe
  • Christmas Decor 2021
  • Cinnamon Star Pastry Recipe

SHOP OUR HOME

FOLLOW US

ON INSTAGRAM

For daily updates on our house projects and rescue kitties, follow us on Instagram @ahousewebuilt

ON SHOP.LTK

To shop our home pics daily, follow ahousewebuilt in the free SHOP.LTK app (formerly LIKEtoKNOW.it) now available from the App Store to get product sources from our pics. With this app, you can instantly shop your screenshot of any of our Instagram pics! We always link exactly what we have when available and often offer similar options as well!

Copyright © 2025 · Metro Pro on Genesis Framework · WordPress · Log in